


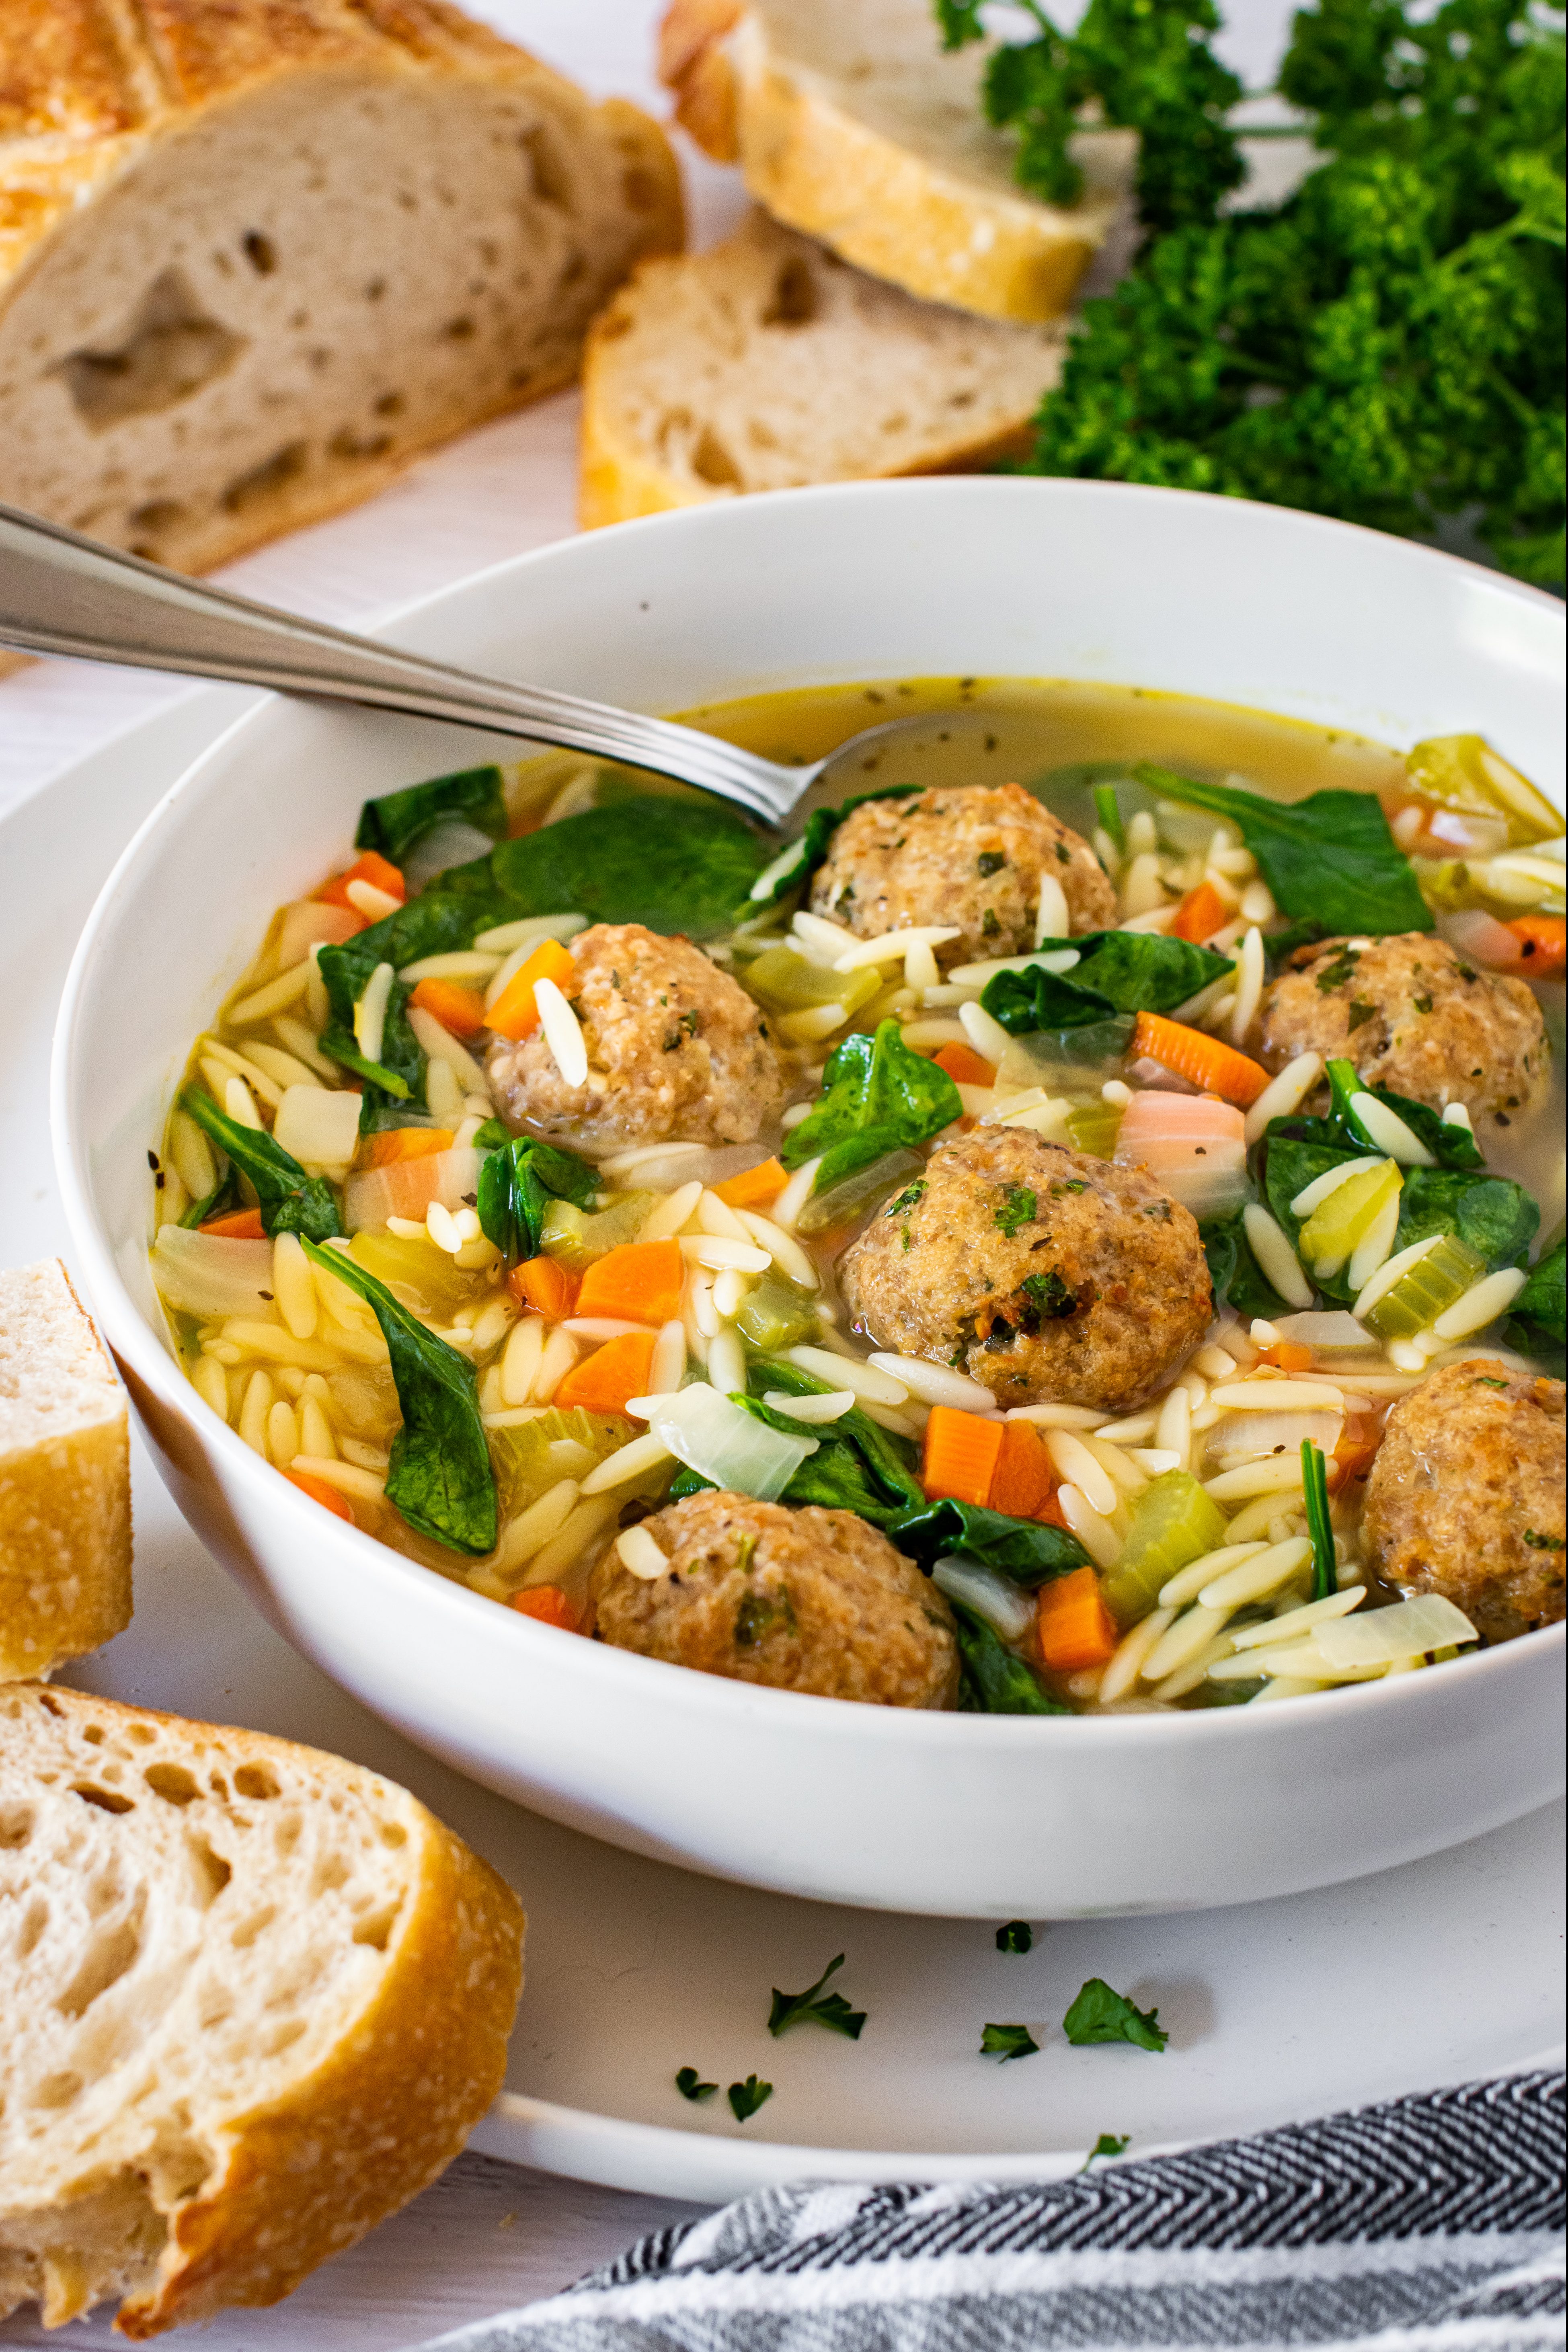
ITALIAN WEDDING SOUP
Your whole family will love this Italian wedding soup with delicious meatballs, healthy vegetables, and pasta, all cooked in a savory broth.

I absolutely love a good soup, and when your entire family gives it two thumbs up (even the picky eater), you know you have a winner. With this soup, you have your complete dinner in one bowl; protein, pasta, and lots of vegetables! This means less time spent making dinner and fewer dirty dishes.
What is Italian Wedding Soup?
No, it is not a traditional soup served at weddings in Italy. The name wedding comes from the Italian phrase “minestra maritata,” which means ‘married soup.’ Why is it married? It’s the marriage of ingredients, and the resulting delicious flavor in the soup.
An authentic Italian Wedding soup will always have these two ingredients; green vegetables and meat. When it comes to vegetables, it is common to use lettuce, kale, spinach, or cabbage. Meat is usually represented by some type of meatballs or sausage.

What Type of Pasta is Best?
Any type of small pasta will work. The most common types of pasta used in Italian wedding soups are the smallest types; acini de pepe, pastina, or orzo pasta. They can be found amongst the other pasta in most grocery stores.
How to Make this Recipe
Start with the meatballs.
- Combine all the meatball ingredients in a medium bowl (it’s easiest to use your hands to mix).

- Form into 1-inch balls and place on a parchment paper-lined baking sheet.

- Bake at 400°F for 20 to 25 minutes. Check that the meatballs are done with a kitchen thermometer. It should read at least 160°F.

- Set the meatballs aside a prepare the soup.
Next, make the soup.
- Add the chopped carrots, celery, and onions to a pan with a little oil. Cook until tender. This takes about 20 minutes.
- Add the chicken broth, dried parsley, dried basil, ground pepper, and salt. Bring almost to a boil.
- Add the pasta, cover, and turn down the heat to medium. Cook the pasta until tender, about 10 minutes.
- Add the meatballs and spinach, and continue to cook the soup over medium-low heat. Cook until the spinach has wilted and the meatballs are heated through; about 5 minutes.
- Ladle the soup into the bowls, garnish with parmesan cheese and serve.

Using Frozen Spinach
- You may also use a 6-ounce package of frozen spinach.
- Let it thaw, pat it dry, and add it at the end. Give it a few minutes to heat before serving.
Storage
- Refrigerate the leftovers in an airtight container for 3-4 days or freeze in an airtight container for 3-4 months.
- When reheating the soup, the pasta will have soaked up some of the broth, and the soup will be thicker. If needed, you can add a little more broth to the soup before reheating it to thin the soup a bit.

Italian Wedding Soup
Your whole family will love this Italian wedding soup with delicious meatballs, healthy vegetables, and pasta, all cooked in a savory broth.
Ingredients
Meatballs:
- 1 pound ground turkey or pork
- ½ cup Italian bread crumbs
- ½ cup grated parmesan cheese
- 3-4 garlic cloves, minced
- 1 large egg
- ¼ cup chopped fresh parsley
- 1 teaspoon salt
Soup:
- 1-2 tablespoons oil
- 1½ cups chopped carrots
- 1 cup chopped celery
- 1 cup chopped sweet onion
- 6 cups chicken broth
- 1 teaspoon dried parsley
- 1 teaspoon dried basil
- ¼ teaspoon ground black pepper
- ½ teaspoon salt
- ¾ cup acini de pepe, pastina or orzo pasta**
- 6 ounces baby spinach
- grated parmesan cheese for garnish
Instructions
Meatballs:
- Preheat the oven to 400°F. Prepare a baking sheet by lining it with parchment paper.
- Mix the turkey or pork, bread crumbs, parmesan cheese, garlic, egg, parsley, and salt together in a medium bowl. It is easiest to use your hands to mix the ingredients.
- Shape mixture into meatballs, about 1-inch in diameter, and place on the prepared baking sheet.
- Bake for about 20 to 25 minutes. Check for doneness with a thermometer, which should read at least 160°F. Set aside while you finish the soup.
Soup:
- Add the oil to a large pot and heat over medium-high heat until hot. Add the chopped carrots, celery, and onions and cook until tender, about 20 minutes.
- Pour in the chicken broth. Then add the parsley, basil, pepper, and salt. Heat until the soup is hot and steaming.
- Turn the heat down to medium, add the pasta and stir to combine. Cover and cook until the pasta is done, about 10-12 minutes.
- Add the meatballs and spinach and stir. Continue to cook the soup over medium-low heat until the spinach has wilted, about 5 minutes. Sample the soup and add more salt to taste, if needed.
- Ladle the soup into bowls and top with grated parmesan cheese (optional).
Notes
**If you like a brothier soup, you can reduce the pasta to 1/2 cup. Note that as the soup sits, the pasta will absorb more broth, so you can add more broth to thin the soup as desired.
Using Frozen Spinach:
- You may also use a 6-ounce package of frozen spinach.
- Let it thaw, pat it dry, and add it at the end. Give it a few minutes to heat before serving.
- Refrigerate the leftovers in an airtight container for 3-4 days or freeze in an airtight container for 3-4 months.
- When reheating the soup, the pasta will have soaked up some of the broth, and the soup will be thicker. If needed, you can add a little more broth to the soup before reheating it to thin the soup a bit.
Tried this recipe? Leave a comment and rating below.Follow me on Facebook and never miss a recipe!
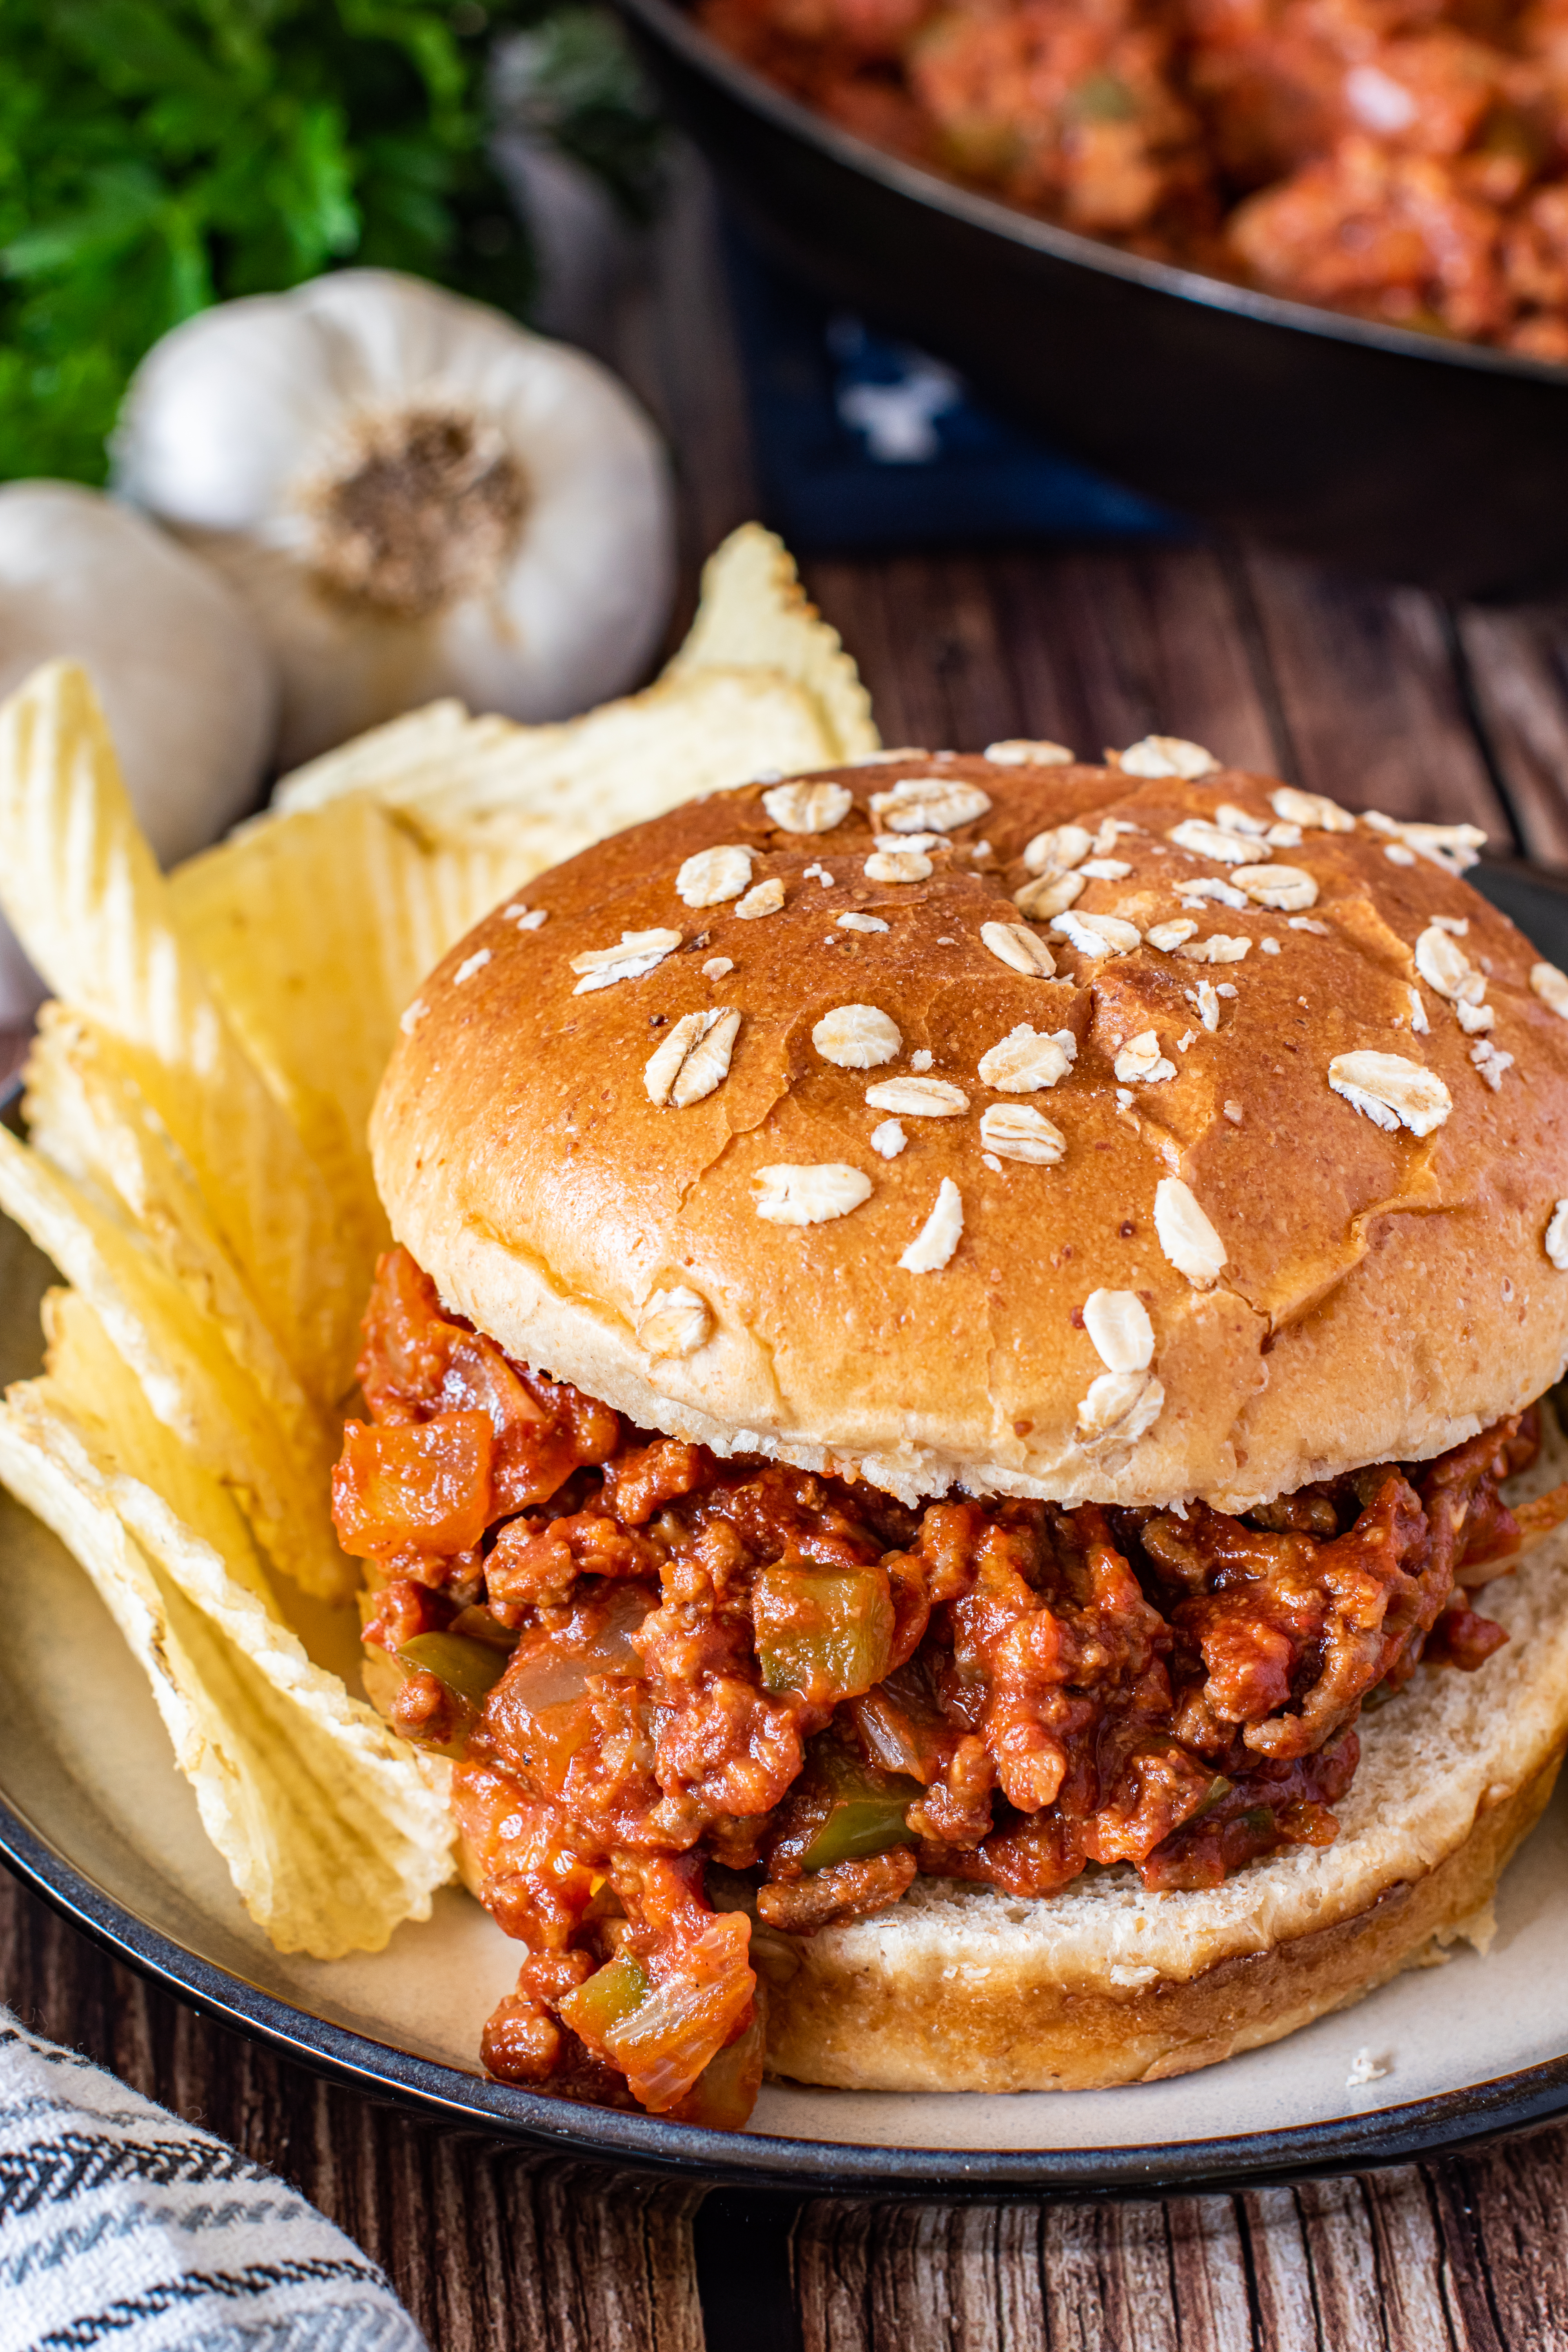
SLOPPY JOES
These Sloppy Joes are delicious enough for adults and kids alike! Made from scratch, with a rich, smoky flavor and the addition of healthy vegetables, these truly are finger-licking-good!

Having Sloppy Joes for dinner doesn’t have to mean opening a can of premade Sloppy Joe mix…Yuck! Instead, you can make a homemade, delicious, flavourful meal that the whole family will love in under an hour!
Don’t be afraid to slip vegetables into dishes like Sloppy Joes; not only are they healthy, but they add flavor and texture. And you don’t have to stick to what I have listed in the recipe; you could use red peppers, celery, or carrots.

I initially didn’t write this recipe with barbeque sauce as one of the ingredients, but when I tried it, WOW!! It gave the sloppy joes such a rich, smokey flavor. So I rewrote the recipe and worked in the barbeque sauce. It doesn’t matter which brand you use; just use your favorite.

I highly recommend toasting the hamburger buns. Trust me; it will take your Sloppy Joes to a whole other level! Of course, if you don’t have a toaster or the buns won’t fit in your toaster, you can always toast the buns in the oven.
- Preheat the oven to 350° F.
- Toast your bread on the middle rack of the oven on a sheet pan for about 10 minutes, flipping it halfway through.
The lower heat will give you a bit more control — cut down the time for golden brown toast, and leave it in a bit longer if you like it darker and crisper.

Sloppy Joes
These Sloppy Joes are delicious enough for adults and kids alike! Made from scratch, with a rich, smokey flavor and the addition of healthy vegetables, these truly are finger-licking-good!
Ingredients
- 2 pounds ground beef
- 1 large onion, diced, about 1½ cups
- 1 large green pepper, diced, about 1 cup
- 6 garlic cloves, minced
- 2 6-ounce cans tomato paste
- 1 8-ounces can tomato sauce
- ½ cup barbeque sauce, any brand
- 3 tablespoons brown sugar
- 2 teaspoons ground mustard
- 1½ tablespoons white vinegar
- 1 teaspoon salt, more to taste
- 8 hamburger buns, toasted
Instructions
- In a large skillet, brown the ground beef over medium-high heat until it is browned and cooked through. Remove the ground beef from the heat and drain off the fat (retaining about a tablespoon to fry the vegetables). Set the ground beef aside.
- Add the diced onions and green peppers to the same skillet and saute until tender, 10 to 15 minutes.
- While the vegetables are cooking, whisk together the tomato paste, tomato sauce, barbeque sauce, brown sugar, ground mustard, vinegar, and salt, in a small bowl. Set aside.
- Add the minced garlic to the skillet and saute with the vegetables for an additional 30 seconds, stirring constantly.
- Return the cooked ground beef to the skillet and stir together with the vegetables. Turn the heat down to medium and add the sauce ingredients. Stir until completely mixed in. Taste and add more salt if needed.
- Continue cooking until everything is heated through and steaming, about 10 minutes.
- Serve on toasted buns (see notes).
Notes
Toasting the Buns:
- Use a toaster, or
- Preheat the oven to 350° F. Toast your bread on the middle rack of the oven on a sheet pan for about 10 minutes, flipping it halfway through. The lower heat will give you a bit more control — cut down the cooking time for golden brown toast, and leave it in a bit longer if you like it darker and crisper.
Tried this recipe? Leave a comment and rating below.Follow me on Facebook and never miss a recipe!
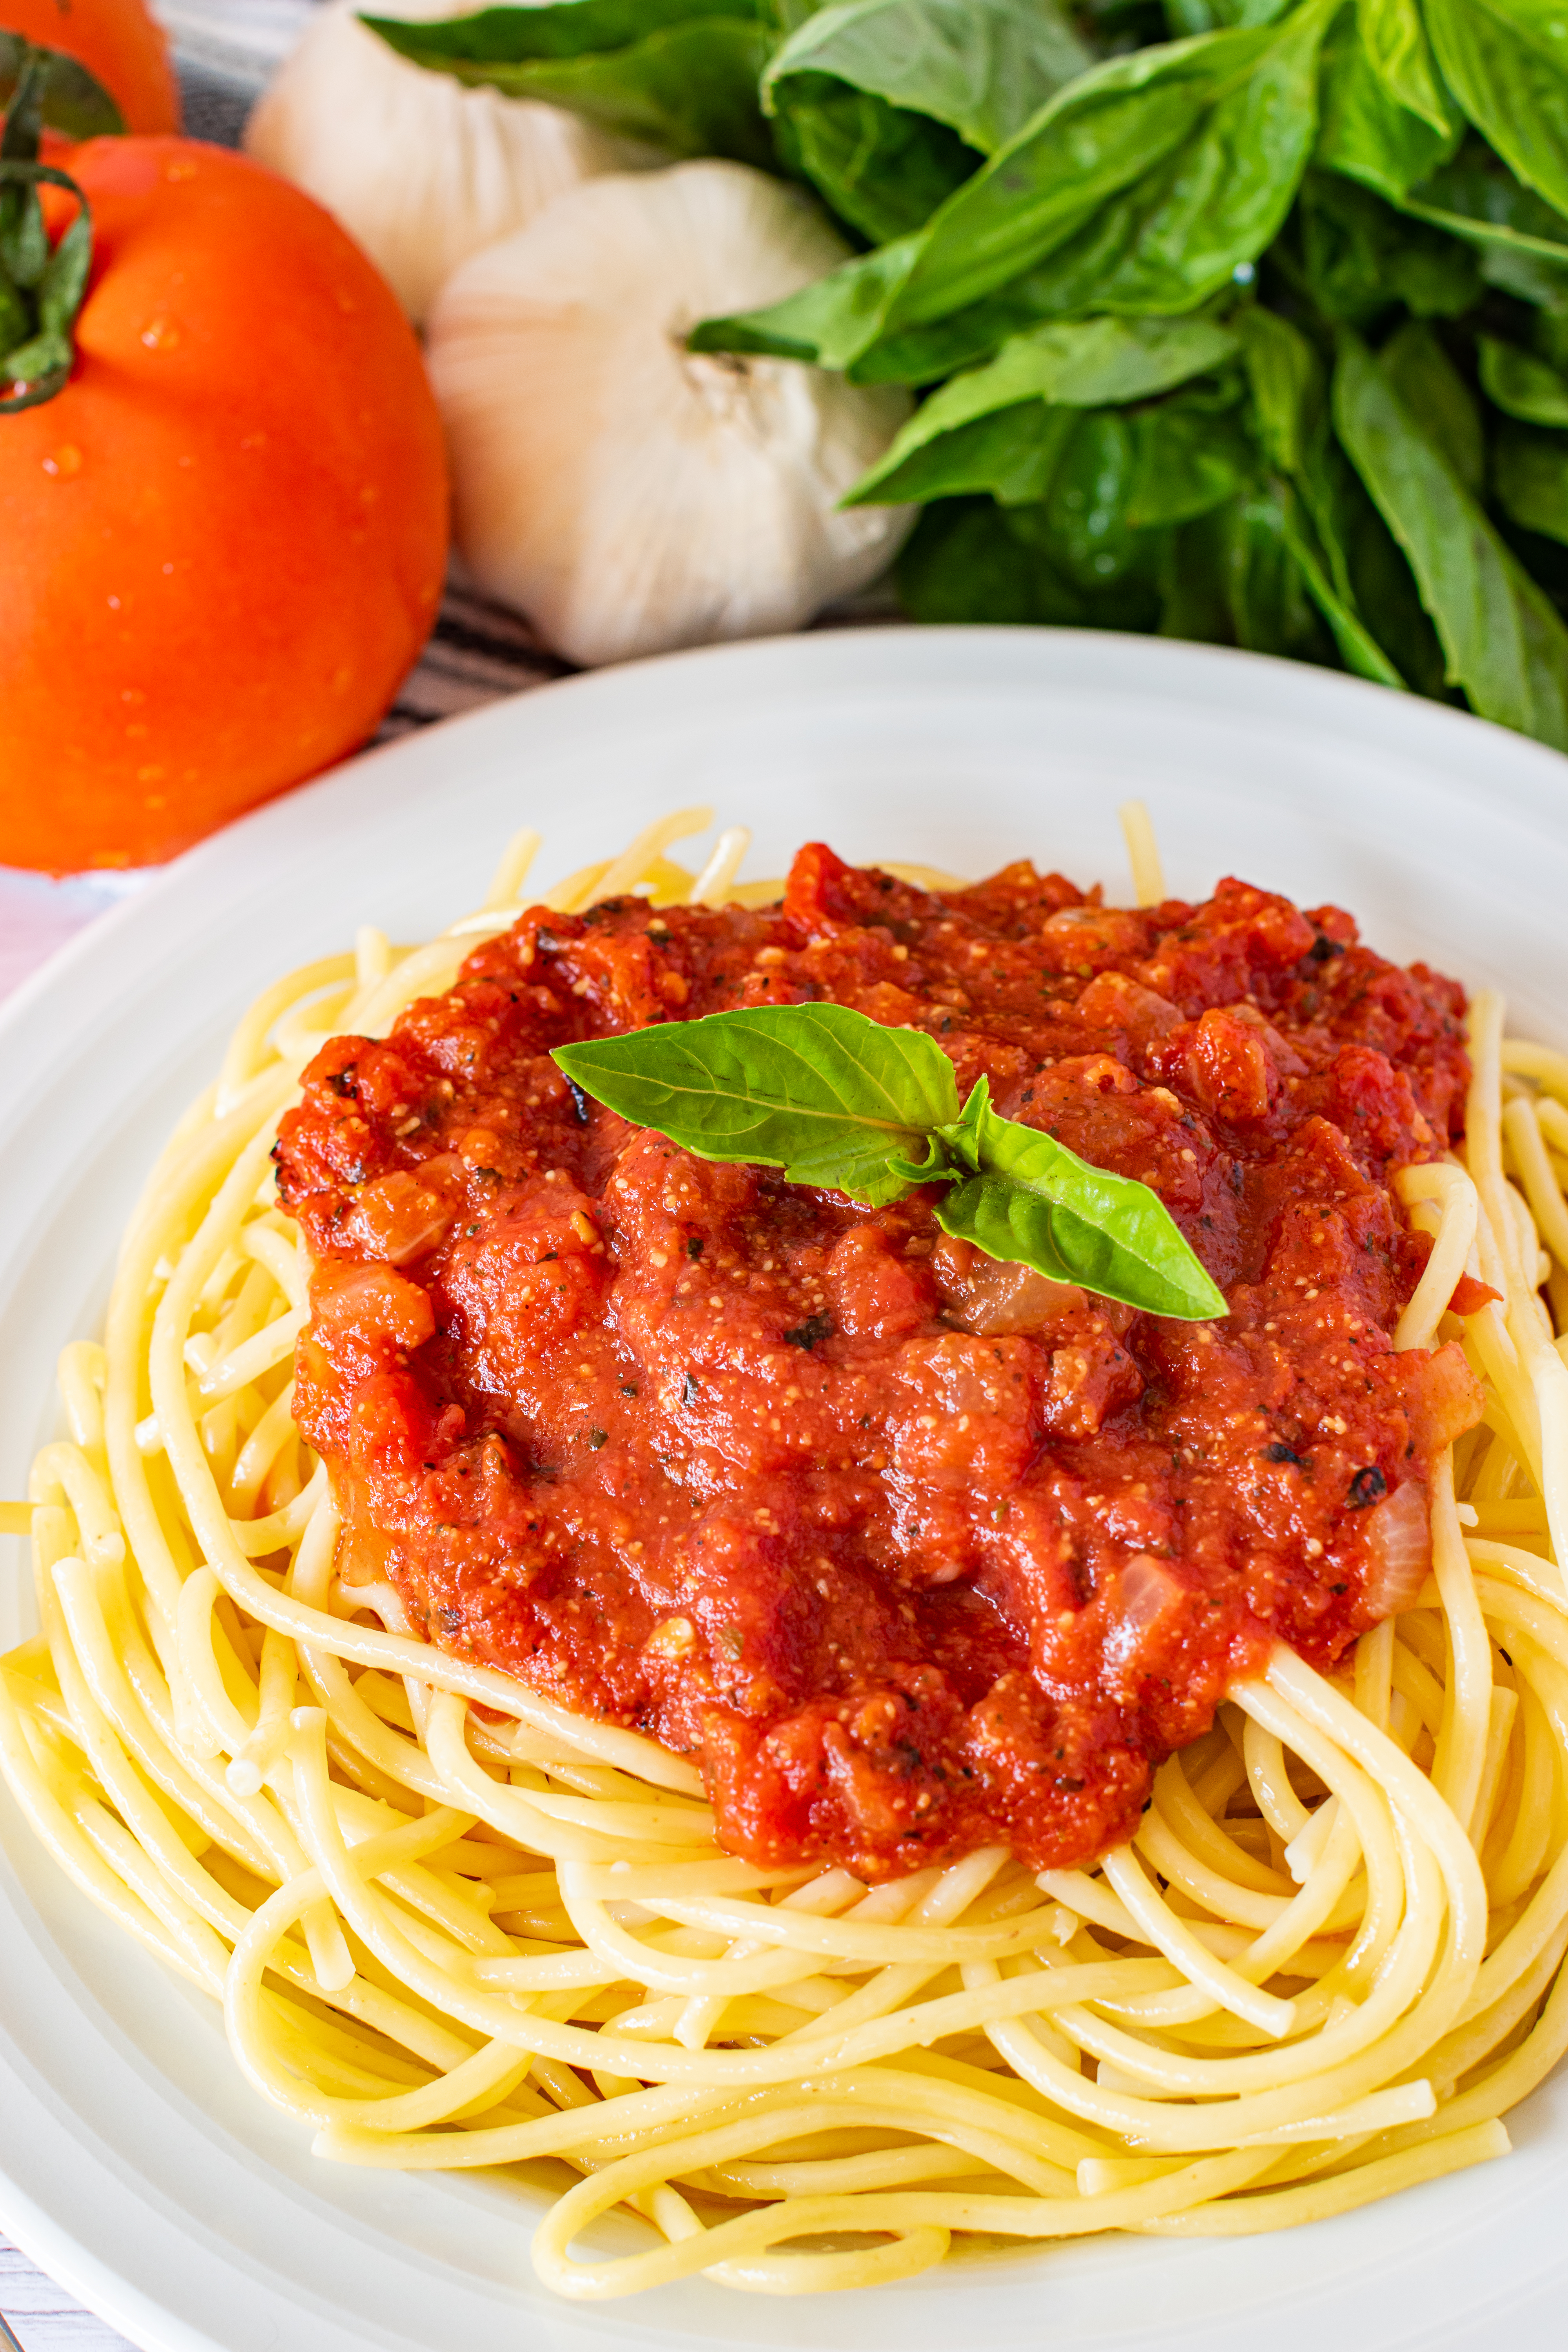
HOMEMADE SPAGHETTI SAUCE
Homemade spaghetti sauce doesn’t need to be complex or time-consuming to be delicious. You just need good, quality ingredients to make a sauce full of amazing flavor. This recipe is perfect for making large batches to feed a crowd or freezing for quick, easy meals later.

Spaghetti night is a favorite in our house. Everyone loves it and leaves the table satisfied and happy. It’s one of those meals that doesn’t need to be overly complex or time-consuming to be amazing!
For years, I thought homemade spaghetti sauce must be hard to make or at least hard to make really good. So I bought spaghetti sauce in a jar. It wasn’t bad; we enjoyed it. But I finally decided to develop my own recipe for homemade spaghetti sauce that was both easy and delicious. And here it is! I will never go back to spaghetti sauce in a jar again.

Best Tomatoes to Use:
The best spaghetti sauce is made using crushed San Marzano tomatoes. San Marzano is a variety of plum tomatoes with a more robust flavor and are sweeter and less acidic. You can usually find canned San Marzano tomatoes at your grocery store. But there are times I can’t find this variety, so I have used other brands of crushed tomatoes or fire-roasted crushed tomatoes, and the sauce still turns out amazing. So whichever type or brand you use, be sure they are crushed tomatoes.

Adding Meat to the Sauce:
If you like to have meat in your spaghetti sauce, you certainly can add it. I love to use ground pork sausage in my sauce, or you can use ground beef. You can brown the meat with the onions (be sure to cook it thoroughly), draining off the extra fat, or cook the meat separately and add it to the sauce at the end.
We love meatballs with our spaghetti, and my Baked Sausage Meatballs complement this sauce perfectly. The meatballs are full of flavor and baked to perfection! And don’t forget the garlic bread with homemade Garlic Bread Spread!

Freezing Instructions:
It’s easy to freeze any leftovers to use later or make a larger batch with the intent to freeze for future use. Allow the sauce to cool completely, spoon the desired amount into sealable freezer bags, label, and lay flat in your freezer. Once frozen, they stack easily in your freezer.

Thawing and Reheating Instructions:
When you are ready to use the sauce, let it thaw at room temperature for a few hours or in the refrigerator overnight. Then, reheat on the stovetop over medium-low heat until warmed through.


Homemade Spaghetti Sauce
Homemade spaghetti sauce doesn't need to be complex or time-consuming to be delicious. You just need good, quality ingredients to make a sauce full of amazing flavor. This recipe is perfect for making large batches to feed a crowd or freezing for quick, easy meals later.
Ingredients
- 1 tablespoon olive oil
- 1 sweet onion, diced
- 6 garlic cloves, minced, (more or less based on preference)
- 2 28 ounce cans crushed tomatoes, preferably fire-roasted
- 2 tablespoons granulated sugar
- 1½ teaspoons salt
- 1½ teaspoons dried oregano
- 2 teaspoons dried sweet basil, (1½ tablespoons minced fresh basil)
- ½ cup grated parmesan cheese
Instructions
- Heat oil over medium to medium-high heat in a large skillet or pot. Add the diced onions and saute for 10 to 15 minutes, stirring frequently. Next, add the garlic and saute for another 1 to 2 minutes, stirring frequently to prevent the garlic from burning.
- Add the crushed tomatoes, sugar, salt, oregano, basil, and parmesan cheese (break up any clumps before adding). Stir well. Bring to a simmer.
- Reduce the heat to medium-low, but maintain a simmer. Simmer for at least an hour to give the sauce time to cook down and thicken.
- Serve over spaghetti noodles. This spaghetti sauce pairs perfectly with my Baked Sausage Meatball recipe.
Notes
Adding Meat to the Sauce: If you like to have meat in your spaghetti sauce, you certainly can add it. You can use ground pork sausage or ground beef. Brown the meat with the onions (be sure to cook it thoroughly), draining off the extra fat, or cook the meat separately and add it to the sauce at the end.
Freezing Instructions: It’s easy to freeze any leftovers to use later or make a larger batch with the intent to freeze for future use. Allow the sauce to cool completely, spoon the desired amount into sealable freezer bags, label, and lay flat in your freezer. Once frozen, they stack easily in your freezer.
Thawing and Reheating: When you are ready to use the sauce. Let it thaw at room temperature for a few hours or in the refrigerator overnight. Then reheat on the stovetop over medium-low heat until warmed through.
Tried this recipe? Leave a comment and rating below.Follow me on Facebook and never miss a recipe!
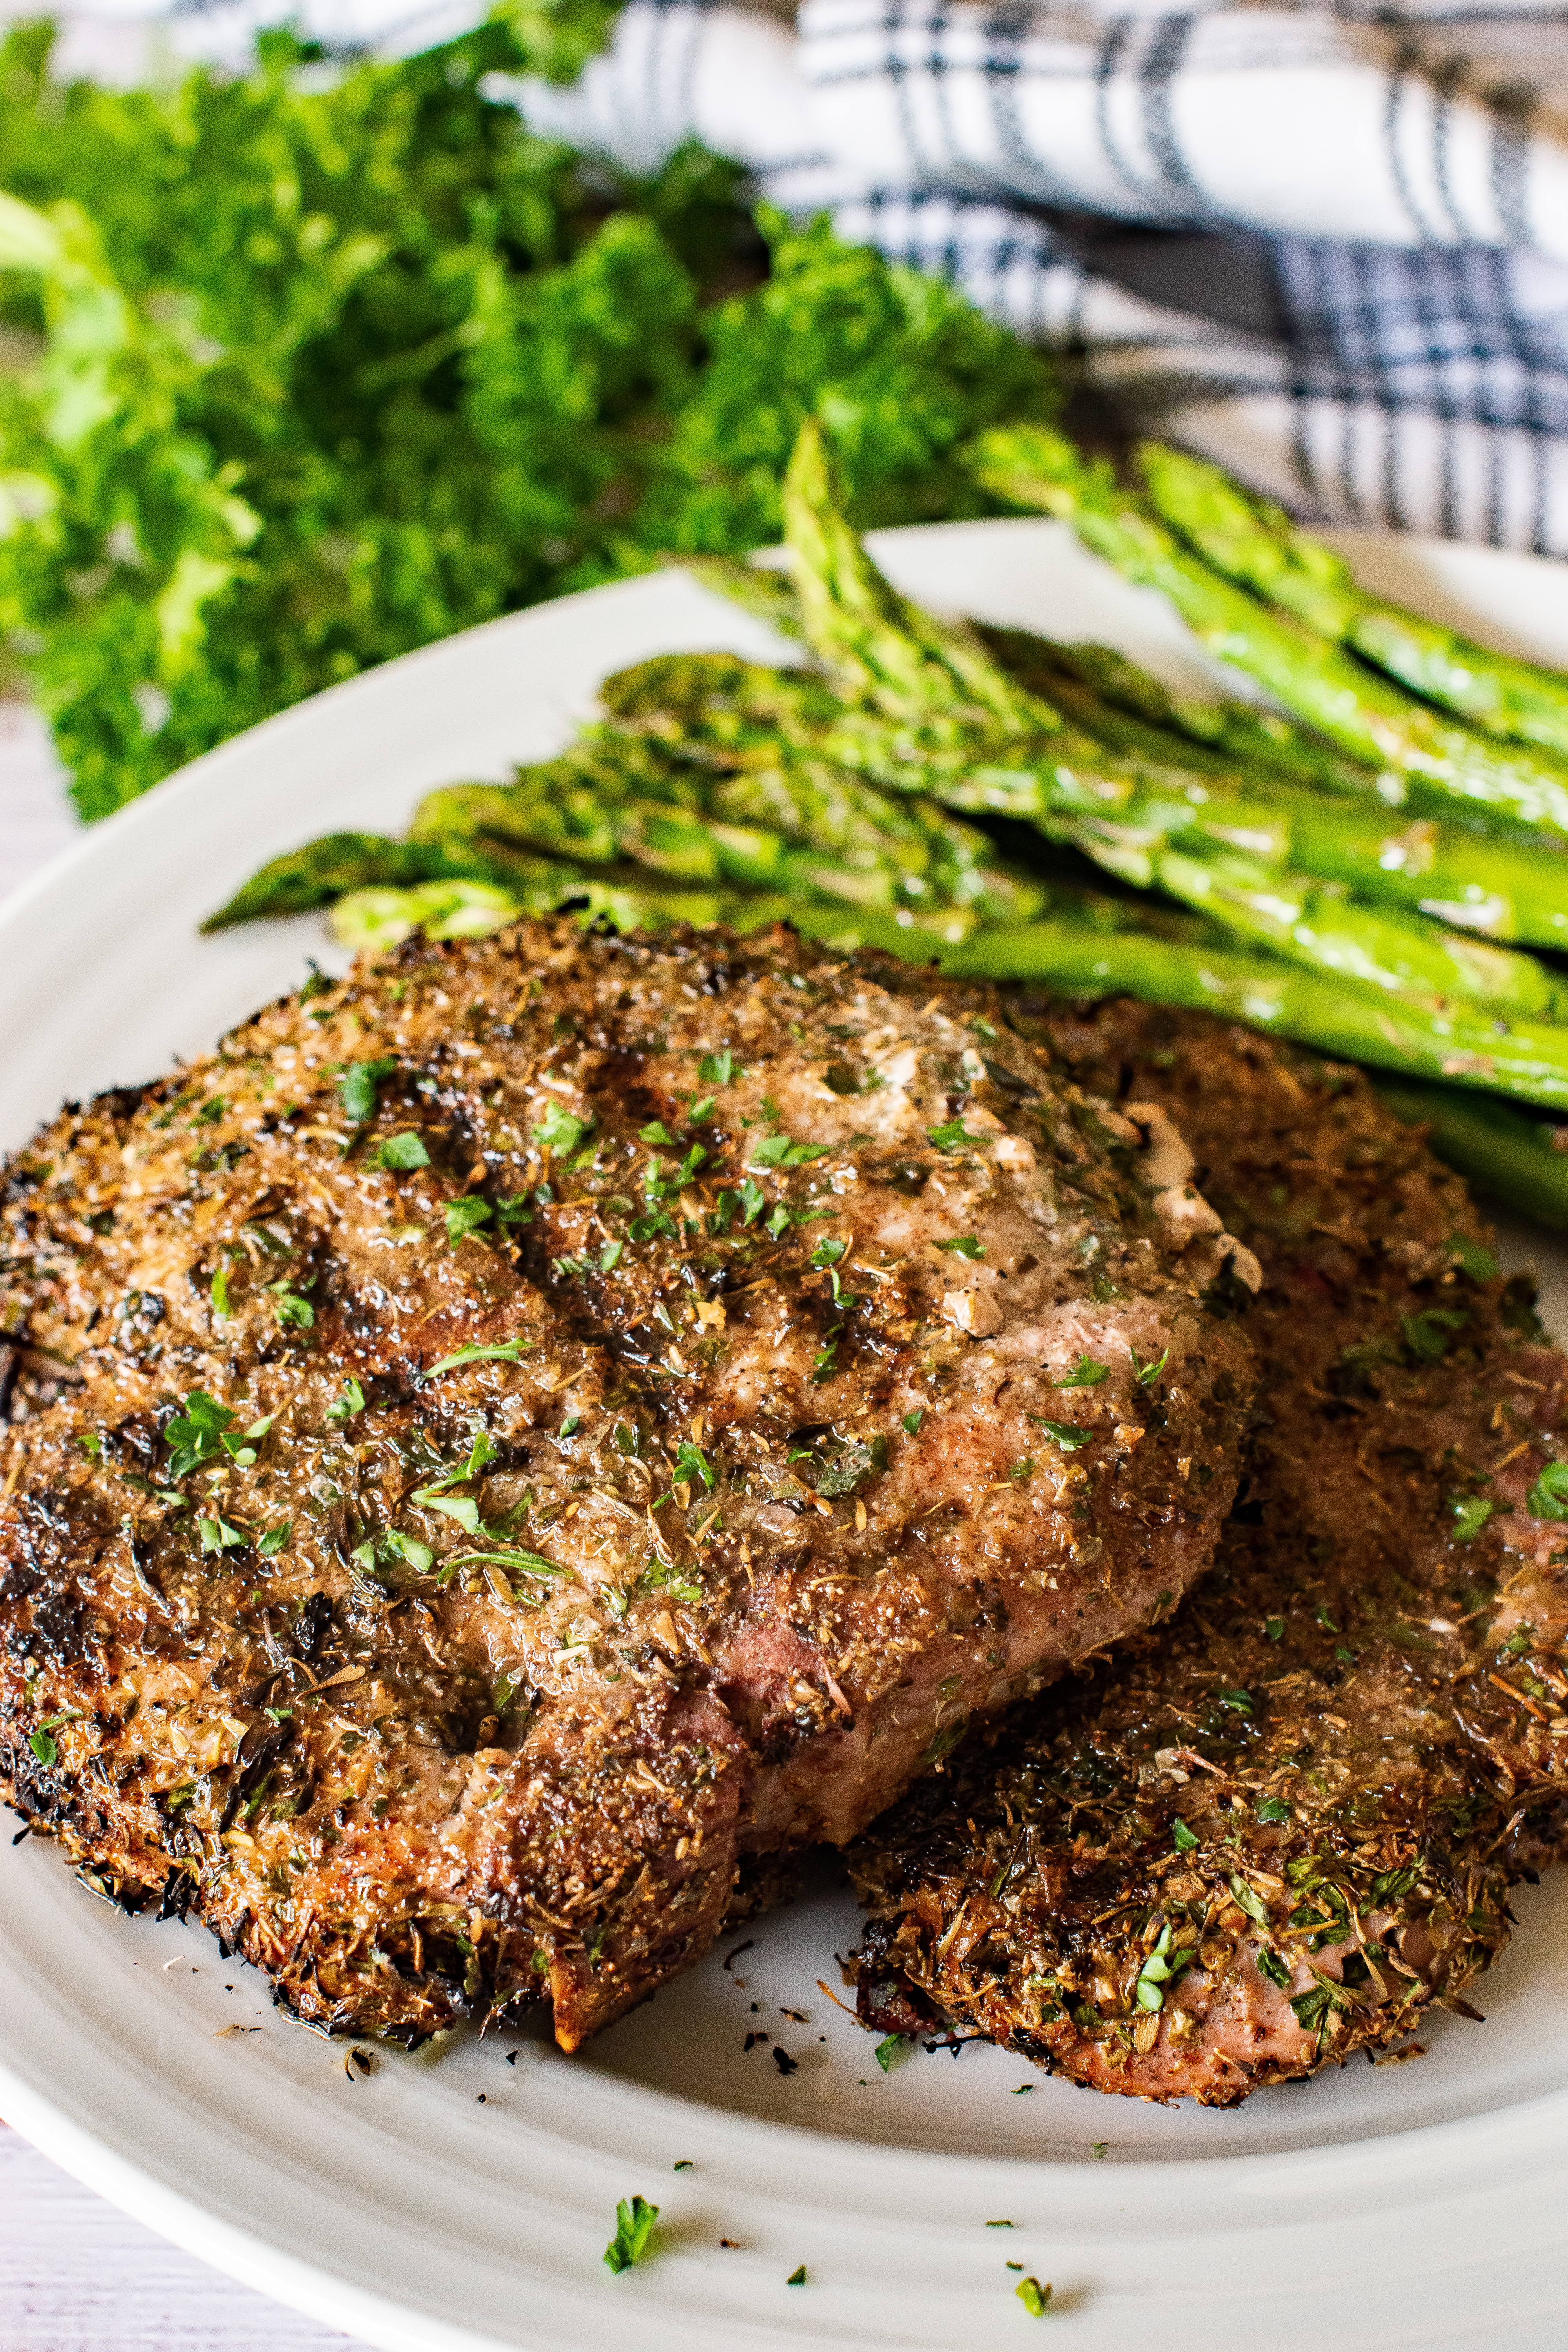
HERBED PORK CHOPS
Forget dry, over-cooked, flavorless pork chops…These are grilled to perfection, juicy, tender, and bursting with flavor! I am confident these will become a family favorite in your house!

I have not always been a fan of pork chops. I guess my earlier experiences with them weren’t so great. I always associated pork chops with being dry, tough, and not very flavorful.
Little did I know that my issue wasn’t with pork but how we were taught to cook it. Back in the olden days (before May 2011), the USDA’s safe temperature guideline for pork chops was 160°F, resulting in tough, dry shoe leather. As it turns out, pork used to carry a pathogen that caused trichinosis. However, thanks to improved breeding practices, trichinosis from pork is no longer a health concern today. As a result, the USDA now says it’s safe to cook pork to 145°F. The 145°F recommendation was music to most cooks’ ears, as it yields moist, juicy, and slightly pink-in-the-middle pork.

Being able to cook pork to a lower temperature has truly changed how I feel about pork chops. I love them! The 15° difference allows me to cook or grill pork chops that I am proud to serve. They are always moist, tender, juicy, and flavorful. This particular recipe is a family favorite. The herb combination is incredible, and with the surprising addition of cinnamon, they are true perfection!

This recipe is enhanced by grilling the pork chops, so I highly recommend it! However, I realize that sometimes grilling isn’t practical or possible, so I’ll provide stovetop instructions in the recipe notes, so no one misses out on this amazing recipe.
For this Recipe:
I recommend using bone-in pork chops. While boneless chops may be cheaper, the bone keeps the pork chop moist and adds more flavor.

- Start by allowing your pork chops to come to room temperature. Meanwhile, gatherer all your herbs together.
- Measure out and combine all the herbs in a small bowl.

- Brush one side of each pork chop with oil and sprinkle with salt. Then add a generous amount of the herbs to the pork chop and pat or rub into the meat. You want the entire pork chop covered with herbs.
- Flip the pork chops over, brush with oil, sprinkle with salt, and add the herbs. (You can store any leftover herbs in an air-tight container for up to 6 months).

- Preheat the grill over medium-high to high heat. **Stovetop directions are in the notes.
- Once the grill is preheated, place the chops on the grill and allow to cook for 4 to 5 minutes, and then flip. Continue cooking on the other side for another 4 to 5 minutes or until the internal temperature reaches 140°F. I recommend always using a meat thermometer to ensure your meat is cooked to a safe temperature. **Actual grilling time will depend on your grill and the thickness of the chops.
- When they reach an internal temperature of 140°F, they are done. Remove them from the grill and let them rest on a plate for 5 minutes, during which time they will continue cooking with the residual heat and eventually reach 145°F.

Herbed Pork Chops
Forget dry, over-cooked, flavorless pork chops…These are grilled to perfection, juicy, tender, and bursting with flavor! I am confident these will become a family favorite in your house!
Ingredients
- ⅓ cup dried parsley flakes
- ¼ cup dried marjoram
- ¼ cup dried thyme
- 3 tablespoons rubbed sage
- 2 tablespoons garlic powder
- 2 tablespoons onion powder
- 1 teaspoon salt
- 1 teaspoon ground cinnamon
- 4-6 bone-in pork chops
- 2-4 tablespoons oil
Instructions
- Take the pork chops out of the refrigerator and allow them to come to room temperature.
- In a bowl, combine the first eight ingredients.
- Brush the pork chops with oil and lightly salt. Rub a very generous amount of the herb mixture on the pork chops. Flip the pork chop over and repeat on the other side.
- Preheat the grill over medium-high to high heat. **Stovetop directions are in the notes.
- Once the grill is preheated, place the chops on the grill, allow to cook for 4 to 5 minutes, and flip. Continue cooking on the other side for 4 to 5 minutes or until the internal temperature reaches 140°F. **Actual grilling time will depend on your grill and the thickness of the chops. I recommend always using a meat thermometer to ensure your meat is cooked to a safe temperature.
- When they reach an internal temperature of 140°F, they are done. Remove them from the grill and let them rest on a plate for 5 minutes, during which time they will continue cooking with the residual heat and eventually reach 145°F.
Notes
Stovetop Instructions:
-
Heat your skillet to medium-high and add 1 tablespoon of olive oil. When it’s shimmering hot, add your chops.
-
Sear on one side, without moving them, until they are nice and golden brown on the first side, about 3-5 minutes. Then flip and sear the other side until browned.
-
The best way to check if the pork chop is done is to use a meat thermometer. When they reach an internal temperature of 140°F, they are done.
-
Remove them from the skillet and let them rest on a plate for 5 minutes, during which time they will continue cooking with the residual heat and eventually reach 145°F.
-
Cooking time can vary based on the thickness of the pork chops.
Tried this recipe? Leave a comment and rating below.Follow me on Facebook and never miss a recipe!

BAKED SAUSAGE MEATBALLS
Are you ready to make pasta night even better? This meatball recipe is so easy to make, and they come out incredibly tender, juicy, and full of flavor every time! Whether serving these over your favorite plate of pasta or serving as an appetizer at your next party, they’re always sure to impress!
Everyone in our house looks forward to pasta night. But who doesn’t? Spaghetti and meatballs have been a classic Italian-American dish since the late 1800s.
It’s safe to say how I serve pasta has evolved over the years. In the early years of my marriage, I always used ground beef, it’s what I grew up on, but I haven’t used ground beef with my pasta in almost 15 years. When I discovered how much more flavor there was when I used pork sausage, I never went back. When I mean more flavor…I mean, WOW FLAVOR!!

One day my oldest said, “why don’t you make meatballs this time?” It was my lightbulb moment! Of course…MEATBALLS!! I was determined to make the most amazing, unforgettable meatball recipe. After tweaking the recipe here and there, I finally had a recipe that my family went crazy for. I had my meatball recipe!
You might think twenty meatballs would be a lot for a family of four, but trust me – when your husband is sneaking 2 or 3 before you even sit down for dinner, and the kids come running the second you pull them out of the oven for a taste…And of course, I have to sample, right? Well, the point is, twenty doesn’t go as far as you might think.
Below I will share all my tips and tricks for making the perfect meatballs:
- For starters, I bake my meatballs. Baking them gives the meatballs a little more flavor without additional oil. Be sure to line your baking sheet with parchment paper or foil. If using foil, be sure to lightly spray it with cooking oil. This step is to prevent the meatballs from sticking to your baking sheet.

- Fresh, quality ingredients are a must –
- Sweet pork sausage – When making meatballs, fat is your friend. It will help you have tender, juicy, flavorful meatballs. So you’ll want to avoid using lean ground meat. Instead, I highly recommend using pork sausage (not ground pork), as this will give them an amazing depth of flavor due to the seasonings mixed into the sausage.
- Italian style bread crumbs – I prefer to use Italian bread crumbs instead of plain because they have additional seasonings. Italian bread crumbs have oregano, basil, garlic powder, onion powder, parsley flakes, salt, and pepper. All this equals FLAVOR! Also, it’s always better to use dry bread crumbs instead of soaked bread, or you’ll have mushy, fall apart meatballs.
- Milk – Any fat content will work. Milk helps to bind everything together and adds moisture.
- Egg – The egg is the other binder in this recipe, so don’t leave it out!
- Grated parmesan cheese – more flavor!
- Worcestershire sauce, garlic, pepper, and salt – add more flavor!
- Add all the ingredients to a medium bowl and mix with your hands until everything is evenly combined. Trust me on this one; you can combine the ingredients better by hand than with a spoon.
- Using your hands, form the meat into 1 1/2 inch balls. To do this, gently press the meat in your hands and then roll until you have a perfect ball. Do not compact the meatballs too tightly, or you will have dense meatballs. Instead, press them just enough so that they stay together in a nice ball. It is also important that you make all your meatballs the same size so they bake evenly.

- Bake at 400F degrees for 20 to 25 minutes or until the internal temperature reaches 160F-165F degrees in the middle.

Serve on top of your favorite pasta dish. These work great with my Homemade Spaghetti Sauce, and don’t forget the garlic bread with my Garlic Bread Spread.
These also make great party appetizers! Simply stick a toothpick in each meatball, plate, sprinkle with parmesan cheese and fresh finely chopped parsley, and serve. Trust me; these will be a hit!! Enjoy!

Baked Sausage Meatballs
Are you ready to make pasta night even better? This meatball recipe is so easy to make, and they come out incredibly tender, juicy, and full of flavor every time! Whether serving these over your favorite plate of pasta or serving as an appetizer at your next party, they’re always sure to impress!
Ingredients
- 1 pound sweet pork sausage
- ½ cup Italian style bread crumbs
- ¼ cup milk
- ¼ cup grated parmesan cheese
- 1 egg
- 2 teaspoons Worcestershire sauce
- 2 teaspoons minced garlic
- ¼ teaspoon pepper
- ½ teaspoon salt
Instructions
- Preheat the oven to 400°F. Line a baking pan with foil or parchment paper. If using foil, spray lightly with cooking spray to keep the meatballs from sticking.
- In a medium bowl, add all the ingredients and mix thoroughly with your hands.
- Shape the meatballs into 18- 20 balls (about 1½ inches in diameter). Press together slightly while rolling them in-between your hands. Make sure the meatballs are the same size.
- Place on prepared pan about ½ inch apart.
- Bake for 20 to 25 minutes or until the internal temperature reaches 160°F-165°F.
Notes
These also can be made in bulk and frozen. After baking, allow the meatballs to completely cool. Place the cooled meatballs in a freezer bag, press all the air out and seal well. Use within 6 months.
To thaw the meatballs, pull the bag of meatballs out of the freezer and place it in the refrigerator to thaw. This can take a few hours or overnight, depending on the size of the meatballs and how many are in the bag.
Tried this recipe? Leave a comment and rating below.Follow me on Facebook and never miss a recipe!
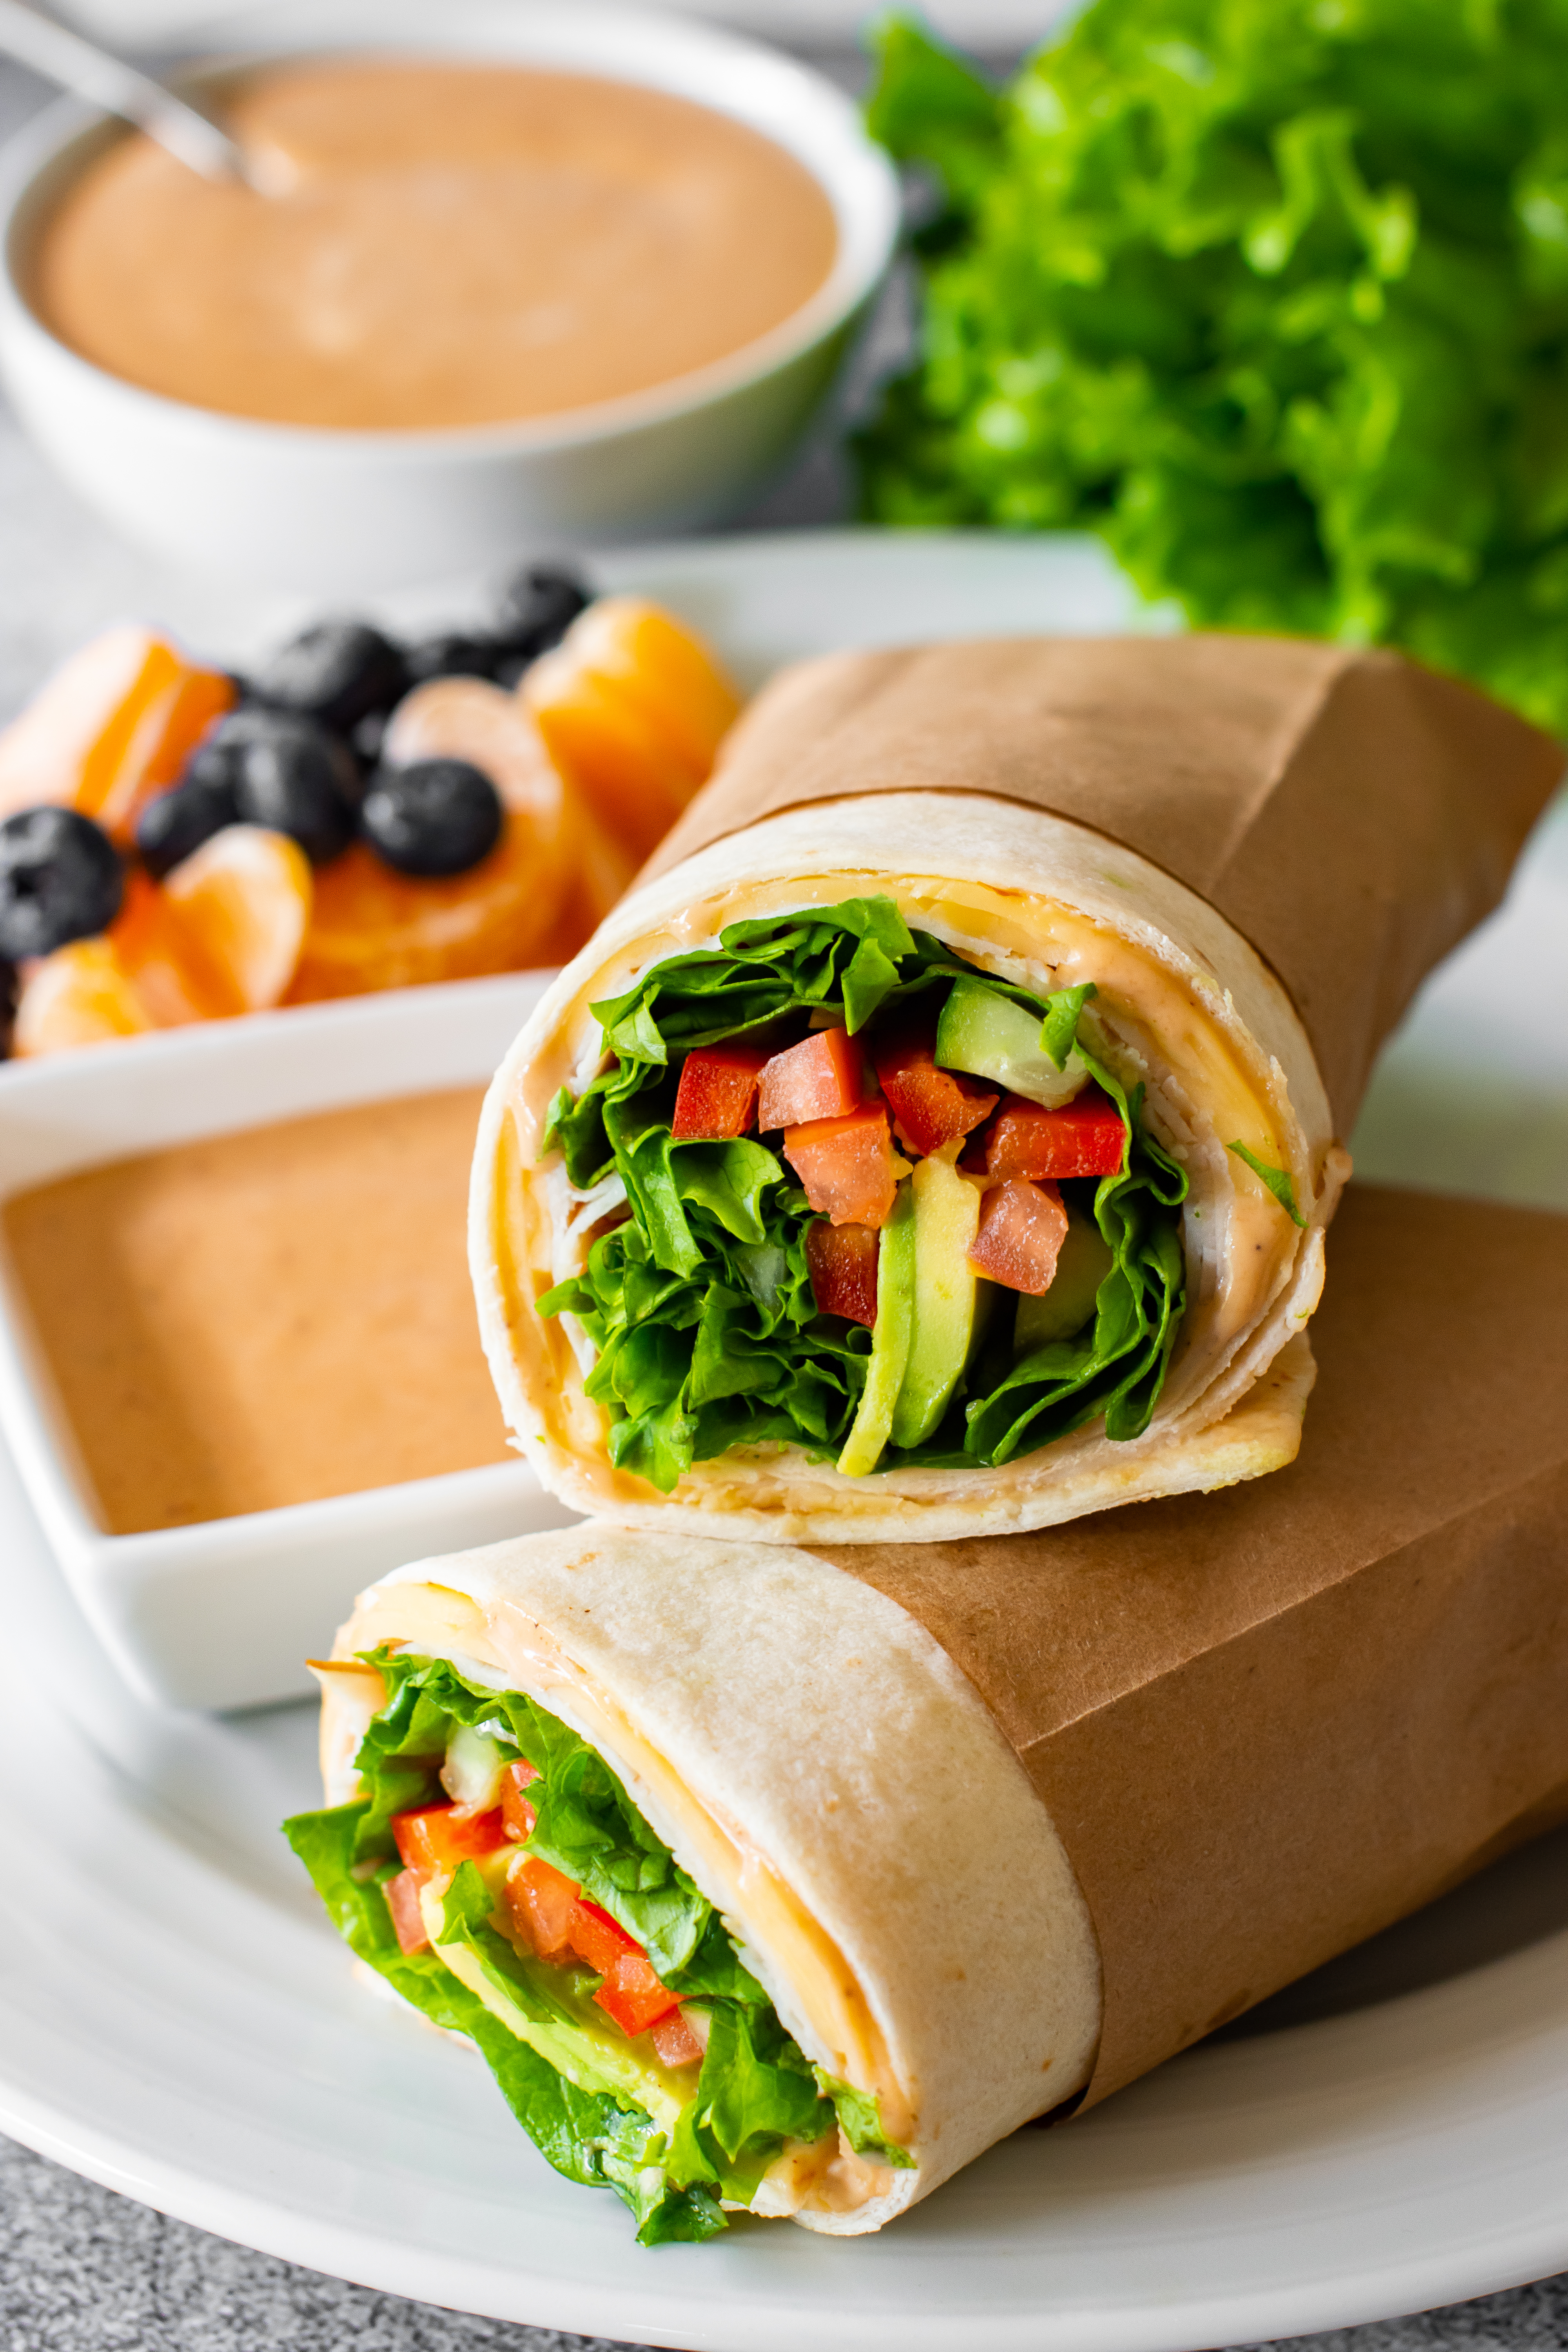
SOUTHWEST CLUB WRAPS
If you are looking for a quick and healthy dinner idea that includes loads of flavor, look no further! These wraps are healthy, delicious, and completely satisfying.

We all need some go-to recipes that are easy and healthy, but we don’t want to sacrifice flavor just because we are trying to be healthy. And if you are anything like me, you want to break out of your salad rut once in a while. Don’t get me wrong, I love salads, but part of eating healthy consistently is keeping your food interesting. Wraps are a great way to mix it up, and honestly, the variations are endless!

Sauce: These wraps start with a southwestern-style sauce, ranch dressing, and barbecue sauce. I make a ratio suggestion for the ranch and barbecue sauce, but you can change that based on your preference. You can use any variety of barbecue sauce that you like. If you love barbecue sauce, add more! If you want a bit of heat to wrap, use a spicy barbecue sauce.
Cheese: You really can use any you like, shredded or sliced. My preference is Monterey Jack or Pepper Jack cheese, as I find they go perfectly with the other flavors of the wrap. I have even used sliced Gouda…and it didn’t disappoint! One suggestion, if you use shredded cheese, be sure to layer it on top of the sauce; the shredded cheese will stick to the sauce and will be less likely to fall out of your wrap when you are eating it.
Lunch Meat: Turkey works the best, as it is mild in flavor and allows the sauce to be the dominant flavor, and at the same time adds healthy protein to your wrap. However, you could certainly try other lunch meats and find a combination that you love.
Vegetables: This is where you can really get creative or even individualize the wraps. I love to load my wraps up with lots of lettuce; I’ve even used spinach when we had it growing in our garden. My husband loves olives, so I’ll load his up with extra. On the other hand, I don’t like olives, so I leave them out of mine. I do recommend using the peppers and cucumbers, as they add a nice crunch to the wrap.
For added flavor, we like to dip our wraps in the leftover sauce or make a little extra, if needed. We even save the leftover sauce for dipping carrots, bell peppers, or cucumbers. Our family prefers the ranch/barbecue combinations over just ranch for dipping vegetables. Try it!
My kids even enjoy getting involved in making the wraps to their liking, loading up on the things they like, and skipping the ones they don’t. I find they are more likely to eat vegetables if they have some control over which ones they get to eat. Otherwise, my kids will peek through the wrap suspiciously, concerned about what I might have slipped inside.


Southwest Club Wraps
If you are looking for a quick and healthy dinner idea that includes loads of flavor, look no further! These wraps are healthy, delicious, and completely satisfying.
Ingredients
Sauce:
- ¾ cup ranch dressing
- ⅓ cup barbecue sauce, (any brand will do)
For the Wraps:
- tortillas, (use the large burrito size)
- lettuce or spinach leaves
- 2 tomatoes, thinly sliced
- 8 ounces shredded cheese or sliced cheese, (Monterey jack or pepper jack)
- 1 ripe avocado, sliced thinly
- 1 large red bell pepper, sliced into thin strips
- ½ of a cucumber, sliced into thin strips
- ½ – 1 cup sliced black olives
Instructions
Sauce:
- Combine the ranch dressing and the barbecue sauce in a small bowl. Mix well. Set aside.
Wraps:
- Prepare all the vegetables by washing and slicing them as indicated on the ingredient list.
- Begin assembling the wraps. Layout the desired number of tortillas. Start with the sauce, spread evenly over the entire tortilla, leaving about an inch around the edge. Layer the cheese and meat over most of the tortillas. Add the vegetables down the center of the tortilla.
- Roll the finished wrap. To make a closed-end wrap, fold both the right and the left edges over the vegetables about one to two inches and then roll from the bottom. Be sure to press the ingredients into the center of the wrap as you roll the tortilla tightly.To make an open-ended wrap, fold only one edge and roll tightly.
- If you make a closed-end wrap, cut the wrap in two and eat half at a time.
- Use the leftover sauce to dip the wrap as you eat it.
Tried this recipe? Leave a comment and rating below.Follow me on Facebook and never miss a recipe!

BLACKBERRY-BACON GRILLED CHEESE
This adult version of the classic grilled cheese sandwich brings sweet and savory together with perfection. Made with bacon, sweet blackberry jam, smoky cheese, and jalapenos. One bite, and you’ll never think of grilled cheese sandwiches as “kids’ food” again!

Why should kids be the only ones who get to enjoy this classic sandwich? The crunch of the toasted bread, the stringy melted cheese, greasy fingers. Well, now you can have your sandwich and eat it too! This is grilled cheese for adults!
I’ve seen other food bloggers, who I follow, do varying versions of this sandwich, and I thought, “Yes, a grilled cheese sandwich for me!” My favorite food as a kid was grilled cheese. You could take me to any restaurant in town, fine dining or otherwise, and there I was, ordering a grilled cheese sandwich every time! Of course, my parents were slightly annoyed with my eating rut and lack of dining adventure, but hey, this girl likes her grilled cheese! All that to say, this sandwich makes me happy!! This is my comfort food!
Here’s what you’ll need:
- Bread
- Smoky cheese (I like to use gouda, but any smoky cheese will do)
- Bacon
- Jalapeno
- Blackberry jam
The first step is frying up the bacon – the crispier, the better. While the bacon is frying, slice the jalapenos. Remove the seeds if you want less heat. Also, thinly slice the cheese. I always use gouda for this recipe. It’s a soft cheese with a mild smoky flavor. I find that it just complements the other flavors perfectly.
Once you have drained the bacon, assemble your sandwich by layering the cheese, bacon, and jalapenos. Spread one side of the bread generously with blackberry jam. Butter the outside of the sandwich on both sides. Heat your skillet over medium-low to medium heat (depending on your stove).
**I like to preheat my skillet on medium, and right before I add the sandwich, I lower the heat to medium-low. The key is to slowly toast your bread to give the cheese enough time to melt completely. If your heat is too high, your bread will be completely toasted (or burnt), but your cheese will not have had enough time to melt. Low and slow is the key.
Once one side is golden-brown, flip and brown the other side. This pairs perfectly with a bowl of tomato soup or any soup of your liking. Enjoy!


Blackberry-Bacon Grilled Cheese
This adult version of the classic grilled cheese sandwich brings sweet and savory together with perfection. Made with bacon, sweet blackberry jam, smoky cheese, and jalapenos. One bite, and you'll never think of grilled cheese sandwiches as "kids' food" again!
Ingredients
- 4 slices bread
- cheese, Gouda or other smoky cheese
- 6-8 slices bacon
- 1-2 jalapenos, sliced
- blackberry jam
- butter
Instructions
- Start by frying up the bacon in a medium skillet until nice and crispy. Then drain the bacon on a paper towel.
- Assemble the sandwich by layering the cheese, bacon, and jalapenos.
- Generously spread blackberry jam on one side of the bread.
- Butter the outside of the sandwich on both sides.
- Heat a skillet over medium to medium-low heat. Grill the sandwich until the bread is golden-brown and the cheese begins to melt. Flip and repeat on the other side. **The key is to heat the sandwich slowly, allowing the cheese to melt completely.
Tried this recipe? Leave a comment and rating below.Follow me on Facebook and never miss a recipe!
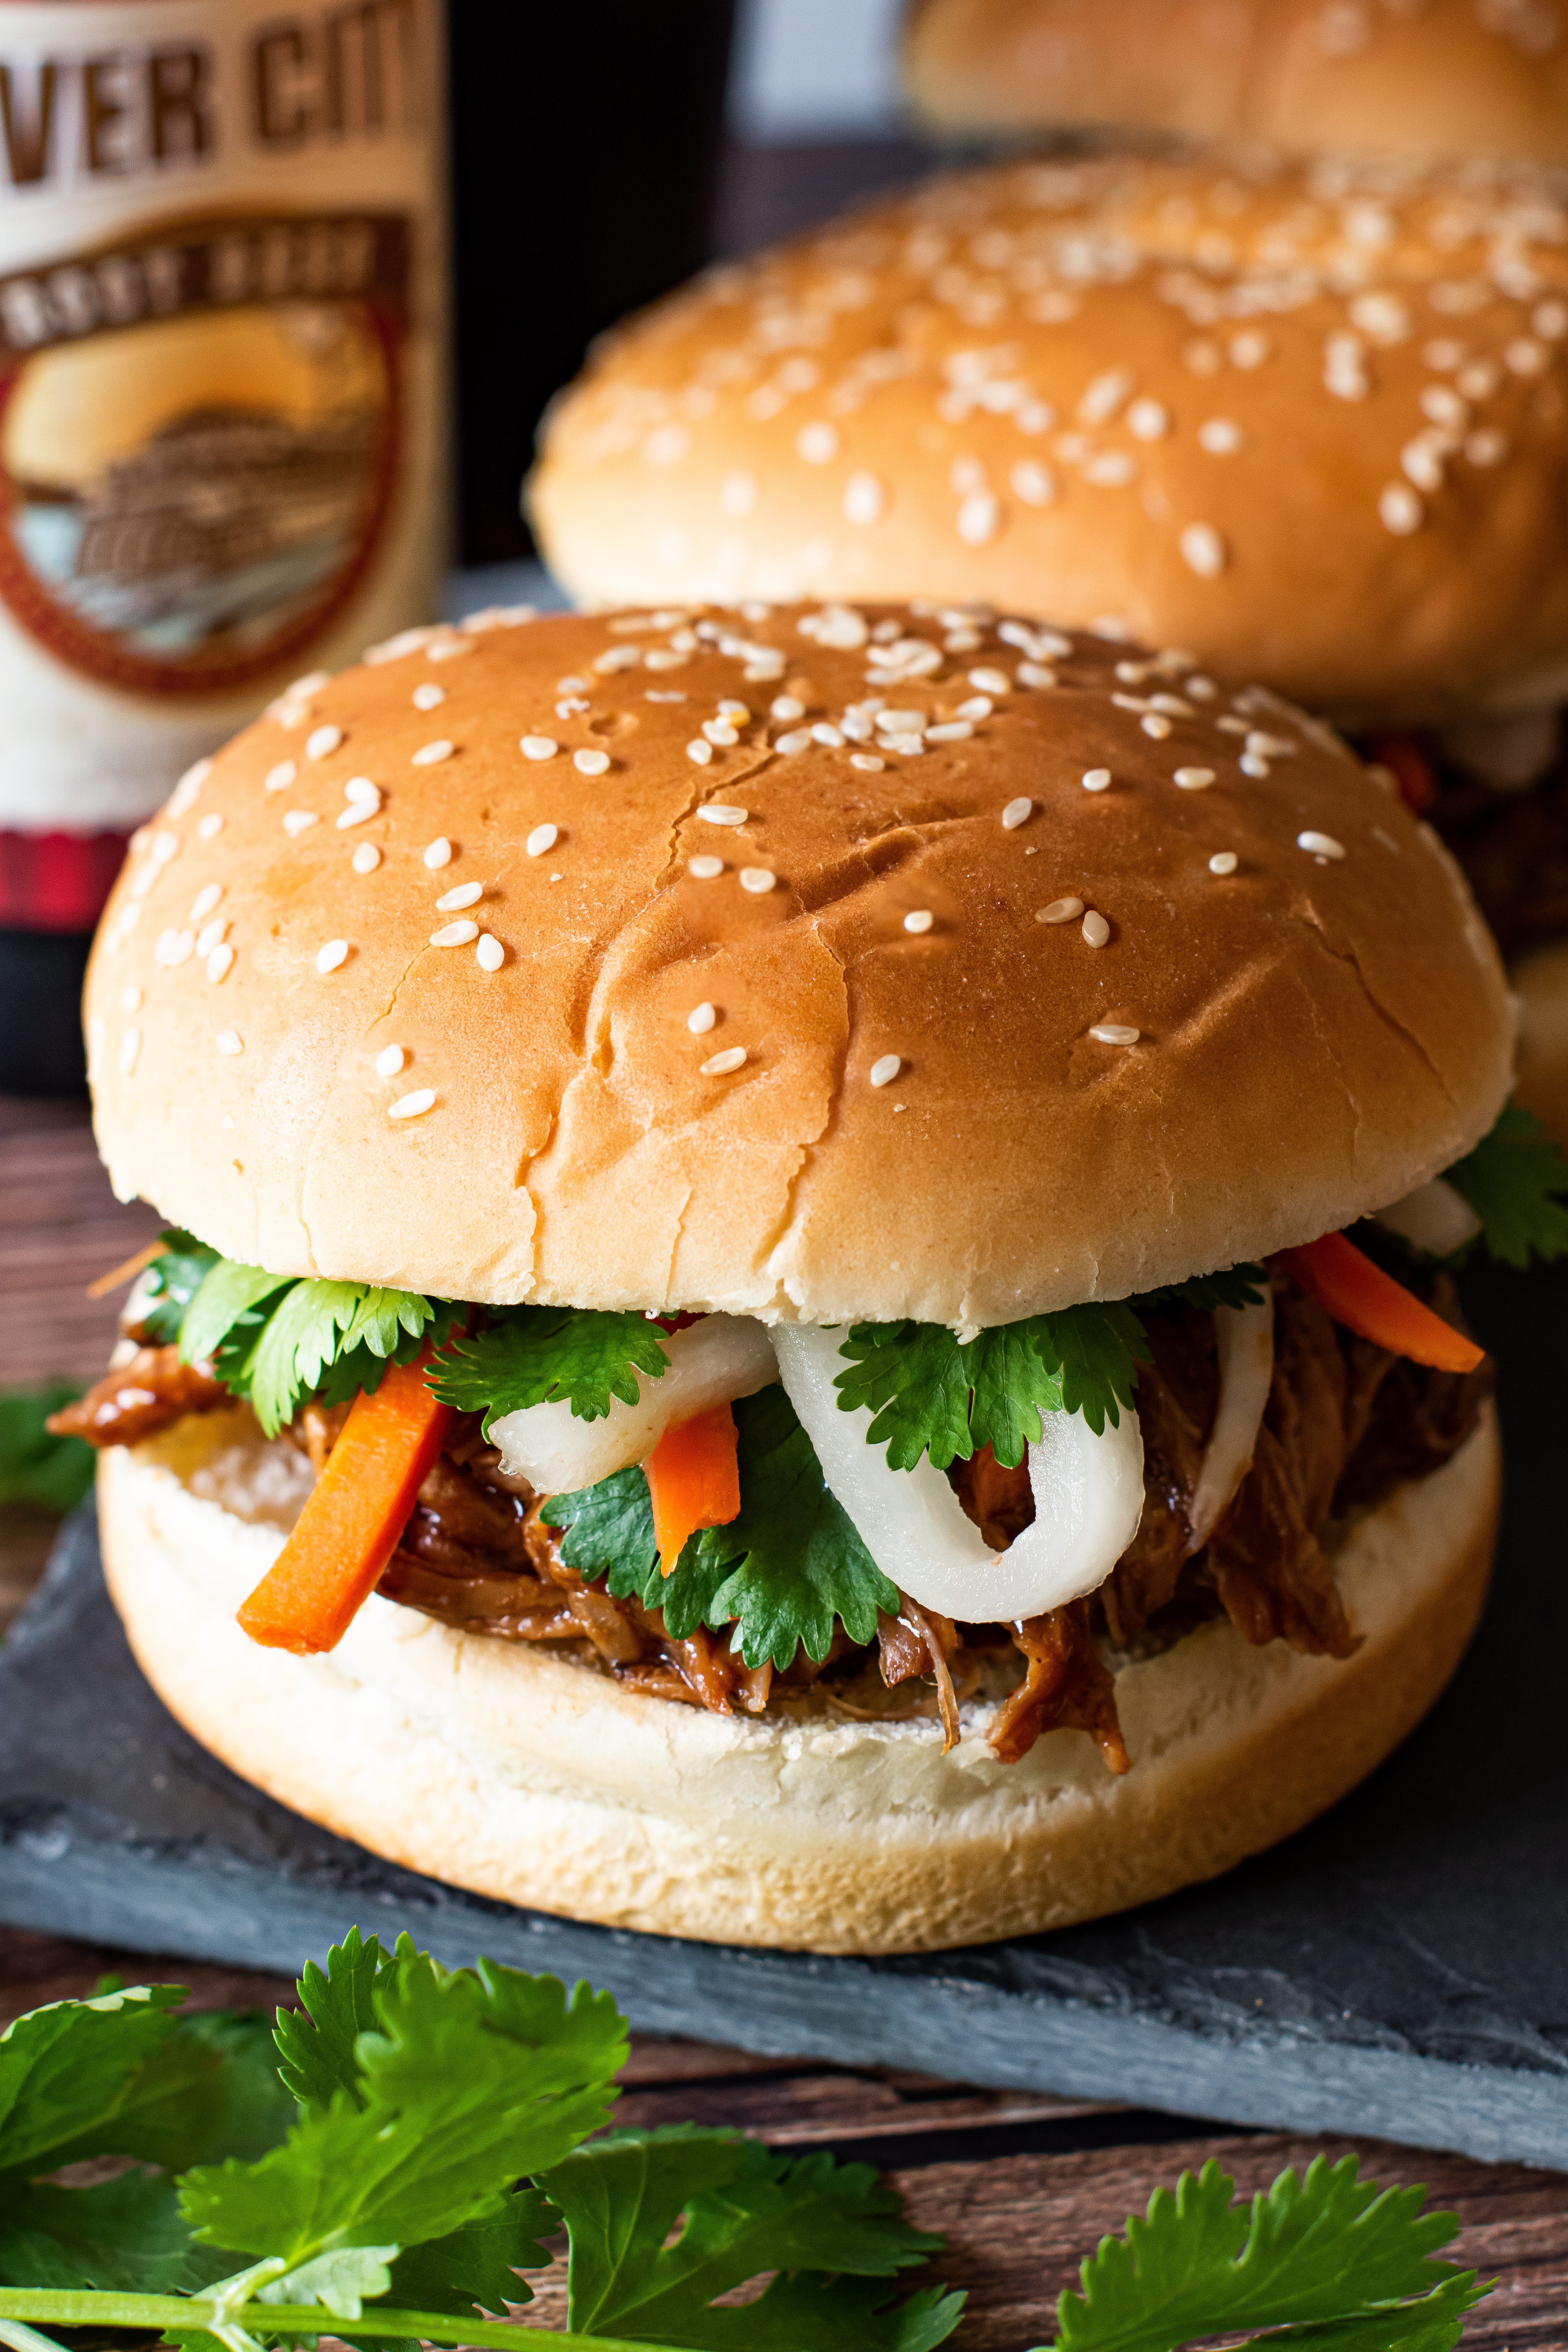
PULLED PORK SANDWICHES
With just three ingredients, you can put together these amazingly delicious pulled pork sandwiches. It tastes like you spent all afternoon in the kitchen, but it’ll be our little secret that you only spent 15 minutes putting these together!

We all have those days where pulling dinner together can be a challenge, whether you are juggling kids’ activities, a job, or even both! Or honestly, maybe you just want a break from making a time-consuming dinner! Hey, we’ve all been there! But I know you also want to give your family a great-tasting meal that they will enjoy eating and that you can feel good about serving.
I have a pretty good list of crockpot meals that save me on my busy days. This recipe is at the top of my list. The whole family loves it! I love that it is simple, delicious, and versatile. I typically serve it on hamburger buns as a sandwich (but one of my kids likes to eat it without a bun), and we often will eat the leftovers with a side of rice the next day. I love meals where you can serve the leftovers the next night differently, so it doesn’t feel like we’re having leftovers!

For this recipe:
Pork loin, root beer, and barbecue sauce…that’s it! It feels like cheating (is cooking supposed to be this easy?)! Cooking dinner does not need to be complex or challenging; it just needs to taste good!
Why root beer? Root beer – or any soda – does an amazing job of tenderizing meat. Slow cooking the pork in the soda breaks down all the tougher connective tissues in the meat, leaving you with incredibly tender, moist meat. Also, don’t worry about all the sugar in the soda because when the meat is done cooking, you will pour off any excess soda.
The soda won’t add much flavor to the meat; its only job is to tenderize. But don’t worry, the barbecue sauce is where your flavor will come from. You can use any barbecue sauce you enjoy. You can also add more or less than the recipe calls for based on your personal preference.

Our favorite toppings are cilantro, pickled carrots, and daikon (Japanese radish). Not only is it pretty to look at, but the carrots and daikon add a nice crunch to the sandwich, which is a nice contrast to the tender pork. Also, as with any pickled vegetable, the tang from the vinegar complements the other flavors from the barbecue sauce perfectly! I buy the carrots and the daikon together, already pickled. You can also buy them raw and pickle them yourself.
There are a variety of ways to serve these sandwiches, you could add sautéed onions, coleslaw, or even pineapple!


Pulled Pork Sandwiches
With just three ingredients, you can put together these amazingly delicious pulled pork sandwiches. It will taste like you spent all afternoon in the kitchen, but it'll be our little secret that you only spent 15 minutes putting these together!
Equipment
- Slow Cooker, Instant Pot, Crock Pot
Ingredients
- 2 pound pork tenderloin
- 1 12 ounce bottle of root beer, any brand
- 1 18 ounce bottle of barbecue sauce, any brand
- salt to taste
- 8 hamburger buns
Optional Toppings:
- cilantro
- pickled carrots and daikon
- onions
- coleslaw
- pineapple
Instructions
- Place the pork in the slow cooker or Instant Pot; pour the root beer over the meat.
- Cover and cook on high for 4 hours or low for 8 hours. The center of the meat should reach between 145°F and 160°F. (See notes for Instant Pot cooking times).
- Take the cooked pork out of the cooker and shred the pork using two forks. The meat should pull apart easily. Pour out any reaming root beer and discard.
- Return the meat to the slow cooker, and stir in the barbecue sauce. Add salt to taste.
- Serve over hamburger buns and garnish with the toppings of your choice.
Notes
Cooking Times:
For a standard crockpot or slow cooker, cook for 4 hours on high heat or 8 hours on low heat.
For an instant Pot, the low heat setting doesn’t seem to cook at a high enough temperature. So I set the Instant Pot to the slow cook mode and set it to high heat, cooking for at least 8 hours.
Tried this recipe? Leave a comment and rating below.Follow me on Facebook and never miss a recipe!
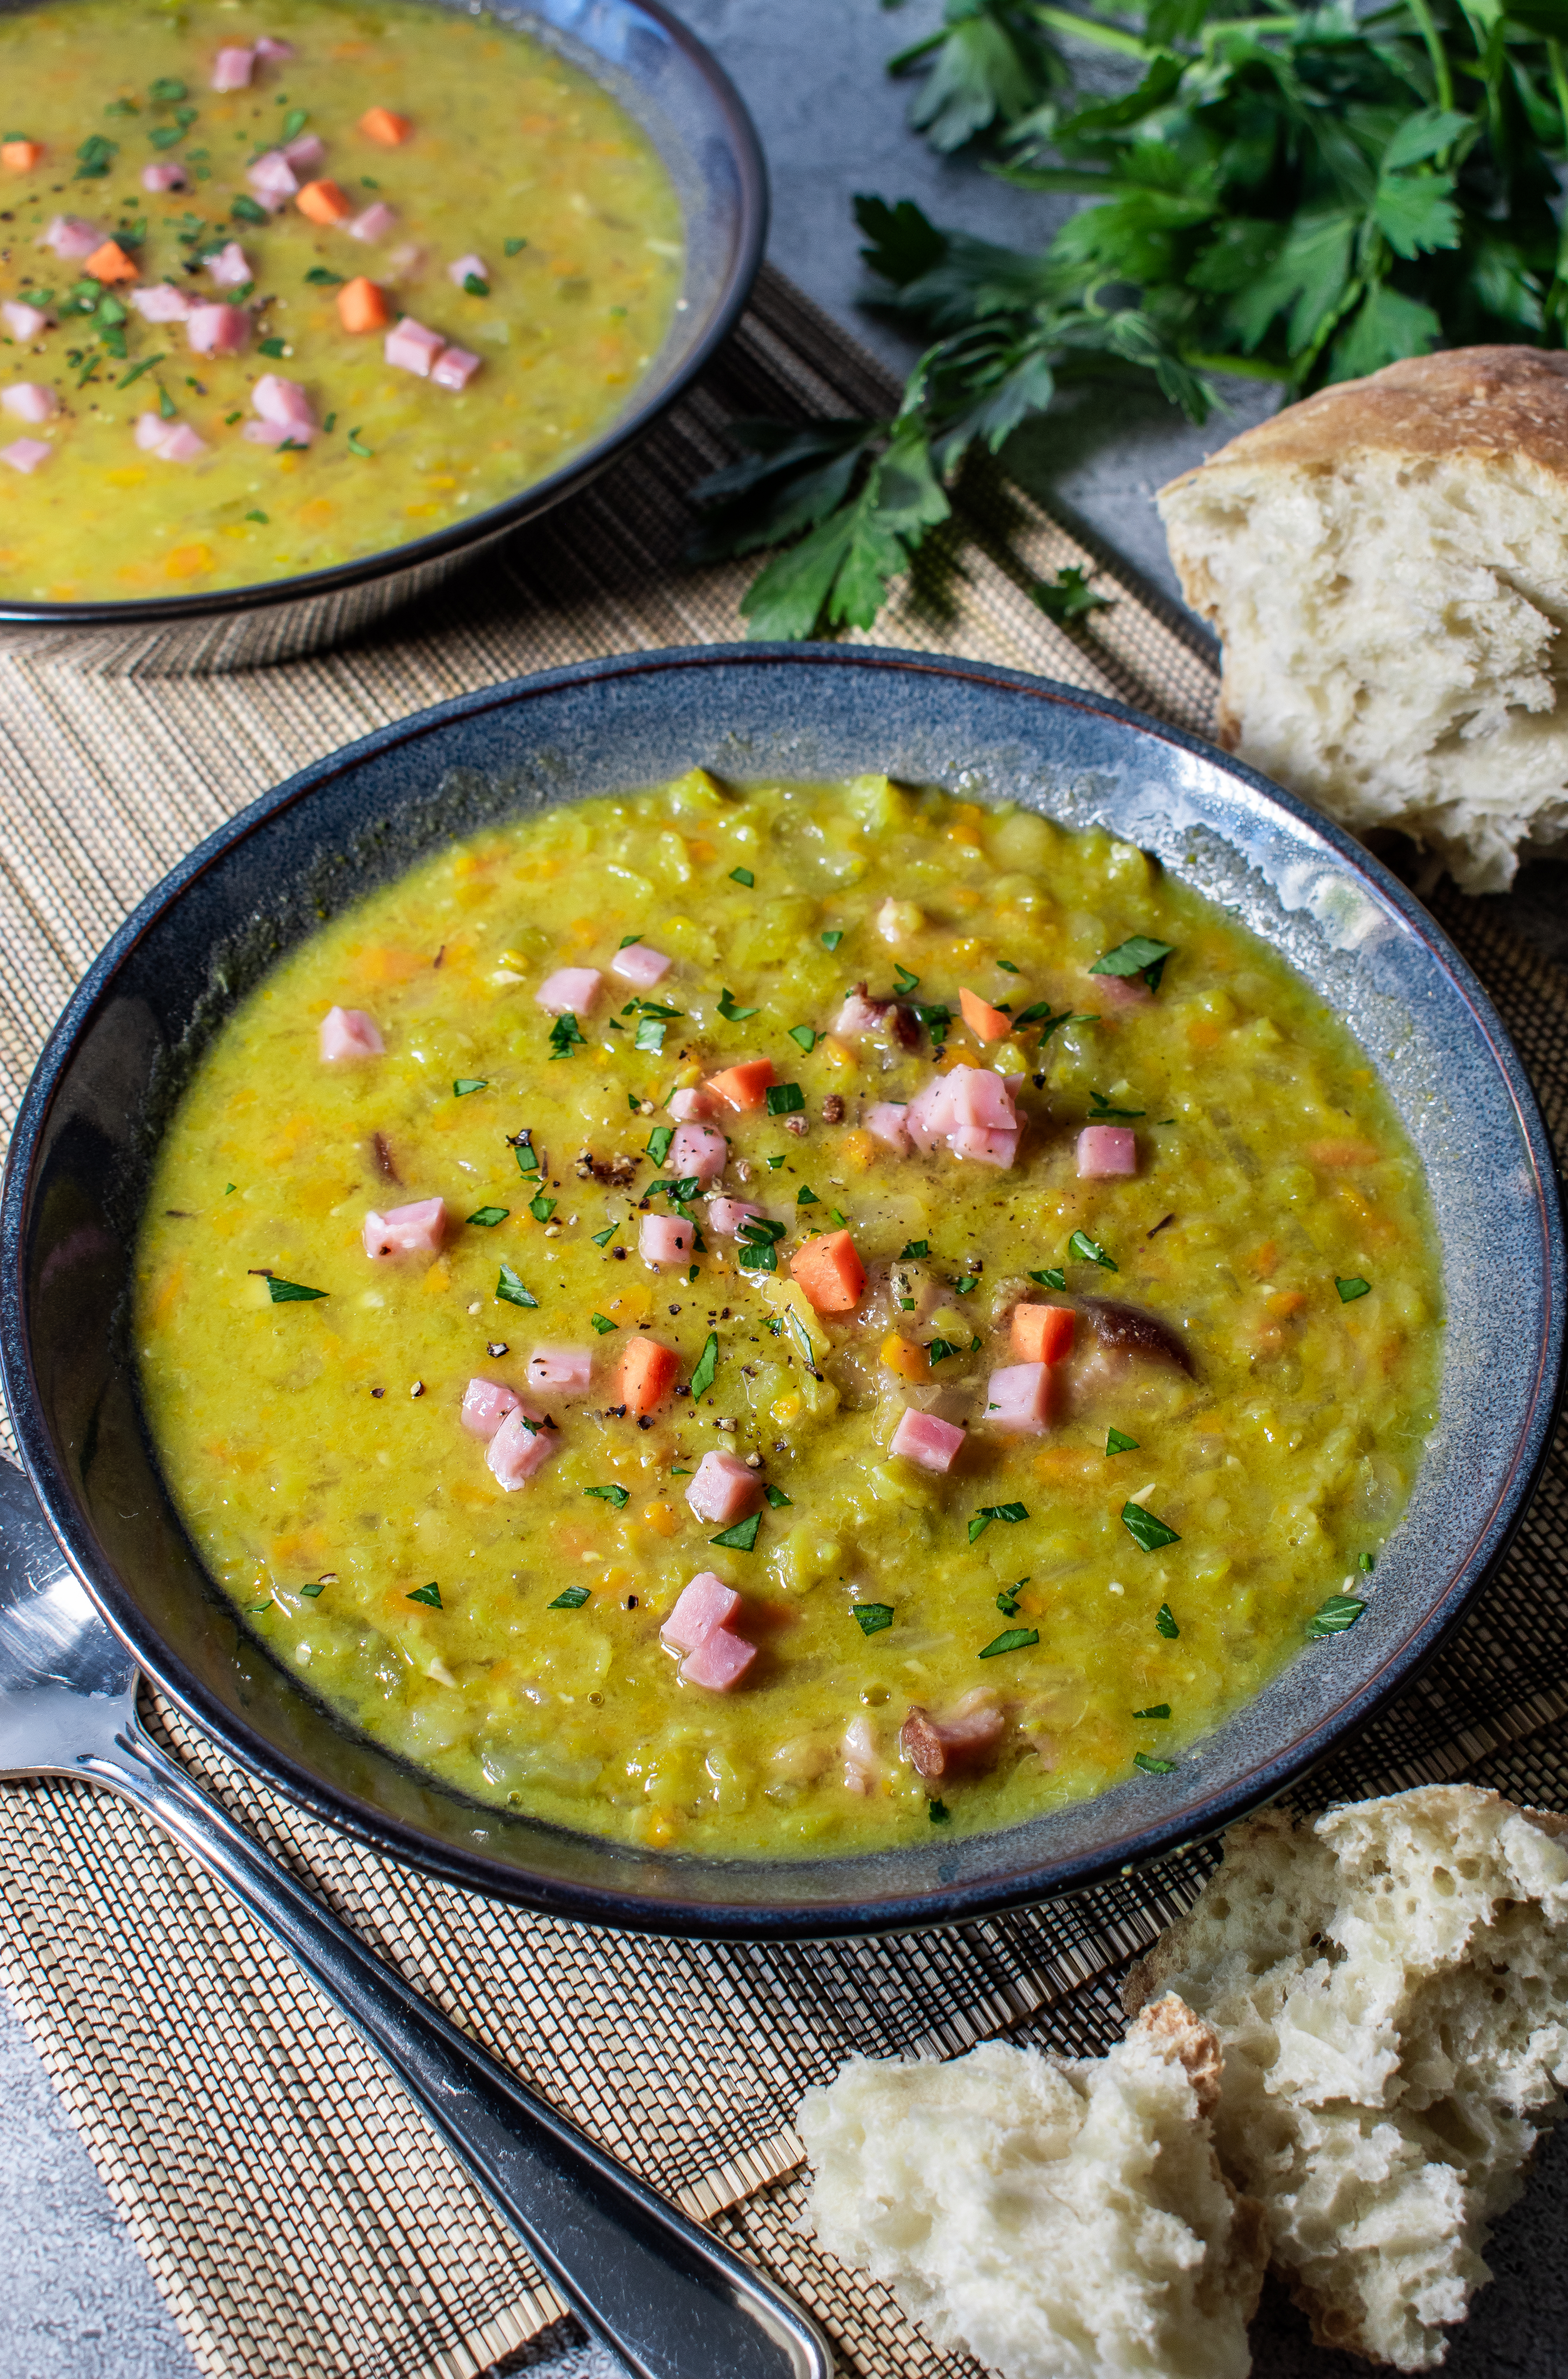
SPLIT PEA SOUP
Everyone needs a good, classic split pea soup recipe for those long chilly, rainy days of winter. This soup is packed full of fresh vegetables and smoky ham for a combination that is sure to win your whole family over. This is sure to be your new favorite comfort food!

I have been making this soup for years and have tweaked it some along the way. It’s a favorite in our house – and for a good reason! This soup is just so full of flavor, not to mention all the healthy vegetables and loads of protein! Not only are you getting protein from the ham, but split peas are also a great source of protein! Half a cup of cooked split peas provides 8 grams of protein, which by comparison, a large egg has 6 grams! So this is one soup you can feel great about eating and feeding to your family!

For This Recipe:
- Start by sautéing the onions and garlic. Sautéing simply means cooking in a pan with butter or oil until the vegetables are tender. Sautéing the onions and garlic concentrates their natural sugars, taking on a glorious sweetness while simultaneously enhancing their flavor. Be sure to stir frequently because garlic burns easily. The onions and garlic only need a couple of minutes to become tender and sweet.
- Chop the celery and carrots. Add all the vegetables, including the onions and garlic, to a crockpot or instant pot.
- Add the chicken broth, thyme, salt, and pepper, and stir to combine all the ingredients.
- Rinse the split peas well. Add them to the crockpot and stir.
- For the meat, you can use smoked ham shanks, smoked ham hocks, or regular ham. I have used all three, and they all make for a delicious tasting soup!
- Smoked ham shanks: This is my favorite meat to use. The shanks are smoked, which gives the soup a rich, smoky flavor. There is usually quite a bit of meat on the shanks, which I cut off and add to the soup after it has cooked for 8 hours.
- Smoked ham hocks: This lends the same rich, smoky flavor as the ham shanks, but it can be a hit or miss on whether there is enough meat on the bones. More times than not, I get very little meat from the shanks. So you’ll still get the delicious smoky flavor, just not much meat.
- Ham: This is always a winning choice – a great way to use up leftover ham! The only downside to using ham is that you won’t get the smoky flavor that you would with the shank or the hock. But trust me, you will still have a very delicious soup! If you use ham, cut it into bite-size pieces and add it to the soup at the beginning of the cooking process, allowing all the flavors to meld together as the soup cooks.
- Add whichever meat you choose to the broth and vegetables. If you are using ham hocks or ham shanks, be sure they are completely covered by the broth. This allows for all the rich smoky flavors to incorporate into the soup as it cooks.
- For a standard crockpot or slow cooker, cook for 4 hours on high heat or 8 hours on low heat. For an Instant Pot, the low heat setting doesn’t cook at a high enough temperature, and the vegetables don’t always get tender enough. So, I set the instant pot to high heat and cook for at least 8 hours. Also, with the instant pot, I remove the lid for the last hour and let some of the moisture evaporate as it finishes cooking, so the soup is less watery.
- When the soup is done, transfer the ham shank (or ham hock) to a cutting board and cool for 10 minutes. Using a knife or fork, remove as much meat from the bones as possible. Cut the meat into bite-sized pieces. Return the meat to the soup along with the chopped parsley, and stir everything together. Serve and enjoy!

Some of the equipment I love to use are listed below:

Split Pea Soup
Everyone needs a good, classic split pea soup recipe for those long chilly, rainy days of winter. This soup is packed full of fresh vegetables and smoky ham for a combination that is sure to win your whole family over! This is sure to be your new favorite comfort food!
Ingredients
- 2 tablespoons olive oil
- 1 yellow or sweet onion, finely chopped
- 2 cloves garlic, minced
- 3 medium carrots, chopped
- 2 stalks celery, chopped
- 1 teaspoon dried thyme
- 1 teaspoon salt
- ½ teaspoon ground pepper
- 6 cups chicken broth
- 1 pound green split peas, rinsed
- 2 smoked ham shanks, smoked ham hocks, or about 1 pound ham, **See notes
- ½ cup fresh flat-leaf (Italian) parsley, chopped
Instructions
- In a frying pan over medium heat, warm the oil. Add the onion and garlic, and sauté until softened, 4-5 minutes.
- Add the sautéed onion and garlic to the crockpot or instant pot, along with the carrots, celery, dried thyme, salt, pepper, and chicken broth. Stir to combine.
- Rinse the split peas thoroughly and then add to the crockpot. Stir the soup to combine all the ingredients.
- Add the smoked ham shanks, ham hocks, or ham to the slow cooker. If you are using ham shanks or ham hocks, make sure they are completely covered by the soup.
- Cover and cook on high heat for 4-5 hours or low heat for 8-10 hours. The peas should be very tender when the soup is done.
To Finish the Soup:
- Transfer the ham shank (or ham hock) to a cutting board, and let cool for 10 minutes. Using a knife or fork, remove as much meat from the bones as possible. Cut the meat into bite-sized pieces. Return the meat to the soup along with the chopped parsley, stir.
Notes
For the meat, you can use smoked ham shanks, smoked ham hocks, or regular ham. I have used all three, and they all make for a delicious tasting soup!
Cooking Times: For a standard crockpot or slow cooker, cook for 4 hours on high heat or 8 hours on low heat. For an Instant Pot, the low heat setting doesn’t cook at a high enough temperature, and the vegetables don’t always get tender enough. So, I set the instant pot to high heat and cook for at least 8 hours. Also, with the instant pot, I remove the lid for the last hour and let some of the moisture evaporate as it finishes cooking, so the soup is less watery.
- Smoked ham shanks: This is my favorite meat to use. The shanks are smoked, which gives the soup a rich, smoky flavor. There is usually quite a bit of meat on the shanks, which I cut off and add to the soup after it has cooked for 8 hours.
- Smoked ham hocks: This lends the same rich, smoky flavor as the ham shanks, but it can be a hit or miss on whether there is enough meat on the bones. More times than not, I get very little meat from the shanks. So you’ll still get the delicious smoky flavor, just not much meat.
- Ham: This is always a winning choice – a great way to use up leftover ham! The only downside to using ham is that you won’t get the smoky flavor that you would with the shank or the hock. But trust me, you will still have a very delicious soup! If you use ham, cut it into bite-size pieces and add it to the soup at the beginning of the cooking process, allowing all the flavors to meld together as the soup cooks.
Cooking Times: For a standard crockpot or slow cooker, cook for 4 hours on high heat or 8 hours on low heat. For an Instant Pot, the low heat setting doesn’t cook at a high enough temperature, and the vegetables don’t always get tender enough. So, I set the instant pot to high heat and cook for at least 8 hours. Also, with the instant pot, I remove the lid for the last hour and let some of the moisture evaporate as it finishes cooking, so the soup is less watery.
Tried this recipe? Leave a comment and rating below.Follow me on Facebook and never miss a recipe!

GRILLED CHICKEN TACOS
Healthy, delicious, and satisfying…Those are the three words I would use to describe these chicken tacos! Not only that, they are easy to make!

I am so excited to share this recipe with you. This recipe is a family favorite in our home, and I’m confident it will be yours too! This recipe came together from a desire to feed my family healthy and delicious meals. The combination of the grilled chicken, fresh guacamole, and the fresh vegetables in the pico de gallo made for a dinner that I felt good about feeding to my family. Enough chit-chat; let’s jump right in!
About this recipe:
If you’ve spent much time on my blog, you’ve probably discovered I love to grill! And I really do! It’s a healthy way to cook your food while at the same time adding favor. Not to mention less mess in the kitchen; that’s always a plus in my book!
When grilling chicken, I always use thighs. This is because thighs are juicier than chicken breasts, and you are less likely to end up with dry chicken. But if you prefer to use chicken breast, it will work fine for this recipe. I simply season the chicken with olive oil, salt, pepper, and cumin. When I season the chicken, I always brush on the oil and add salt and pepper. I then pat a generous amount of cumin onto the chicken. I am generous with the cumin because when you grill, you will lose some cumin as the fat drips off the chicken, and you do want a reasonable amount of cumin flavor to come through.
Preheat your grill over medium-high to high heat. Grill the chicken for 4-5 minutes on each side. Your grill temperature and cooking time will vary based on your grill and the thickness of the chicken. When grilling chicken, I ALWAYS use a meat thermometer to check if it is done. You do NOT want to eat undercooked chicken. Your chicken is done when the internal temperature reaches 165F. Allow the chicken to cool before chopping it into bite-size pieces.
This is a recipe that I think is enhanced by grilling the chicken, so I highly recommend it! However, I realize that sometimes grilling isn’t practical or possible, so I’ll provide stovetop instructions in the recipe notes below so no one misses out on this fantastic recipe.

Pico De Gallo:
To me, the pico de gallo is the star of this recipe! Look at those bright, bold colors! Pico de gallo is easy to make; all you do is dice the onion, tomatoes, pepper, and cilantro, stir in the fresh lime juice, garlic, salt, and voilà; you’re done.
The guacamole is almost as equally easy to make. The hardest part is finding a perfectly ripe avocado that’s as pretty on the inside as on the outside. I get so frustrated cutting open what appears to be a perfect avocado, only to discover that it has all kinds of black spots on the inside…I digress…Where was I? Guacamole! Add the avocado, lime juice, and salt to a small bowl and mash with a fork until you have the desired consistency. Taste test and add more salt if needed.
You are ready to assemble your tacos! Some suggestions for additional toppings – feta cheese, shredded cheese, sour cream, salsa, or hot sauce.
Feeding Kids:
Young kids aren’t likely to eat a taco; if yours do, you’re doing awesome as a parent…Mine didn’t, but an easy dinner solution was to make them chicken quesadillas. You already have the tortillas and grilled chicken; you just need some shredded cheese. Heat a pan over medium on the stove. Lightly butter one side of the tortilla and lay it butter-side down in the preheated pan. Quickly top with shredded cheese and cut-up chicken. Butter one side of another tortilla and place it on top, butter side up. Once the bottom tortilla is golden brown, flip the quesadilla over (trying not to fling chicken and cheese across the stove, good luck), and cook until golden brown and the cheese is melted. When the quesadilla is done, move it to a cutting board and slice it into triangles and serve with a side of sour cream (optional).
What to do With Leftovers:
I intentionally make extra of both the chicken and the pico de gallo. Not only do they make great tacos the next day, but they make a healthy and delicious chicken salad. I take any lettuce, spinach, or kale, that I have on hand, add some of the leftover chicken and pico de gallo, top with feta cheese and salad dressing, and done! You have a simple and healthy lunch or dinner with your leftovers!


Grilled Chicken Tacos
Healthy, delicious, and satisfying…Those are the three words I would use to describe these chicken tacos! Not only that, they are easy to make!
Ingredients
- tortillas, taco size
- 2 pounds chicken thighs
- olive oil
- ground cumin
- salt and pepper
Pico De Gallo
- 2 large tomatoes, diced
- 1 whole onion, diced
- 1 large green pepper, diced
- 2 teaspoon raw garlic, minced
- ⅓ cup cilantro, chopped
- 1 tablespoon fresh squeezed lime juice
- salt, to taste
Guacamole
- 1-2 avocados, mashed
- 1-2 teaspoons fresh-squeezed lime juice
- salt, to taste
Optional Toppings:
- feta cheese
- shredded cheese
- sour cream
- salsa
Instructions
- Preheat the grill on medium-high or high heat (depending on your grill). (See notes for stovetop instructions).
- Trim fat off of chicken. Brush the chicken with olive oil. Season with salt and pepper. Pat on a generous amount of cumin. Flip the chicken over and repeat on the other side.
- Grill the chicken until well done, 4 to 5 minutes per side, or until internal temperature reaches 165°F.
- Remove from grill and allow the chicken to cool before cutting or shredding.
- While the chicken is cooling, prepare the pico de gallo.
Pico De Gallo:
- Dice the tomato, onion, and green pepper and add to a medium bowl. Add the minced garlic and chopped cilantro. Add the lime juice and salt and stir to combine everything well. Place in the refrigerator until ready to serve.
- Cut the cooled chicken into small pieces.
Guacamole: (Be sure to do last)
- Add the avocado, lime juice, and salt to a small bowl. Mash with a fork until you have the desired consistency. Taste and add more salt, if needed.
To Assemble:
- Heat the tortillas on the grill or the stovetop. **See notes
- Fill the taco with chicken and layer on the guacamole and the pico de gallo. Add any additional toppings – feta cheese, shredded cheese, sour cream, or salsa.
Notes
On the stovetop, season the chicken the same way you would for grilling it. Heat your pan and 1 tablespoon of oil on the stove over medium-high heat. Place chicken in the pan and cook undisturbed for 5 to 7 minutes. Flip and continue cooking for another 7 minutes or until the internal temperature reaches 165F. Cooking time will always depend on the thickness of the chicken breasts.
To heat the tortillas: I heat mine directly on the stovetop. You can do this directly on the burner or in a pan. Turn the heat to medium, giving it a few seconds to heat up. Then place the tortilla, either on the burner or in the pan. Flip the tortilla after 10 to 15 seconds; I usually flip 2 to 3 times. Remove from heat and immediately fill the tortilla. If you are heating several tortillas, place the warm tortillas on a plate and wrap them in a kitchen towel to keep them warm. Serve immediately.
Tried this recipe? Leave a comment and rating below.Follow me on Facebook and never miss a recipe!

YAKI UDON
This dish is noodle-perfection! It’s an all-in-one meal in a bowl with a perfect blend of meats and vegetables! Not only is it fun to make, it’s fun to eat! Grab a pair of chopsticks and dig in!

Comfort food in our house usually involves noodles, in some form. When I discovered udon noodles at one of our favorite Japanese restaurants, it was love at first bite! Thick, chewy, and hearty – just look at them, what’s not to love!!
What are udon noodles? They are a thick and chewy wheat-flour noodle used frequently in Japanese cuisine and are a perfect accompaniment to soup or stir-fries like this one.
What is yaki udon? Yaki udon is Japanese stir-fried udon noodles mixed with meat and vegetables.
There are so many things to love about this recipe! Not only is it beautiful to serve – just look at those bright, bold colors – it’s fun to make and fun to eat! Even better, it is completely customizable: you can omit any ingredients you don’t like, add the ones you do, or add more or less of anything. The one thing that I wouldn’t recommend changing is the soup base. It gives this recipe such incredible flavor that it just wouldn’t be the same without it.
Some ingredients might be unusual and tricky to find, but this recipe is worth the extra effort! I would start in the Asian food aisle of your local grocery store, or even better, your local Asian market.
Ingredients:
Soup base (mentsuyu): This soup base comes together quickly and is so full of flavor. It really makes this dish what it is. The ingredients are unusual but necessary. You won’t regret using this soup base for your udon noodles!

- Sake: Basically, it’s a Japanese rice wine common in cooking. You can find this in the alcohol aisle of your grocery store.
- Mirin: It’s similar to sake but has more sugar and lower alcohol content.
- Soy sauce: I think we are all familiar with this one…made from the fermented paste of soybeans.
- Kombu (dried kelp): Edible kelp that is widely eaten in East Asia. Kelp is actually quite good for you; if you are new to eating it, I recommend giving it a try. Not only is it high in healthy iodine, but it also contains iron, calcium, vitamins A and C.
- Dried Bonito Flakes (Katsuobushi): This is another unusual ingredient, but one that we have really enjoyed using in multiple dishes because of its strong, distinct flavor. What is it? Katsuobushi is dried, fermented, and smoked skipjack tuna. I usually use bonito flakes, which is a young bonito fish and an inexpensive substitute for skipjack tuna.
Udon noodles: Typically, there are three ways to buy udon noodles: dried (like typical pasta), frozen, and fresh. And yes, some options are much better than others – way better, in fact! I would never recommend buying dried udon noodles. When cooked, they do not have the texture that udon is known and loved for. I actually would avoid buying udon altogether if dried was my only option. Frozen is a step up from dried and most brands are pretty good. But fresh udon is the absolute best way to buy udon. And I don’t normally promote brands on my blog, but Sun Noodles are by far the best I’ve found. Since they are fresh, they are sold in the refrigerated section. They will expire quicker than dried or frozen, usually within a couple of weeks of buying, so take note of the date. Follow the cooking directions on the package of whichever you buy. Fresh udon is only boiled for a couple of minutes, drained, and then rinsed in cool water to stop the cooking. Rinsing also removes some of the starch and prevents the noodles from sticking together. You’ll want your noodles to have a chewy texture, not mushy, so take care not to overcook them.
Meat: You have quite a few options for the meat…you could even make this vegetarian. I have made it with chicken, pork, and char siu. You could even do beef, cut into thin strips. Once I tried char siu pork, though, I was hooked, and it’s how I always make it now. What is char siu? It’s a Chinese version of barbecue pork, with a mixture of honey, five-spice powder, fermented tofu (red), dark soy sauce, hoisin sauce, and sherry or rice wine. I buy mine already made in the meat section, but you can certainly make it yourself.
Kamaboko (or steamed fish cake): Many of you may be wondering what this is. If you frequent ramen restaurants, you most likely have seen it and eaten it. Basically, it’s a cured, processed seafood product of Japan. It is made of puréed white fish, formed into different shapes, including semi-cylinder loaves, and steamed until it becomes firm. High-quality kamaboko will contain as much protein as eggs and many healthy nutrients. It will also be low in fat and calories. However, it may be high in sodium, so when you are purchasing kamaboko, you will want to check the ingredients to ensure you are making a health-conscious choice. Color is often added to give it that bold, bright pink color. It certainly does look pretty in this dish, but if you prefer not to have the color additive, you can buy kamaboko without the pink color added.


Vegetables: This is where you can get really creative. You could add a variety of vegetables that I don’t have listed. I have seen people use mushrooms, bok choy, baby corn, asparagus, peppers, or snow peas. You are really only limited by your creativity!
- Cabbage: I prefer napa cabbage, also called Chinese cabbage, for this dish. Cabbage will cook down to almost nothing, seriously! The first time I made this, I used 5 big leaves, and by the time I finished cooking the yaki udon, I could hardly find the cabbage. My husband actually said, “you know what would go good with this? Cabbage.” So the next time, I added more – a whole head, to be exact! Trust me; it cooks down! To prepare the cabbage, I remove the outermost leaves and discard them. I then separate the remaining leaves and cut out the thick rib in the center of each leaf, just using the tender outer edges of the leaves. You can either cut or tear the leaves by hand, but don’t make the pieces too small, or they will be nonexistent when cooked.
- Carrots: I like to julienne the carrots (cut into long thin strips).
- Onion: I use a sweet onion, roughly chopped. You could also use yellow onion.
Most of the work to make this dish is in the prep, making the soup base, and cutting up the meat and the vegetables. But once the prep is done, it comes together quite quickly. Don’t let the length of this post or the ingredients intimidate you. This is a dish worth making! I hope this will become a favorite in your home like it is in mine! If you make this, comment and let me know! How did you customize your yaki udon?
If you enjoyed this recipe, check out my Curry Udon Soup.


Yaki Udon
This dish is noodle-perfection! It's an all-in-one meal in a bowl with a perfect blend of meats and vegetables! Not only is it fun to make, it's fun to eat! Grab a pair of chopsticks and dig in!
Equipment
- wok
Ingredients
Noodle Soup Base, (Mentsuyu) :
- ½ cup sake
- 1¼ cup mirin
- 1 cup soy sauce
- 1 2×2 inch piece kombu (dried kelp),
- 1 cup dried bonito flakes
Ingredients:
- 28 ounces udon noodles, fresh or frozen (preferably 2 packages of fresh Sun Udon Noodles).
- 2-3 tablespoons neutral flavored oil
- 1 pound meat, (8 ounces to 16 ounces), char siu, pork, chicken, or beef, chopped.
- 1 sweet onion, chopped
- 1 carrot, julienned
- 1 roll (6 oz.) kamaboko, (steamed fish cake), sliced
- 1 head of Napa cabbage, cut out the center vein and use the soft leaves
Toppings (optional):
- green onions, sliced
Instructions
Noodle Soup Base Instructions:
- Gather all the ingredients. In a medium saucepan, add the sake and bring it to a boil over medium-high heat. Let the alcohol evaporate for 5 to 10 seconds.
- Add the mirin, soy sauce, kombu, and bonito flakes. Simmer for 5 minutes. Remove from heat and set aside until it has cooled down.
- Pass the mixture through a fine sieve and set aside until ready to use.
Instructions:
- Gather all ingredients.
- Roughly chop the onion.
- Julienne the carrot (cut into long thin strips).
- Remove and discard the first outer layer of cabbage leaves. Separate the remaining leaves. For each leaf, cut out the thick, hard vein from the center of the leaves, only using the tender outside of the leaves. Tear or cut into large pieces. Use most or all of the cabbage. It will seem like a lot, but it cooks down.
- Chop your meat into bite-size pieces, set aside. Slice the kamaboko (steamed fish cake), set aside.
- For udon: Discard any sauce that came with the noodles (you'll use the soup base you made). Follow boiling instructions on the package. After noodles are boiled, drain and rinse in cold water. Rinsing in cold water stops the cooking process and removes some of the starch so the noodles do not stick together. Set aside until ready to use.
- Meanwhile, in a wok or deep frying pan, heat oil over medium-high heat. Add your choice of meat and cook until almost cooked through about 5 minutes. Add the onions and cook until translucent and soft. Add the carrots, kamaboko, and cabbage. With tongs, gently toss the ingredients as the cabbage begins to wilt.
- Add most or all of the soup base (depending on how soupy you want your dish) to the wok or frying pan. Continue to toss with tongs to coat the vegetables evenly and heat up the soup. Add the cooked udon noodles, and toss gently to allow the noodles to absorb some of the soup, about 5 minutes.
- Serve and garnish with green onions.
Tried this recipe? Leave a comment and rating below.Follow me on Facebook and never miss a recipe!
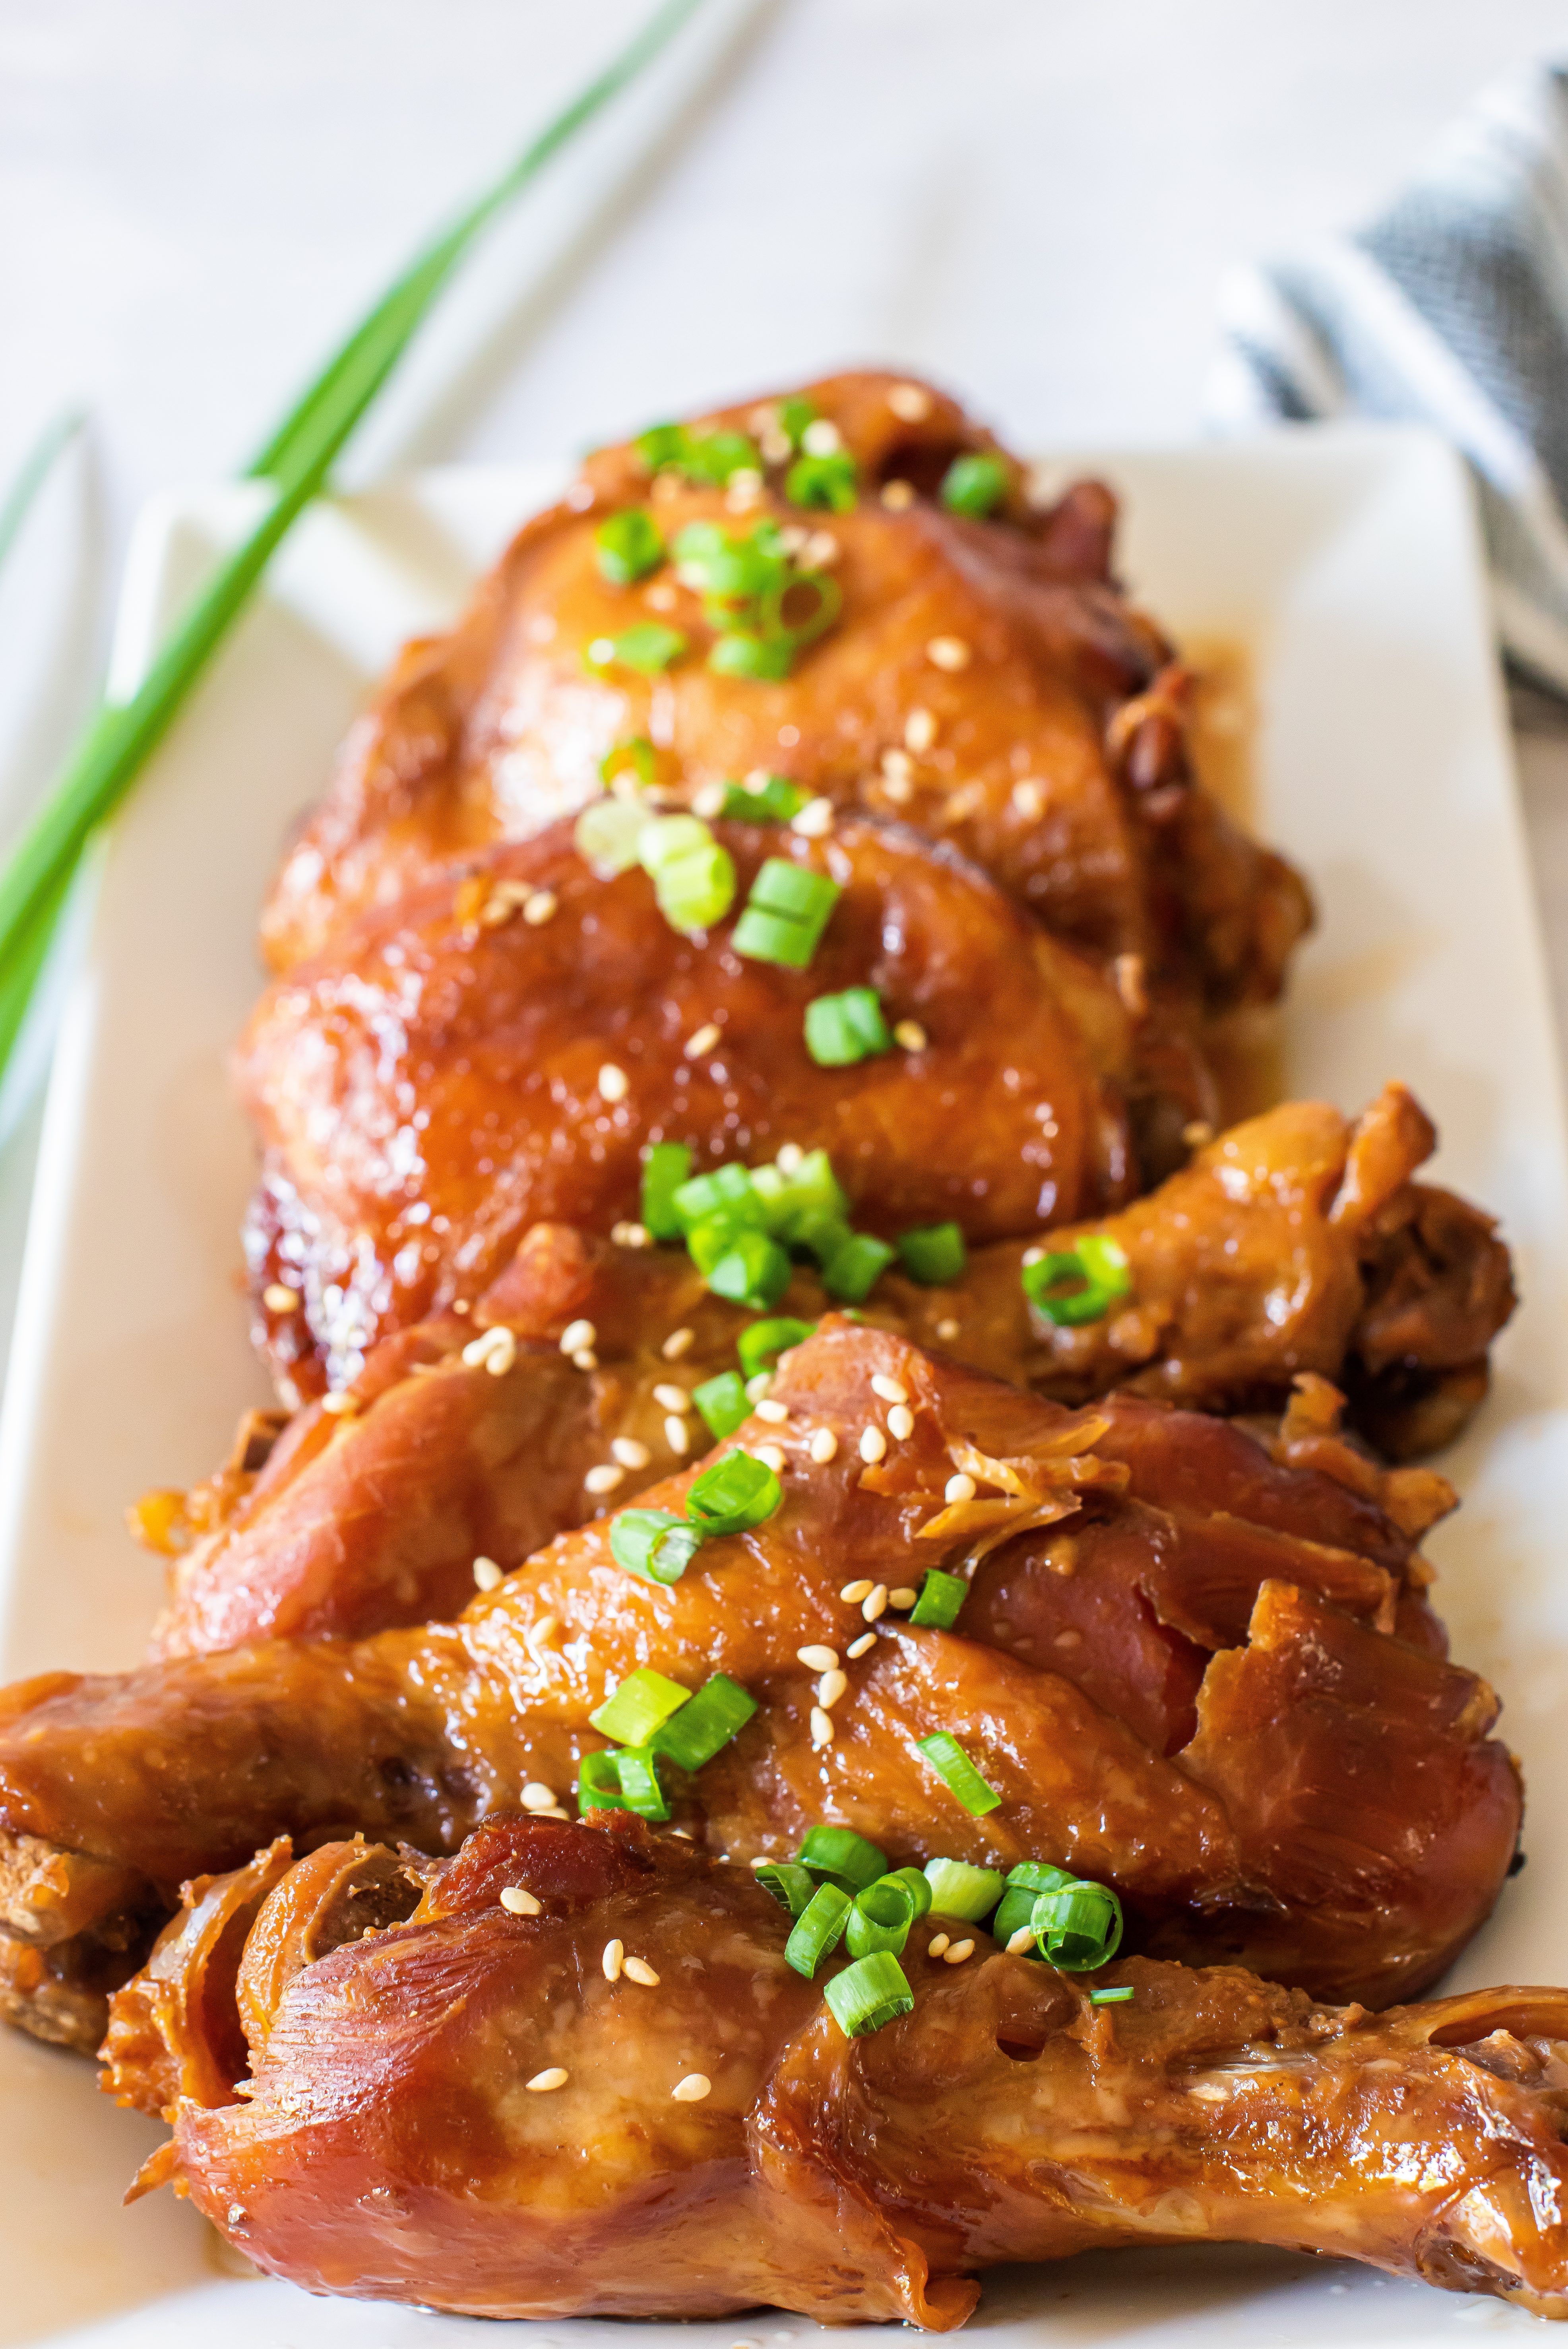
SHOYU CHICKEN
Slow-cooked chicken that is literally falling off the bone tender! Not to mention incredibly moist and bursting with flavor! The best part is it comes together in 15 minutes; you just put everything in the crockpot and forget about it for the next 8 hours.

This is one of my favorite crockpot meals. It comes together so quickly, and the flavor is AMAZING! Not to mention how great your house will smell all day while this chicken is cooking. We all need a good list of crockpot or instant pot meals to get us through those “way-to-busy” days. And this one is at the top of my list. The flavor is so rich, with so many different layers. And the chicken is incredibly moist and literally falling off the bones.
What exactly is shoyu chicken? Shoyu chicken is the traditional Hawaiian recipe for teriyaki chicken. It is typically served with a heaping side of rice and mac-salad, locally known as a “plate lunch.” Shoyu Chicken is cooked in a crockpot or on the stove, never on a grill or in the oven, and results in ginger-fragrant, fork-tender chicken with a deep mahogany skin. Shoyu means “soy sauce” and is the one ingredient that is always included in shoyu chicken recipes. After soy sauce, everyone has their own variations. And this is mine.

For this recipe:
Typically shoyu chicken is made with thighs or a combination of thighs and drumsticks, as well as being bone-in and skin on. I highly recommend using chicken with the bones-in and skin on; not only is it delicious, but more true to traditional shoyu chicken. I do trim off the excess fat.
Really this recipe is as simple as adding all the ingredients to a crockpot or instant pot and cooking it on low for 8 hours. **For the Instant Pot, use the slow cook setting and cook on the high heat setting for at least 8 hours.
To serve, place the chicken on a serving platter or bowl, pour sauce over chicken. Serve with a side of rice.

Some of the tools and equipment that I love to use are listed below:

Shoyu Chicken
Slow-cooked chicken that is literally falling off the bone tender! Not to mention incredibly moist and bursting with flavor! The best part is it comes together in 15 minutes; you just put everything in the crockpot and forget about it for the next 8 hours.
Equipment
- Slow Cooker or crock pot
- Instant Pot
Ingredients
- 5 pounds chicken, bone-in and skin on thighs and drumsticks
- 1 cup shoyu, (soy sauce)
- ½ cup water
- 1 cup brown sugar
- 2 inch piece ginger, diced
- 4 cloves garlic, diced
- 1 tablespoon oyster sauce
- 1 tablespoon mirin
Instructions
- Add the shoyu (soy sauce), water, brown sugar, ginger, garlic, oyster sauce, and mirin to the crockpot or instant pot, stir to combine. Turn on the cooker to begin heating the sauce.
- Trim excess fat off of chicken and place in cooker.
- Set slow cooker to high for 4 hours or low for 8 hours. For an Instant Pot, use the slow cook setting and cook on the high heat setting for at least 8 hours. If the chicken is not completely covered with the sauce, turn the chicken a few times during the cooking process so it cooks evenly and soaks up the flavorful sauce.
- Serve with white rice.
Notes
This recipe can be cooked on the stovetop as well.
Prepare ingredients as instructed above. Place everything in a large pot and bring it to a boil. Lower heat to medium and continue cooking for 30 minutes or until chicken reaches 160F. Remove the chicken and continue to simmer the liquid until it thickens. When done, pour over chicken and serve.
Tried this recipe? Leave a comment and rating below.Follow me on Facebook and never miss a recipe!

CURRY UDON SOUP
Satisfy your noodle cravings with a warm bowl of curry udon soup. Bursting with flavor and full of slurp-worthy noodles, it can be on your table in about 30 minutes.

I first tried curry udon soup at one of our favorite sushi restaurants. It was amazing…warm, thick, loaded with noodles, and so satisfying! My mind instantly started trying to figure out how I could recreate this soup at home. I knew there were three basic ingredients; udon noodles, curry, and chicken. So that is where I started, and I built the recipe from there.
One of the keys to this recipe is curry. This is not powdered curry or Indian curry that you would buy in the spice section of your grocery store. The curry used in this dish is Japanese curry, which is quite different from powdered curry. Japanese curry often has a thick gravy-like texture. The flavor is sweeter than the Indian variety and is umami-rich (a taste often described as meaty, broth-like, or savory). You can find Japanese curry in the Asian aisle of the grocery store. It’s usually sold in large square blocks that you will dissolve in your dish.

Another key ingredient is the udon noodles. Typically there are three ways to buy udon noodles; dried (like typical pasta), frozen and fresh. And yes, some options are much better than others, way better, in fact. I would never recommend buying dried udon noodles; when cooked, they do not have the texture that udon is known and loved for. I actually would avoid buying udon altogether if dried was my only option. Frozen is a step up from dried and most brands are pretty good. But fresh udon is the absolute best way to buy udon. And I don’t usually promote brands on my blog, but fresh Sun Noodles are by far the best I’ve found. Since they are fresh, they are sold in the refrigeration section. They will expire quicker than dried or frozen, usually within a couple of weeks of buying, so take note of the date. Follow the cooking directions on the package of whichever you buy. Fresh udon is only boiled for a couple of minutes, drained, and then rinsed in cool water to stop the cooking. Rinsing also removes some of the starch and prevents the noodles from sticking together. You want your noodles to have a chewy texture, not mushy, so take care not to overcook them.
I chose to use chicken for this soup. That’s how I first had it, so it’s how I recreated the dish. But I have also seen curry udon with thin-cut beef, pork, and no meat. So don’t be afraid to mix it up and try different meats.


Curry Udon Soup
Satisfy your noodle cravings with a warm bowl of curry udon soup. Bursting with flavor and full of slurp-worthy noodles, it can be on your table in about 30 minutes.
Ingredients
- 1 tablespoon oil
- 1 onion, sliced
- 1 pound chicken, boneless and skinless
- 4 – 5 cups chicken broth, depending on how thick you want the soup, (see notes)
- Curry, (I use half a package + 1 square of S&B Golden Curry, this equals 5 small squares)
- 21-28 ounces udon noodles, fresh or frozen (preferably fresh Sun Udon Noodles)
- Green onion, for garnish
Instructions
- Slice the onion. Add the oil to a deep frying pan or pot, and add the sliced onions. Fry over medium-high heat until starting to turn translucent, about 5 minutes.
- While onions are frying, cut up the chicken into bite-size pieces. Then, add the chicken to the frying pan and cook for 10 minutes.
- Add chicken stock and bring to a boil.
- Once the chicken broth is boiling, add the curry. Stir until the curry is completely dissolved in the broth, about 5 minutes.
- Bring a large pot of water to a boil. Boil the udon noodles as instructed on the package (discard any sauce that came with the noodles). When noodles are done, drain and rinse in cool water. This helps to stop the cooking and keeps the noodles from sticking together.
- To serve, place noodles in individual bowls and ladle curry mixture over the top. Garnish with sliced green onions.
Notes
4 cups of broth give you a very creamy, thick soup. 5 cups of broth give it a more soup-like texture.
Tried this recipe? Leave a comment and rating below.Follow me on Facebook and never miss a recipe!

GRILLED CHIPOTLE CHICKEN WITH PEACH SALSA
If you are looking for the perfect dinner for those warm summer evening barbecues, look no further. This spicy grilled chipotle chicken is balanced perfectly with a cool, sweet peach salsa for a dinner that will WOW your friends and family.

I’m always looking for recipes that fit the season. Rainy, cold weather needs warm comfort foods like soups and crockpot meals. Summers need grilling recipes and recipes that use fresh fruits that are ripe in the summer months.
This recipe has both; grilled and fresh fruit! The flavors in this dish are so unique! You get a little heat from the chipotle and jalapeno pepper, which is balanced with a cool, refreshing peach salsa bursting with summery flavors! I am confident this will be a hit in your home.

For this recipe
I always start with grilling the peaches. That way, they can cool as you prepare the other ingredients. Preheat the grill to medium-high heat (the temperature will vary based on your grill). Start by cutting the peaches in half and removing the pits. Brush a little oil on the cut side of the peaches. Put the cut side down on the grill. Grill the peaches for 4 to 5 minutes or longer (again, it will depend on your grill). Rotate the peaches a quarter turn halfway through the grilling. You want the peaches to begin to char (blacken slightly). Remove them from the grill and set them aside to cool.

While the peaches are cooling, begin preparing the salsa. Mix the chopped cilantro, red onion, diced jalapeno, lime juice, and salt. Stir to combine. Chop the cooled peaches and gently stir them into the salsa. Place the salsa in the refrigerator until you are ready to serve it with the chicken.

When grilling chicken, I always use thighs. Thighs are juicier than chicken breasts, and you are less likely to end up with dry chicken. The chicken is seasoned on both sides with a mixture of salt, chipotle seasoning, and garlic powder. Then I grill the chicken for 4-5 minutes on each side. Your grill temperature and cooking time will vary based on your grill and the thickness of the chicken. When grilling chicken, I ALWAYS use a meat thermometer to check if it is done. You do NOT want to eat undercooked chicken. Your chicken is done when the internal temperature reaches 165°F.
This is a recipe that I think is enhanced by grilling the chicken, so I highly recommend it! However, I realize that sometimes grilling isn’t practical or possible, so I’ll provide stovetop instructions below so no one misses out on this fantastic recipe.
Stovetop Instructions:
On the stovetop, season the same way you would for grilling. Heat your pan and 1 tablespoon of oil on the stove over medium-high heat. Place chicken in the pan and cook undisturbed for 5 to 7 minutes. Flip and continue cooking for another 7 minutes or until the internal temperature reaches 165°F. Cooking time will always depend on the thickness of the chicken you are using.
To serve, plate the chicken and top with salsa. Add a wedge of lime and sliced avocado.

Grilled Chipotle Chicken with Peach Salsa
If you are looking for the perfect dinner for those warm summer evening barbecues, look no further. This spicy grilled chipotle chicken is balanced perfectly with a cool, sweet peach salsa for a dinner that will WOW your friends and family.
Ingredients
- 2 pounds boneless, skinless chicken thighs
- 4 tablespoons olive oil
- 2 – 4 teaspoons chipotle powder, (amount depends on how much spice you want)
- 2 teaspoons garlic powder
- 1 teaspoon salt
Salsa
- 2 peaches, halved and pitted
- ⅓ cup fresh cilantro, coarsely chopped
- ½ heaping cup red onion, chopped
- 1-2 jalapeno peppers, seeded and finely chopped, (optional)
- ¼ teaspoon salt
- 1 tablespoon freshly squeezed lime juice
Garnish:
- 4 lime wedges
- 1 avocado, sliced (optional)
Instructions
- Preheat the grill on medium-high or high heat (it will depend on your grill).
- Cut the peach in half and remove the pit. Brush the cut side of the fruit lightly with olive oil.
- Place on the grill, cut side down, and grill until slightly softened and beginning to char, about 4 -5 minutes (depending on your grill). Rotate the peaches a quarter turn halfway through. Set aside to cool.
- While the peaches are cooling, begin preparing the salsa. Mix together the chopped cilantro, chopped red onion, diced jalapeno, lime juice, and salt. Stir to combine.
- Chop the cooled peaches and gently stir into the salsa. Refrigerate until ready to use.
- Mix together the chipotle powder, garlic powder, and salt.
- Prepare the chicken by brushing both sides with olive oil and sprinkling generously with the chipotle powder mixture. Grill the chicken, 4 to 5 minutes, flip and continue grilling on the other side for 4 to 5 minutes (the timing will depend on your grill). Check that the internal temperature of the chicken has reached 165°F. When the chicken is done, allow it to rest for 5 to 10 minutes before serving.
- To serve, plate the chicken and top with salsa. Add a wedge of lime and sliced avocado.
Notes
On the stovetop, season the same way you would for grilling it. Heat your pan and 1 tablespoon of oil on the stove over medium-high heat. Place chicken in the pan and cook undisturbed for 5 to 7 minutes. Flip and continue cooking for another 7 minutes or until the internal temperature reaches 165°F. Cooking time will always depend on the thickness of the chicken breasts.
Tried this recipe? Leave a comment and rating below.Follow me on Facebook and never miss a recipe!

PANANG CURRY
Rich, thick, and creamy…just as a good curry should be! And to make something good even better, this recipe is loaded with chicken and lots of vegetables to make for a complete meal in one bowl! So grab a spoon and dig in!!

I love a good curry! But not just any curry; I like my curry thick, creamy, and full of meat and vegetables. So I made a lot of adjustments to this recipe until it was just the way I liked it. And I think you will too!
Let’s talk about the ingredients…
Panang curry paste: You certainly can make this from scratch. *Confession* – I have not even attempted to. I love the Panang curry paste that I use so much that I have not even thought about trying something else…Maybe someday I’ll try to make it from scratch, but for now, I use canned Panang curry paste.
Panang curry is usually less spicy than traditional red curry because it uses fewer red chilies, but there’s still a distinct kick of spiciness to it. Panang curry pastes vary somewhat from brand to brand. Still, they typically include dried chili peppers, ginger, lemongrass, kaffir lime zest, kaffir lime leaves, coriander root, coriander seeds, and cumin seeds.

Coconut milk: I’ve tried many different coconut milk brands; I’ve used organic and lite or low-fat coconut milk. I have sat on the grocery store floor and compared ingredients labels until my head hurt (seriously, I have). I have learned that there is a big difference between the various cans of coconut milk. So it’s worth choosing carefully. My first goal in choosing canned coconut milk is to avoid all the unnecessary added ingredients. The only canned coconut milk I will buy has three ingredients; coconut, purified water, and guar gum. Guar gum is a thickener and a food binder and is a common food additive. Some brands add color retainers, stabilizers, additional thickeners, and preservatives. To avoid all the other added ingredients, you may have to buy organic.
When buying canned coconut milk, the other choice you have to make is deciding between regular and lite (sometimes called low fat). I have tried using lite or low-fat coconut milk in my curries, and I have never liked the results. The curry is less flavorful and watery, not at all thick and creamy. I have also discovered that the lite coconut milk always has more additives to make up for the less fat, essentially creating a “false” creaminess using artificial ingredients…yuk! So if you want a full-flavored, creamy curry, you must buy regular coconut milk! You won’t regret it!
Fish sauce: For those not familiar with fish sauce, it is a liquid condiment made from fish or krill that has been coated in salt and fermented for up to two years. It is used as a staple seasoning in East Asian cuisine and Southeast Asian cuisine. It has a strong, pungent smell that can be off-putting, but fish sauce is essential in creating authentic Asian flavored dishes. When used correctly, it enhances and complements the dish’s flavors and does not overpower or stand out. Sugar is often used, as it is in this recipe, to balance the strong salty taste of the fish sauce.
Bamboo: I discovered edible bamboo only a few years ago and thought it would go great in curry. Bamboo shoots have a texture similar to water chestnuts with a mild flavor. And not only are they delicious, but they are also good for you as well as a healthy source of fiber.
Thai Basil: Thai basil has purple stems, and its leaves are narrower and perkier than its Italian cousin. Bury your nose in a bunch of Thai basil, and you’ll smell anise, not pesto. Flavor-wise, it’s spicier and bolder, too. If you can’t get your hands on Thai basil, you can use Italian, but it will give you a slightly different taste. We usually have a bush of Thai basil growing in our garden, so it’s easy to go to our garden and pick a handful.
You certainly are not limited to the ingredients listed here. You can get creative with this curry and make it your own. There are so many things you could add to this curry. I have used long beans, green beans (only fresh, not canned), potatoes, carrots, and zucchini. You could even change the meat and use pork, beef, or fish. 

Panang Curry
Rich, thick, and creamy…just as a good curry should be! And to make something good even better, this recipe is loaded with chicken and lots of vegetables to make for a complete meal in one bowl! So grab a spoon and dig in!!
Ingredients
- 5 tablespoons Panang curry paste
- 1 tablespoon cooking oil
- 2 cans coconut milk, full fat
- 2 pounds chicken, cut into 2-inch strips
- 2 tablespoons sugar
- 2 tablespoons fish sauce
- 1 onion, chopped
- 1 or 2 large red peppers, cut into strips
- 1 or 2 large green peppers, cut into strips
- 1 small can of bamboo, (optional)
- 10-15 Thai basil leaves, torn
For Thickening (see notes):
- 4 tablespoons cornstarch
- 4 tablespoons cold water
Instructions
- In a wok or deep skillet, fry the curry paste in the oil over medium-high heat until sizzling and fragrant, 2 to 3 minutes.
- Stir the coconut milk into the curry paste and bring to a boil.
- Add the chicken and cook in the coconut milk for 10 to 15 minutes.
- Stir in the sugar, fish sauce, onions, peppers, and bamboo. Simmer for 10 minutes.
- **If you want your curry thicker, at this point, you can combine the cornstarch and water and mix well until the cornstarch is completely incorporated into the water. Then stir it into the curry quickly and continue stirring as it thickens (see notes).
- Add the Thai basil leaves and serve over rice.
Notes
Before I even start to make this curry, I know that I will want it thickened. So instead of waiting until the end, I add the cornstarch mixture at the beginning to the heated coconut milk, but before it boils. It makes it easier to stir without the meat and vegetables getting in the way. But if you are uncertain whether or not you want to thicken the curry, it is OK to wait until the end.
Tried this recipe? Leave a comment and rating below.Follow me on Facebook and never miss a recipe!
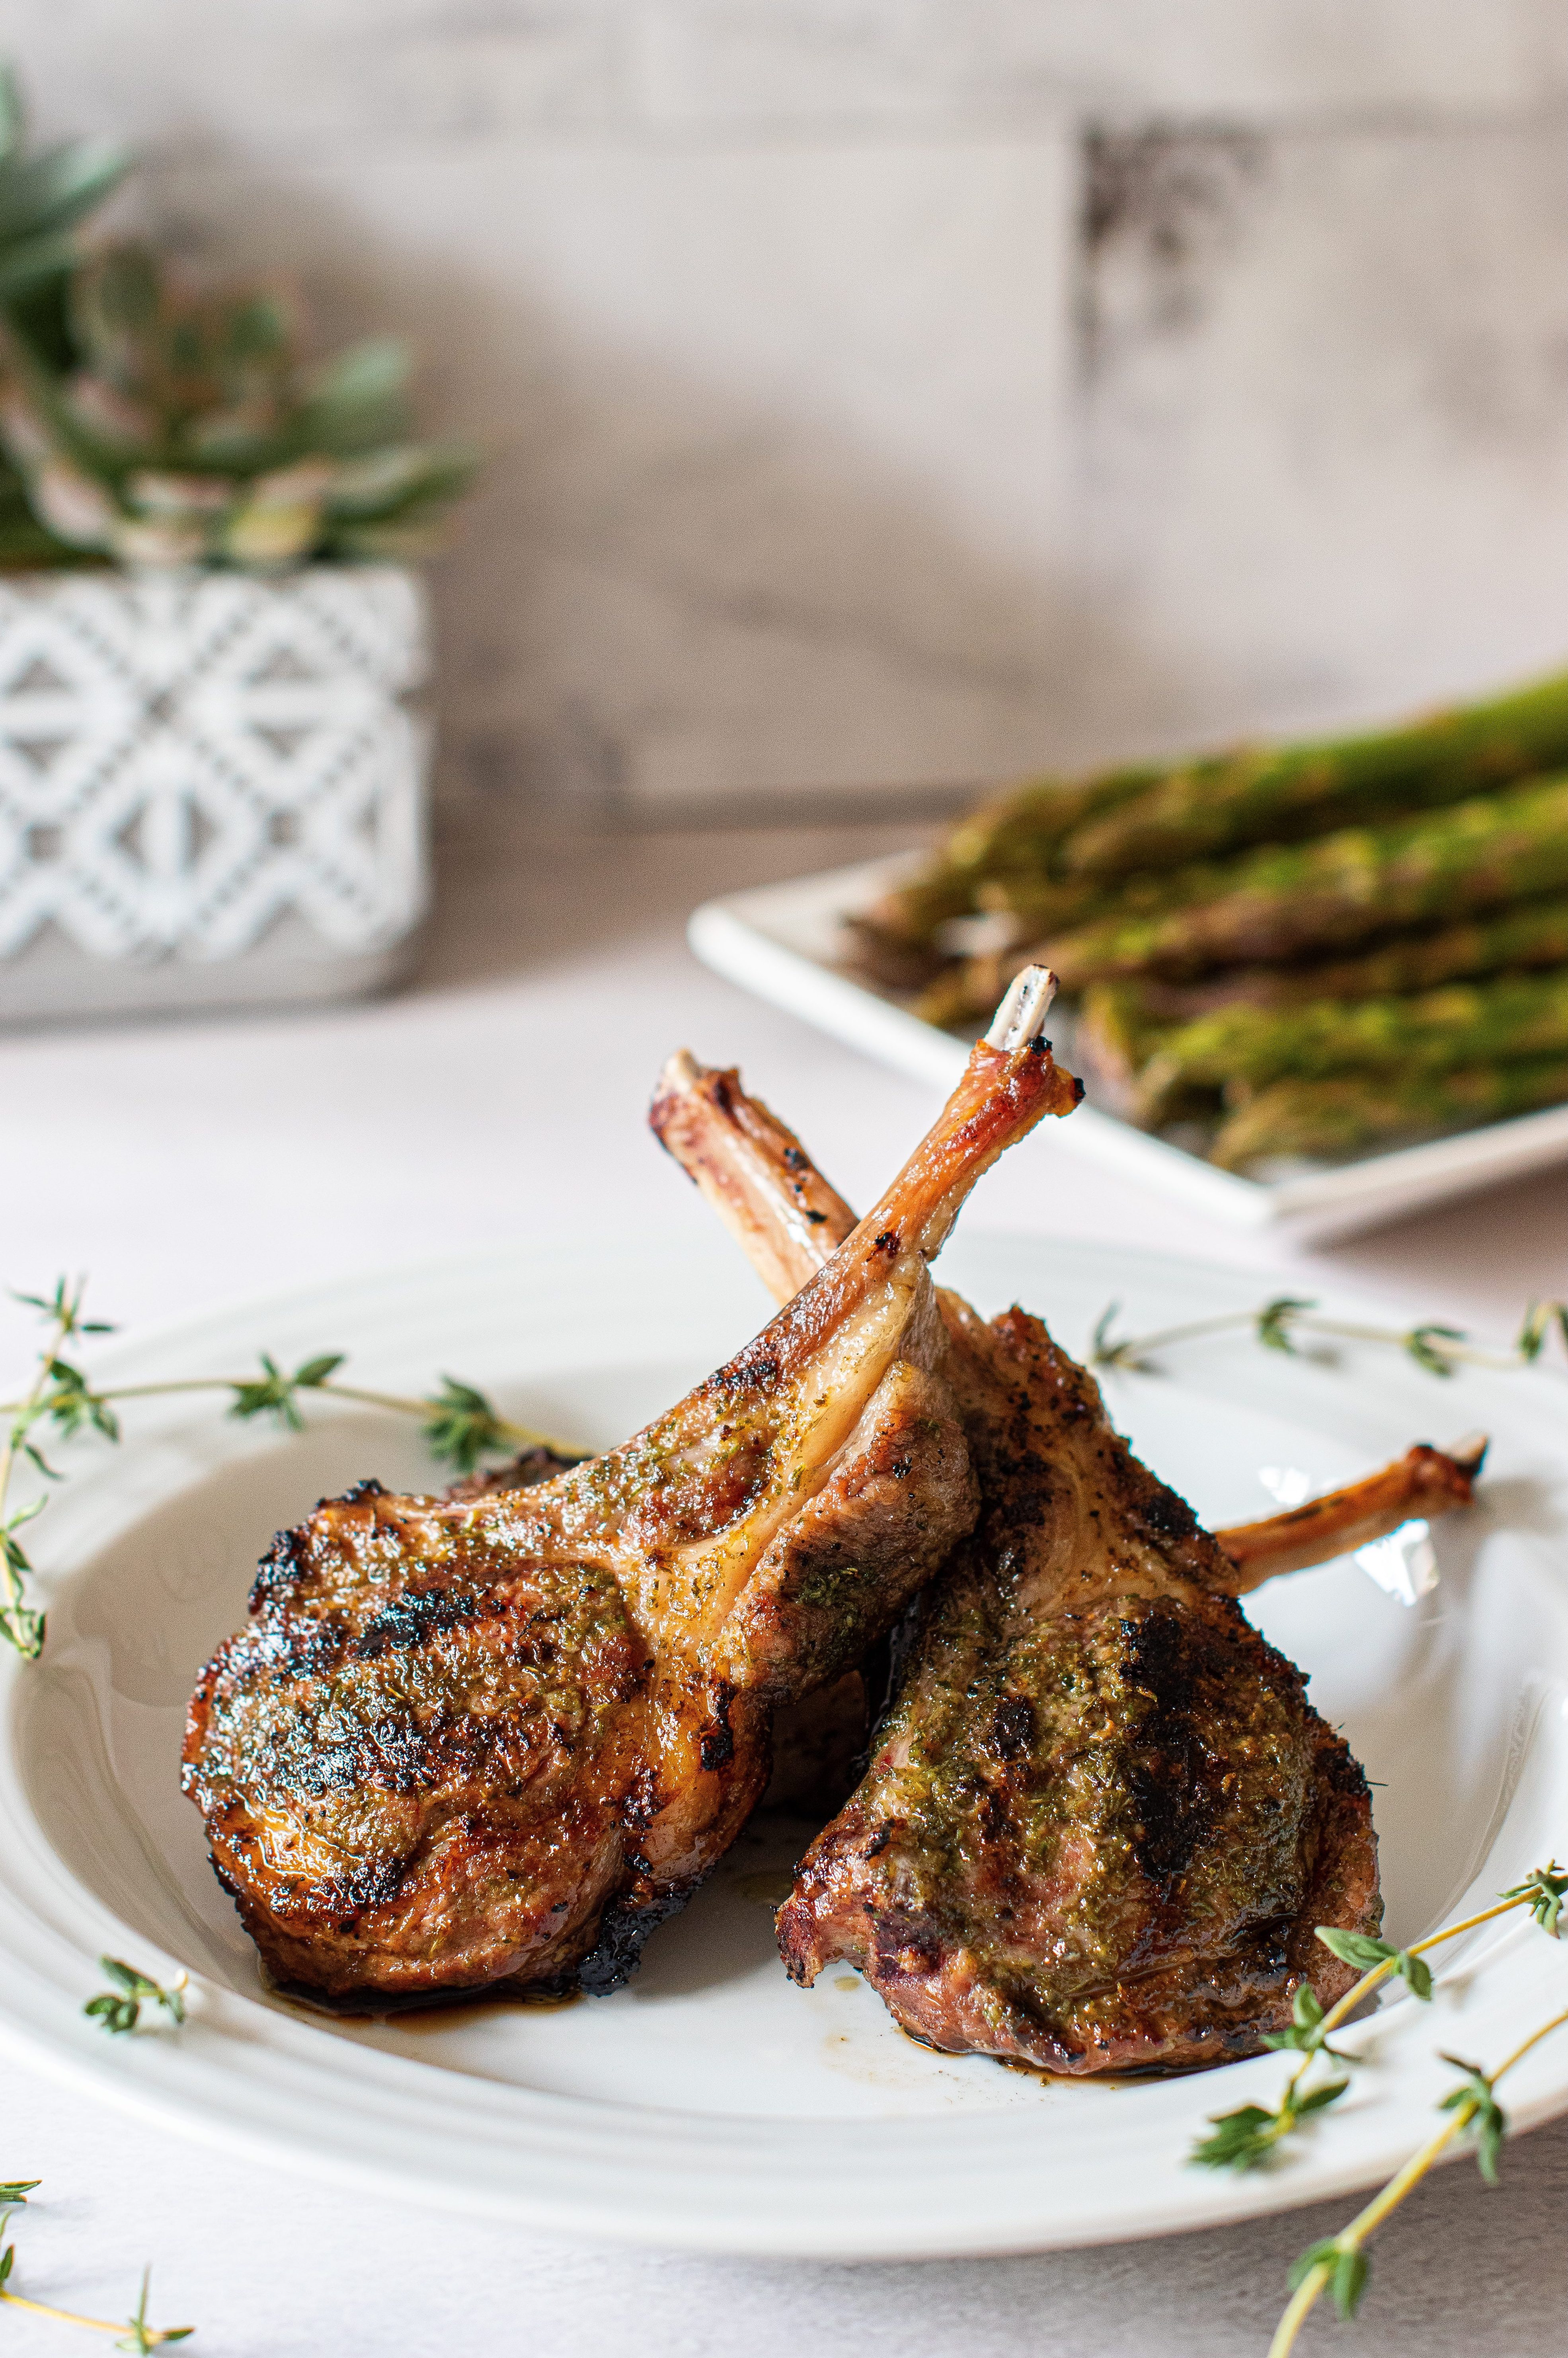
GRILLED ROSEMARY LAMB CHOPS
If you’re looking for that perfect recipe to make for a romantic dinner for two or just want to WOW your friends and family, look no further. Lamb has a sophisticated flavor that will make any dinner feel special. And the use of fresh herbs in this recipe makes it a real show stopper!

I love lamb, especially lamb chops! Just ask my husband. If we go out to a nice restaurant and there is lamb on the menu, there is no debating; I order the lamb!
But for years cooking lamb at home intimidated me. I don’t know why…I guess I assumed it wasn’t easy. But a few years ago, I found a recipe for lamb that looked amazing. My husband had been away on a business trip, and I wanted to cook him a special meal to welcome him home. So I thought I would try to cook lamb. I grilled the lamb (the only way I cook it), and it turned out amazing!! I don’t even remember the recipe, but it was just the first of many times that I have now cooked lamb. I don’t do it often, lamb can be expensive, and the stores here don’t always have it. But l can say that lamb no longer intimidates me! And my whole family loves eating it, including my kids!

The Recipe:
This recipe is so easy and simple and really lets the lamb shine. The key is fresh herbs. You would not get the same result with dried herbs. Honestly, I’ve never tried it with dried because this recipe is fantastic the way it is. We grow rosemary and thyme in our garden, so getting fresh herbs is not a problem. Before growing them, I just picked up the fresh herbs at the grocery store.
Take all of your marinade ingredients and blend them in a mini blender until everything is thoroughly combined and you have a paste.
Trim the extra fat off of the lamb. Lamb always seems to have quite a bit of fat on it. When I first started grilling lamb, I had a big problem with the fat catching on fire and ending up with a grill fire…charred lamb was not what I was going for! However, I have learned that trimming off most of the fat almost eliminates this problem, and the grilling is much more manageable.
Once your lamb is trimmed, brush the marinade generously onto all sides of the lamb. Next, lightly salt the lamb and let it marinate for at least an hour in the refrigerator.
When you are ready to grill the lamb, take it out of the refrigerator and let it come to room temperature (about 20 minutes). Preheat the grill on medium-high to high heat. Once the grill is heated, place the lamb onto the grill. Grill for about 2 to 3 minutes and flip. Grill for an additional 2 to 3 minutes. You are going for a sear on the outside and medium-rare on the inside. If you want to temperature check your lamb for doneness, medium-rare is 130F to 135F. Lamb shines when cooked to medium-rare, so I recommend not grilling it longer. Trust me; it will be juicy, full of flavor, and tender!!
When the lamb is done, remove it from the grill and let it rest for 10 minutes before you serve it. Enjoy!!


Grilled Rosemary Lamb Chops
If you're looking for that perfect recipe to make for a romantic dinner for two or just want to WOW your family, look no further. Lamb has a sophisticated flavor that will make any dinner feel special. And the use of fresh herbs in this recipe makes it a real show stopper!
Equipment
- Grill
Ingredients
- 4 teaspoons fresh garlic, or 4 to 5 cloves
- 4 tablespoons fresh rosemary leaves
- 4 teaspoons fresh thyme leaves
- 2 teaspoons salt
- 6 Tablespoons olive oil
- 8-10 lamb chops
Instructions
- In a small food processor, blend together the garlic, rosemary, thyme, salt, and olive oil. Pulse until combined and creamy.
- Trim excess fat off of lamb chops (see notes).
- Lightly salt both sides of the lamb chops and then generously brush marinade on both sides of the chops. Let them marinate in the refrigerator for at least an hour.
- When ready to grill, remove the lamb chops from the refrigerator and let them come to room temperature, about 20 minutes.
- Heat the grill over medium-high heat, giving it a few minutes to heat up. Add the chops and sear for about 2-3 minutes. Flip the chops over and cook for an additional 3 minutes. You should have a nice brown sear on the outside and still have pink on the inside. Lamb is best-served medium-rare; the internal temperature should be around 125°F. (See below for a more well-done lamb chop).**If you want a well-done lamb chop, cook 5 minutes per side or until the internal temperature reaches 150°F.
- When done, remove from grill and let rest for 10 minutes for serving.
Notes
Lamb often comes with quite a bit of fat still on the meat. I recommend trimming most of it off, not all, because fat does equal flavor and juiciness. The other issue I have run into is the fat catching on fire in the grill and my lamb chops being "fire-roasted," which is not what we are going for. Trimming the fat reduces the chance and size of the grill fire. If the fat does catch on fire, move your lamb chops to an area of the grill where there are no flames; when flames extinguish themselves, move lamb chops back. Do not leave them in the flames, or you will end up with charred chops.
Tried this recipe? Leave a comment and rating below.Follow me on Facebook and never miss a recipe!
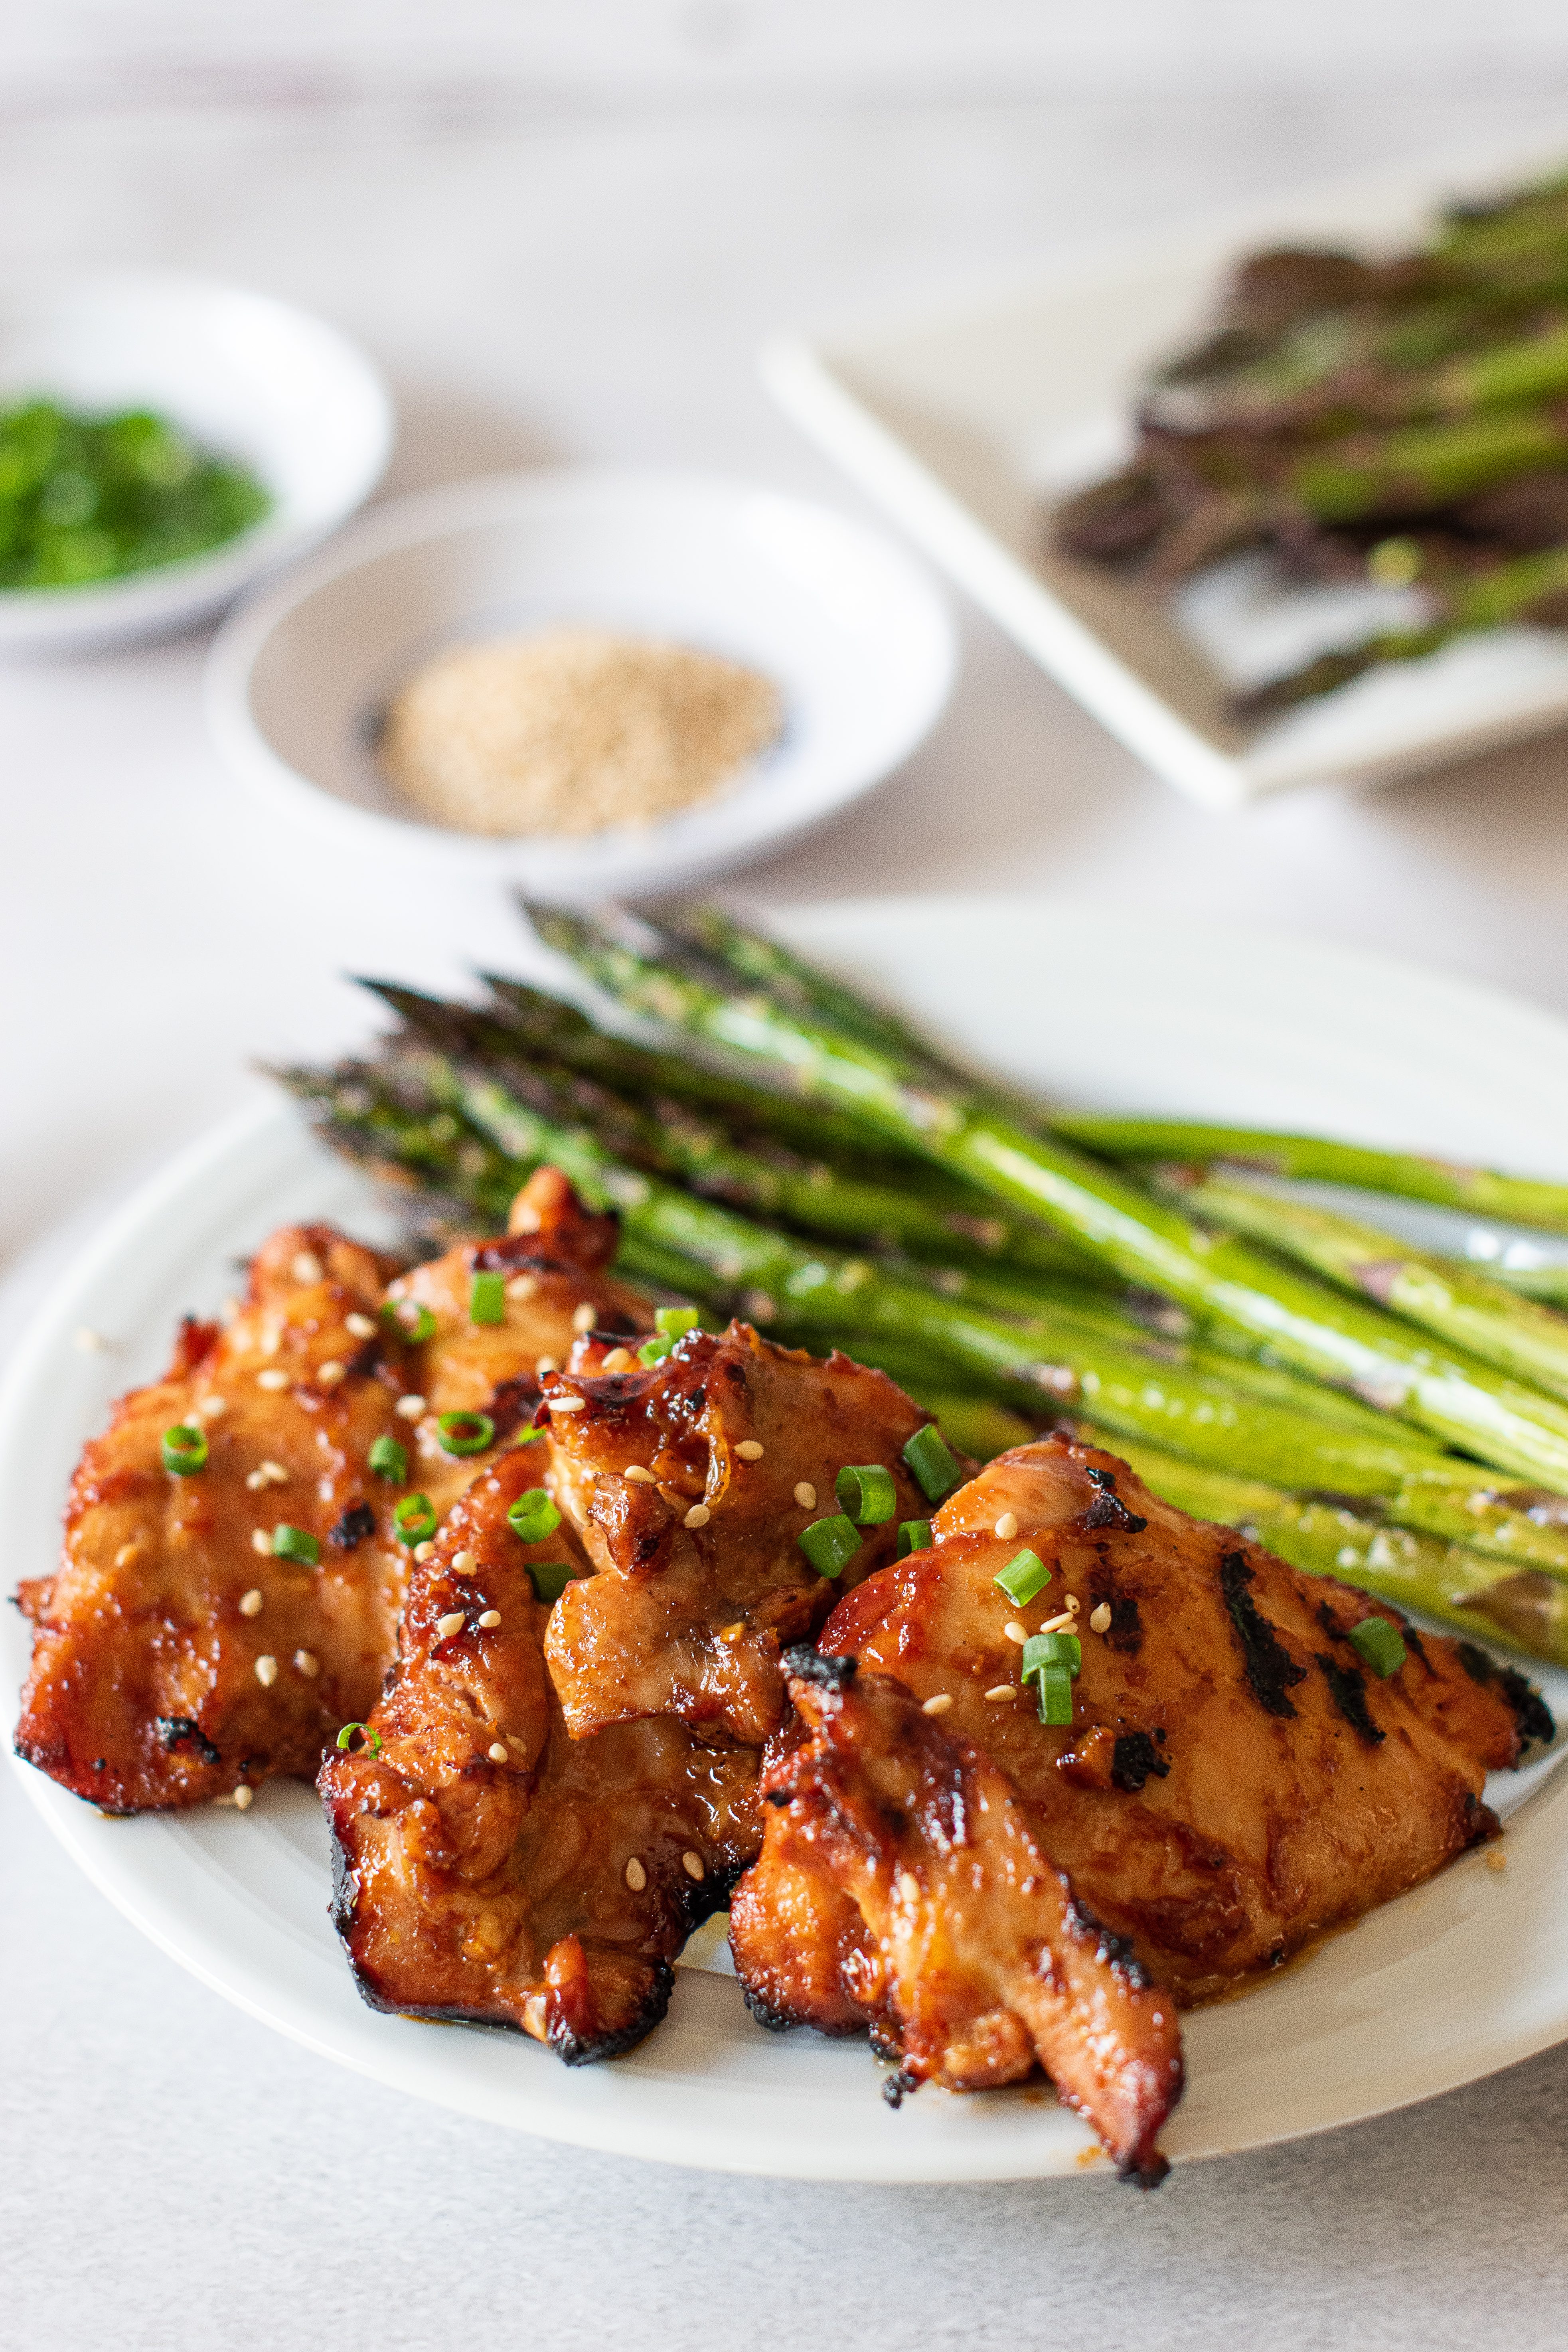
TERIYAKI CHICKEN
This chicken recipe is a winner, hands down! The rich, flavorful marinade and the smoky flavor from grilling make for an outstanding chicken dish. This one is guaranteed to WOW your family and friends alike!

This recipe has been my “go-to” chicken recipe for years. My husband and my kids get excited when they find out I’m making teriyaki chicken for dinner. The marinade in this recipe is what makes the recipe so unique! It is packed with so much flavor. The ingredients all work together to create a tangy, rich, yet smooth marinade that will make you reach for a second, third, or even fourth piece of chicken! I usually have to double this recipe to feed the four of us because my family devours this chicken. And honestly, this chicken is great as leftovers the next day, cold or reheated.
As I mentioned above, this recipe is all about the marinade. So the longer you can marinate the chicken, the better. If you can, I would recommend marinating overnight. If that is not possible or you forget to do it ahead of time, like me, 4 to 6 hours of marinating will still yield amazing results.
I prefer thighs for this recipe. They are just a juicier cut of chicken, and they grill nicely. Start by trimming off as much fat as you can.

Preparing the Marinade:
- Hoisin sauce is a condiment based on fermented soybean paste with other flavors and spices. It adds an Asian flavor to dishes, combining sweet, tangy, and spicy elements. It is critical in this marinade and should not be left out. If you’ve never tried it, trust me, it’s amazing!
- Any ketchup and or soy sauce that you prefer is fine.
- Ginger is another ingredient that is key in this marinade. Do not use powdered ginger because you need the strong flavor of fresh ginger. You can find it in the produce section of most grocery stores. Just peel and finely dice the ginger.
- Garlic should also be fresh, not dried. Dice the garlic.
- You want to use pure sesame oil. It is referred to as toasted or dark sesame oil. Toasted sesame oil is known for its rich, nutty, toasty taste. It has a distinct toasted sesame aroma and adds a punch of flavor to recipes, and this recipe is no different. Just be sure you don’t use light sesame oil; it is too neutral and doesn’t have enough flavor to complement the marinade.
- Rice vinegar is vinegar made from fermented rice in East Asia and Vietnam in Southeast Asia. It can be used as a sweetener in some stir-fries, dressings, sushi rice, etc. In this recipe, the vinegar gives the marinade a slightly tangy taste.
Mix all the marinade ingredients together and add the trimmed chicken. Stir to cover the chicken completely. Cover and refrigerate for 4 to 6 hours or overnight.

Usually, I post directions on how to grill the chicken and cook the chicken on the stovetop. But this is one of those recipes that needs to be grilled to be really good. Trust me on this…It gives it a smoky depth of flavor you can’t get cooking on a stovetop.
When you are ready to grill the chicken, let it sit at room temperature for 20 minutes. Meanwhile, heat your grill to medium-high or high heat (it will vary based on your grill).
Place the chicken on the grill. I like to spoon any marinade left in the bottom of the bowl onto the chicken. Marinade equals flavor! Grill the chicken for 5 to 6 minutes per side. Always check that the internal temperature reaches 160F. (Temperature of the grill and grilling time will vary based on your grill).
Let the chicken rest for 10 minutes before serving. Garnish with green onion and toasted sesame seeds.


Teriyaki Chicken
This chicken recipe is a winner, hands down! The rich, flavorful marinade and the smoky flavor from grilling make for an outstanding chicken dish. This one is guaranteed to WOW your family and friends alike!
Equipment
- Grill
Ingredients
- ¼ cup ketchup
- ¼ cup hoisin sauce
- 2 tablespoons soy sauce
- 2 tablespoons rice vinegar
- 2 teaspoons minced fresh garlic
- 1 tablespoon minced fresh ginger
- 2 teaspoons sesame seed oil
- 8 boneless chicken thighs
Garnish
- toasted sesame seeds
- green onions, sliced
Instructions
Marinade
- Mix the ketchup, hoisin sauce, soy sauce, rice vinegar, minced garlic, minced ginger, and sesame seed oil in a medium bowl. Set aside.
- Trim off any extra fat from the chicken. Add chicken to the marinade. Stir to distribute the marinade onto the chicken evenly. Cover with plastic wrap and place in the refrigerator for 2 to 6 hours (the longer you marinate, the more flavorful the chicken will be). Stir a couple of times while the chicken is marinating.
Grilling the Chicken
- Preheat the grill on high heat.
- Once the grill has heated up, place chicken on the grill. Spoon any remaining marinade onto the chicken.
- Cook chicken for 4-5 minutes (or longer, depending on your grill, see notes). Flip and cook the other side for an additional 4-5 minutes. Using a meat thermometer, check that your chicken has reached an internal temperature of 160°F.
- Remove from the grill and allow to rest for 10 minutes before serving.
- Garnish with toasted sesame seeds and sliced green onions.
Notes
This is one of those recipes that really needs to be grilled to taste the way it is supposed to. So for this recipe, I have not included stovetop directions.
Your grill temperature and cooking time will vary based on your grill and the thickness of the chicken. When grilling chicken, always use a meat thermometer to check if it is done. Your chicken is done when the internal temperature reaches 160°F.
Tried this recipe? Leave a comment and rating below.Follow me on Facebook and never miss a recipe!

CHICKEN AND DUMPLINGS
Chicken and Dumplings is the ultimate comfort food! The dumplings are cooked right in the soup, adding to this dishes’ winning flavor. I know this will become one of your family favorites, just like it is with mine!

We all have those dishes that we call our “comfort food.” This one definitely makes the list for me! My whole family loves this recipe and rarely do they ever leave any leftovers.
For this Recipe:
You can grill the chicken, which is my preference, cook it on a stovetop, or even use leftover chicken. I usually grill my chicken; grilling adds a rich, deep flavor to the chicken. I season the chicken with a bit of oil, salt, and pepper before I grill or cook it. You can use either thighs or breasts.
- To grill: Season and grill on medium-high or high heat for 5 to 6 minutes per side. Always check that the internal temperature reaches 160°F. (Temperature of your grill and grilling time will vary based on your grill).
- Stovetop: Season the same way you would for grilling. Heat your pan and one tablespoon of oil on the stove over medium-high heat. Place the chicken in the pan and cook undisturbed for 5 to 7 minutes. Flip and continue cooking for another 7 minutes or until the internal temperature reaches 160°F. Cooking time will always depend on the thickness of the chicken.

- Allow your chicken to cool, then chop. Of course, you’ll also want to chop up all your vegetables.
- Melt the butter over medium-high heat in a large pot (like a dutch oven). Add the chopped onions, carrots, and celery. Cook for 5 minutes or until vegetables begin to soften. Add the fresh garlic and cook for 1 to 2 minutes more.
- Add flour and stir to combine. Cook for 1 minute. The flour acts as a thickener for the soup.
- Next, add the evaporated milk and the chicken stock and stir together until combined well.
- Bring the soup to a boil and add chicken, thyme, pepper, and salt. Let soup simmer uncovered while you make the dumplings.
For the Dumplings
- Mix all the dry ingredients with a whisk, create a well in the middle and add the milk and melted butter.
- Using a wooden spoon, mix until just combined and a nice dough forms. Your dough should be slightly sticky but not wet.

- Scoop the dumplings directly into the soup. I use a 1 1/2 tablespoon cookie scoop. It gives you nice size dumplings that are uniform in size. If your dumplings are different sizes, they will not cook evenly.
- Cover and cook at a low simmer. They should take about 15 minutes to cook. After 15 minutes, I like to take one dumpling out and cut it open to make sure they are cooked all the way through.
- Serve right away, and enjoy!!


Chicken and Dumpling
Chicken and Dumplings is the ultimate comfort food! The dumplings are cooked right in the soup, adding to this dishes' winning flavor. I know this will become one of your family favorites, just like it is with mine!
Ingredients
- 6 tablespoons butter
- 1 cup sweet or yellow onion, chopped
- 1 cup carrots, chopped
- 1 cup celery, chopped
- 4 cloves garlic, minced
- 3 tablespoons flour
- 12 ounce (1 can), evaporated milk
- 48 ounces chicken stock
- 4 cups cooked chicken, chopped
- 1 tablespoon fresh thyme, (1 teaspoon dried)
- ½ teaspoons pepper, or to taste
- 1 ½ teaspoons salt, or to taste
Dumplings
- 2 cups flour
- 1 tablespoon, plus 1 teaspoon baking powder
- 1 teaspoon salt
- 1 tablespoon fresh thyme, (1 teaspoon dried)
- ¾ cup, (6 ounces), milk
- 4 tablespoon butter, melted
Instructions
- In a large pot (like a dutch oven), melt the butter over medium-high heat. Add onions, carrots, and celery. Cook for 5 minutes or until vegetables begin to soften.
- Add garlic and cook for 1 to 2 minutes more.
- Add flour and stir to combine. Cook for 1 minute.
- Add evaporated milk and chicken stock and stir together until combined well.
- Bring to a boil and add chicken, thyme, pepper, and salt. Let soup simmer uncovered while you make the dumplings.
Dumplings
- In a large bowl, whisk together flour, baking powder, pepper, salt, and thyme.
- Make a well in the center of the flour mixture and pour in the milk and melted butter. Using a wooden spoon or rubber spatula, stir together until a nice dough ball forms. If your dough seems too dry, you can add an extra tablespoon of milk.
- Using a 1 ½ tablespoon cookie scoop, scoop dough and drop directly into the simmering soup. Place them around the pot, not all in the same place.
- Place the lid on your pot and lower the heat to a low simmer (you don't want the soup to scorch, but you want it hot enough to cook the dumplings). Cook for 15 minutes. Cut one dumpling in half to make sure they are cooked through.
- If the dumplings are done, serve while hot. If the dumplings are not done, cook for an additional 2-3 minutes.
Tried this recipe? Leave a comment and rating below.Follow me on Facebook and never miss a recipe!

CLASSIC MEATLOAF
This is meatloaf as meatloaf should be, juicy and bursting with flavor! And the kicker? A tangy, sweet sauce on the top! Perfect for dinner any night!

Meatloaf is a well-known dish, but I wouldn’t call it popular. Most people have probably eaten it at some point in their life. Some of your own encounters with meatloaf may have been quite enjoyable, and others may not have been memorable – or were even quite unpleasant. Meatloaf done right should be juicy, flavorful, and leave you wanting more. Bad meatloaf can be dry, dense, flavorless… Well, you get the idea. But this meatloaf is JUICY and FLAVORFUL! And when my family leaves no leftovers, well, I’d say that’s a pretty good sign!!
Meatloaf has been around for a long time. According to food historian Andrew Smith, the first recorded recipe for the modern American meatloaf is from the late 1870s. But it probably existed before that and was passed down from generation to generation as it often is today. My recipe is based on the meatloaf my mom used to make. My recipe has evolved quite a bit over the years. That’s the great thing about cooking; it’s not a static process but always changing and evolving. So don’t be afraid to step out of your comfort zone! Try something new, mix it up, and add a new spice or new ingredient! Have fun with the process! You might surprise yourself with the delicious outcome!

The first big change I made to this recipe was using half-ground pork and half-ground beef instead of all ground beef. Our family was moving away from eating so much ground beef, and I found ground pork to be as lean or leaner, in some cases, than ground beef. Mixing the two types of meats together also gives a greater variety of flavors. When I’m shopping for my meatloaf meat, I will buy a pound of ground beef and a pound of ground pork and divide each package in half. So I have a half-pound of each meat for the meatloaf and a half-pound of each meat that I will freeze for the next time I make meatloaf.
Going with a leaner cut of meat can leave your meatloaf dry, which we do not want. So I add about a 1/2 cup of shredded cheese. This adds some of the fat back in, which helps keep your meatloaf super juicy, as well as adding flavor. Any cheese will work. I typically use a Mexican 4 cheese blend, but you could use cheddar, pepper jack, American, or even gouda (remember, get creative and try new things).

To make this meatloaf, you will need:
- 1/2 pound of ground pork and 1/2 pound of ground beef
- dry onion soup mix
- Italian bread crumbs
- 1 egg
- milk
- cheese
- minced garlic
I start by stirring together the dry onion soup mix and the bread crumbs. I like to get them mixed well before adding any wet ingredients. I then stir in the milk and let it sit for a couple of minutes to soak into the dry ingredients. I then stir in the egg, cheese, and garlic. The egg in this recipe is the binding agent that helps hold everything together, so don’t leave out the egg.
Now the fun part, wash your hands and get ready to hand-mix your meatloaf. My kids actually hate this part and think it’s gross…I thought they would love squishing raw meat between their fingers…go figure! A spoon or other utensils will not get the job done. You’ll want to get everything uniformly mixed, and mixing with your hands is the best way to do it. Take your rings off first, as nobody wants raw meat squished into the nooks and crannies of their rings! Continue to hand mix the meatloaf until all the ingredients are fully incorporated into the meatloaf. Shape the meatloaf according to the pan you are using. You don’t want the meatloaf touching the side of the baking dish or loaf pan, and you don’t want to smash it down either, or you will end up with a dense meatloaf.
Finally, mix all the sauce ingredients together and set aside; you will add the sauce during the baking process.
Bake in the preheated oven for 40 minutes. Remove the meatloaf and spread the sauce evenly over the top of the meatloaf. Return the meatloaf to the oven and bake for an additional 10 to 15 minutes or until the internal temperature of the meatloaf reaches 160°.
Remove from the oven, and allow the meatloaf to rest for 10 minutes before removing from the pan and slicing. Enjoy!


Classic Meatloaf
This is meatloaf as meatloaf should be; juicy and bursting with flavor! And the kicker? A tangy, sweet sauce on the top! Perfect for dinner any night!
Ingredients
- 1 package dry onion soup mix
- 1½ cups Italian bread crumbs
- ¼ teaspoon salt
- 1 egg
- ¾ cup milk
- 2 garlic cloves, minced
- ½ cup shredded cheese, any cheese
- ½ pound ground beef
- ½ pound ground pork
Sauce
- ¾ cup ketchup
- ½ teaspoon Worcestershire sauce
- 2 tablespoons brown sugar
- 1 teaspoon garlic powder
- ½ teaspoon onion powder
- ¼ tsp salt
Instructions
- Preheat oven to 400°.
- Prepare your loaf pan or other baking dish by lining it with tinfoil, allowing it to come up over the edges, so you can lift out the meatloaf when it's done. Next, line the bottom of the pan with parchment paper (on top of the tinfoil) to prevent the meatloaf from sticking to the tinfoil. This step is optional but does make it easier to serve the meatloaf.
- In a medium bowl, mix onion soup mix, breadcrumbs, and salt. Add the egg and milk, and stir to combine. Let the mixture sit for 5 minutes to allow the breadcrumbs to absorb the milk.
- Stir in the garlic and shredded cheese, mix well.
- Using your hands, mix the meat into the breadcrumb mixture until completely incorporated.
- Shape the meatloaf according to the dish you are using. Place the meatloaf into the dish, shaping it so it is not touching the sides of the dish. Do not press the meatloaf into the dish, or you will end up with dense meatloaf.
Sauce
- Mix all the sauce ingredients together and set aside; you will add the sauce during the baking process.
Baking
- Bake uncovered in the preheated oven for 40 minutes.
- Remove the meatloaf, and spread the sauce evenly over the top of the meatloaf. Return to the oven and bake for an additional 10 to 15 minutes or until the internal temperature of the meatloaf reaches 160°.
- Remove from the oven, and allow the meatloaf to rest for 10 minutes before removing it from the pan and slicing.
Notes
If you do not use all the sauce on top of the meatloaf, you can serve it with the meatloaf, and people can add more to their serving of meatloaf.
To heat the leftover sauce, using a microwave-safe dish, microwave on high for 20 seconds and stir. If it’s not warm enough, go another 20 seconds.
Tried this recipe? Leave a comment and rating below.Follow me on Facebook and never miss a recipe!
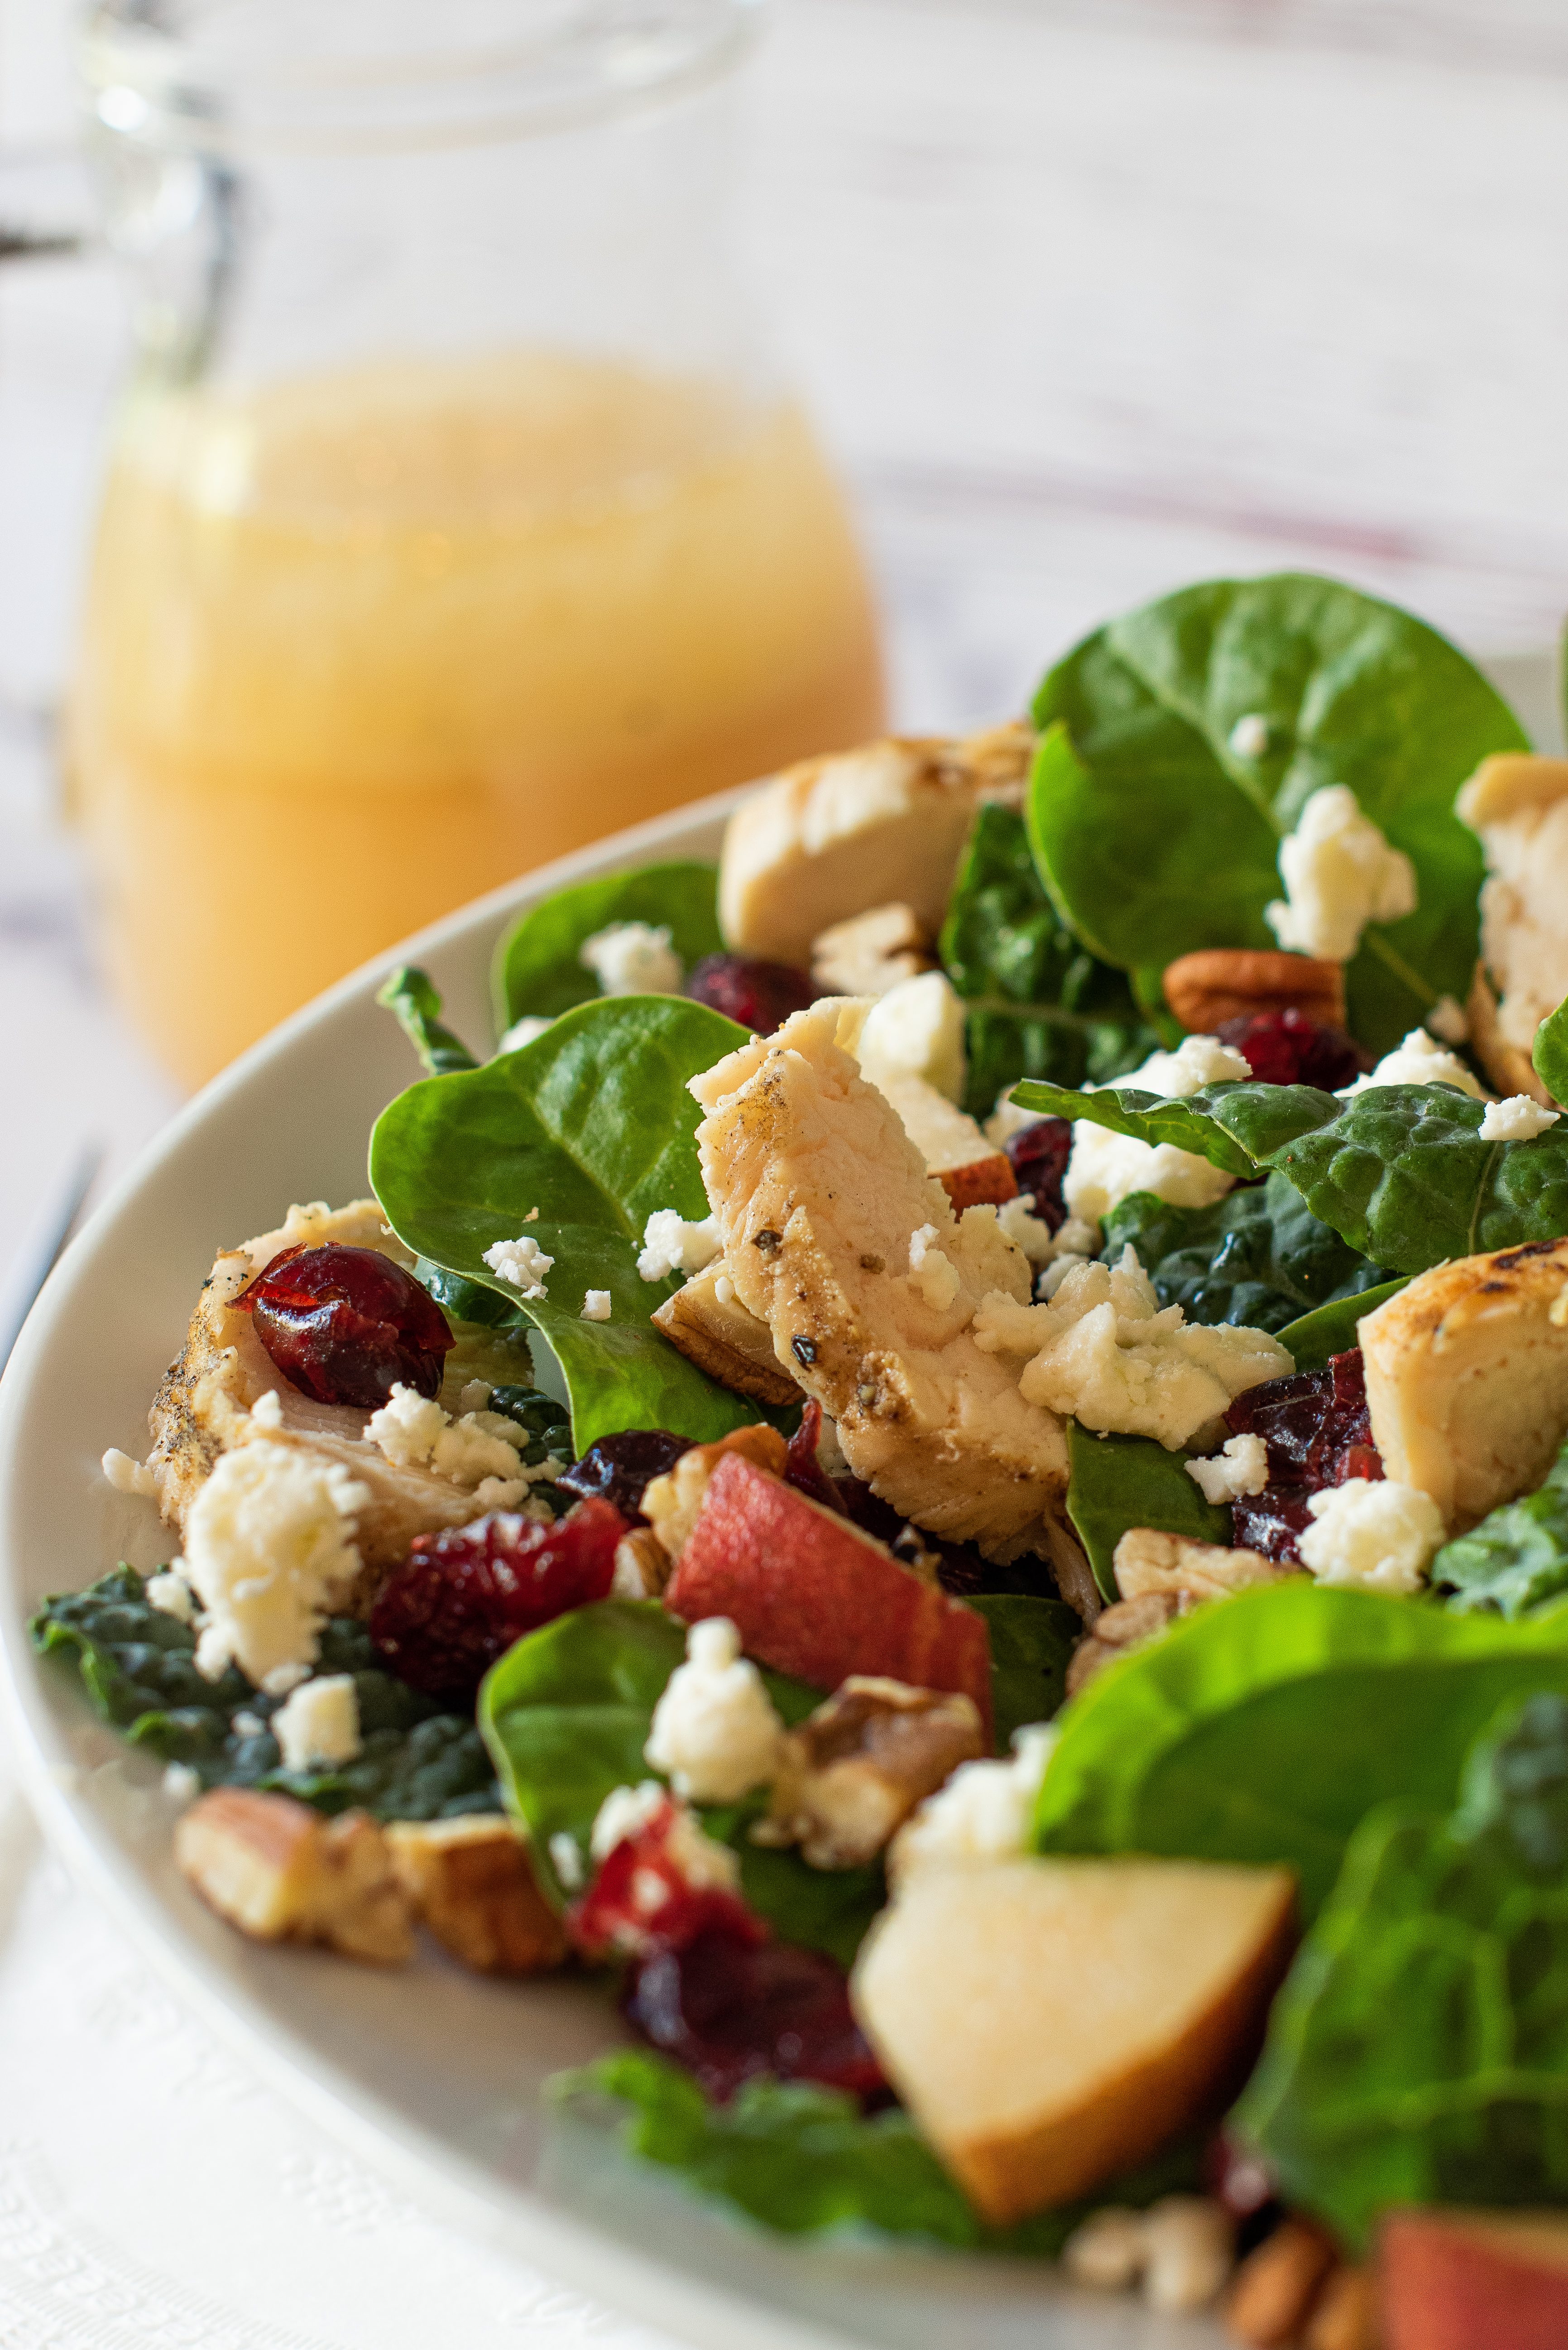
GRILLED CHICKEN AND PEAR SALAD
Any day is a perfect day for a crisp, flavorful salad! This salad is perfect as a main course since it has your protein, fruits, and vegetables all in one! Of course, it also works as a smaller side salad, but it might steal the show!

When we want salad for dinner, this is our go-to! It has everything, protein, fruits, and vegetables. The homemade dressing is tangy and sweet and adds a zing of flavor, making this salad a home run! And it comes together quickly, so no-big-fuss for a delicious and healthy dinner.
This recipe is better with grilled chicken; it adds depth and richness to the flavor that baking or frying won’t give you; it’s also healthier. We pretty much have summer year-round here in Hawaii, so grilling is almost always an option for us. But if you prefer not to grill, or if it’s not an option for you, not a problem; you will still make a fantastic salad! I’ve included the directions for cooking the chicken on the stovetop below and in the recipe notes.
To grill the chicken, I brush the chicken with a bit of oil and lightly season with salt, pepper, and cumin on both sides. Next, I turn my grill on high and let it heat up for a few minutes. Then I grill the chicken for 4-5 minutes on each side. Your grill temperature and cooking time will vary based on your grill and the thickness of the chicken. When grilling chicken, I ALWAYS use a meat thermometer to check if it is done. You do NOT want to eat undercooked chicken. Your chicken is done when the internal temperature reaches 160F.
When cooking your chicken on the stovetop, season the same way you would for the grill. Heat your pan and one tablespoon of oil on the stove over medium-high heat. Place chicken breast in the pan and cook undisturbed for 5 to 7 minutes. Flip and continue cooking for another 7 minutes or until the internal temperature reaches 160F. Cooking time will always depend on the thickness of the chicken breasts.
Let your chicken cool down completely before slicing and assembling your salad; adding warm chicken will wilt your greens. While your chicken is cooling, you can toast the pecans. You can halve them or roughly chop the pecans and add them to a small skillet. Over medium heat, toast the pecans in a dry skillet (do not add oil), stirring, so they don’t burn. This process should take about 5 minutes, and they should be golden, fragrant, and crunchy.

As far as your salad greens go, any greens will work. This is totally up to your preference and/or availability. We grow both kale and spinach in our garden, so I like to use both to give my salad a variety of flavors and textures.
Any variety of pear will work as well. I like the color contrast and crispness of the Anjou pear (pictures above). But again, any will work.

Making homemade dressing is easy and delicious. Add all the dressing ingredients to a blender or mini-prep and process until smooth, about 30 seconds. That’s it! Use immediately or store in a sealed jar in the refrigerator for up to 1 week.


Grilled Chicken and Pear Salad
Any day is a perfect day for a crisp, flavorful salad! This salad is perfect as a main course since it has your protein, fruits, and vegetables all in one! Of course, it also works as a smaller side salad, but it might steal the show!
Ingredients
- 3-4 chicken breast
- cumin, for seasoning chicken
- salt and pepper, for seasoning chicken
- 6 cups salad greens, any salad greens
- 2 medium pears, any variety
- ⅓ cup dried cranberries
- ⅓ cup chopped pecans, toasted
- ¼ cup feta cheese
Dressing
- ½-1 shallot, (depending on the size of the shallot) peeled
- ½ cup olive oil, extra virgin
- 4 tablespoons apple cider vinegar
- 2 tablespoons Dijon mustard
- 3 tablespoons honey
- 4 tablespoons Greek yogurt
- ½ teaspoon salt
- ¼ teaspoon ground pepper
Instructions
- Preheat grill on high heat. Brush chicken lightly with oil and season with salt, pepper, and cumin on both sides.
- Add chicken to the grill and cook for 4-5 minutes on each side. (Your grill temperature and cooking time will vary based on your grill and the thickness of the chicken). When grilling chicken, always use a meat thermometer to check if it is done. Your chicken is done when the internal temperature reaches 160°F.
- Allow chicken to cool before slicing.
- While the chicken is cooling, toast the pecans. Halve or roughly chop the pecans and add them to a small skillet. Over medium heat, toast the pecans in a dry skillet (do not add oil), stirring frequently so they don't burn. This process should take about 5 minutes, and they should be golden, fragrant, and crunchy.
- Wash and slice the pears.
Dressing
- Peel the shallot. Add the shallot and all the other dressing ingredients to a blender, mini-prep, or immersion blender and process for 30 seconds. Use immediately or refrigerate for up to 1 week. Shake thoroughly before using.
Notes
Cooking chicken on the stovetop: When cooking your chicken on the stovetop, season the same way you would for grilling it. Heat your pan and 1 tablespoon of oil on the stove over medium-high heat. Place chicken breast in the pan and cook undisturbed for 5 to 7 minutes. Flip and continue cooking for another 7 minutes or until the internal temperature reaches 160F. Cooking time will always depend on the thickness of the chicken breasts.
Tried this recipe? Leave a comment and rating below.Follow me on Facebook and never miss a recipe!
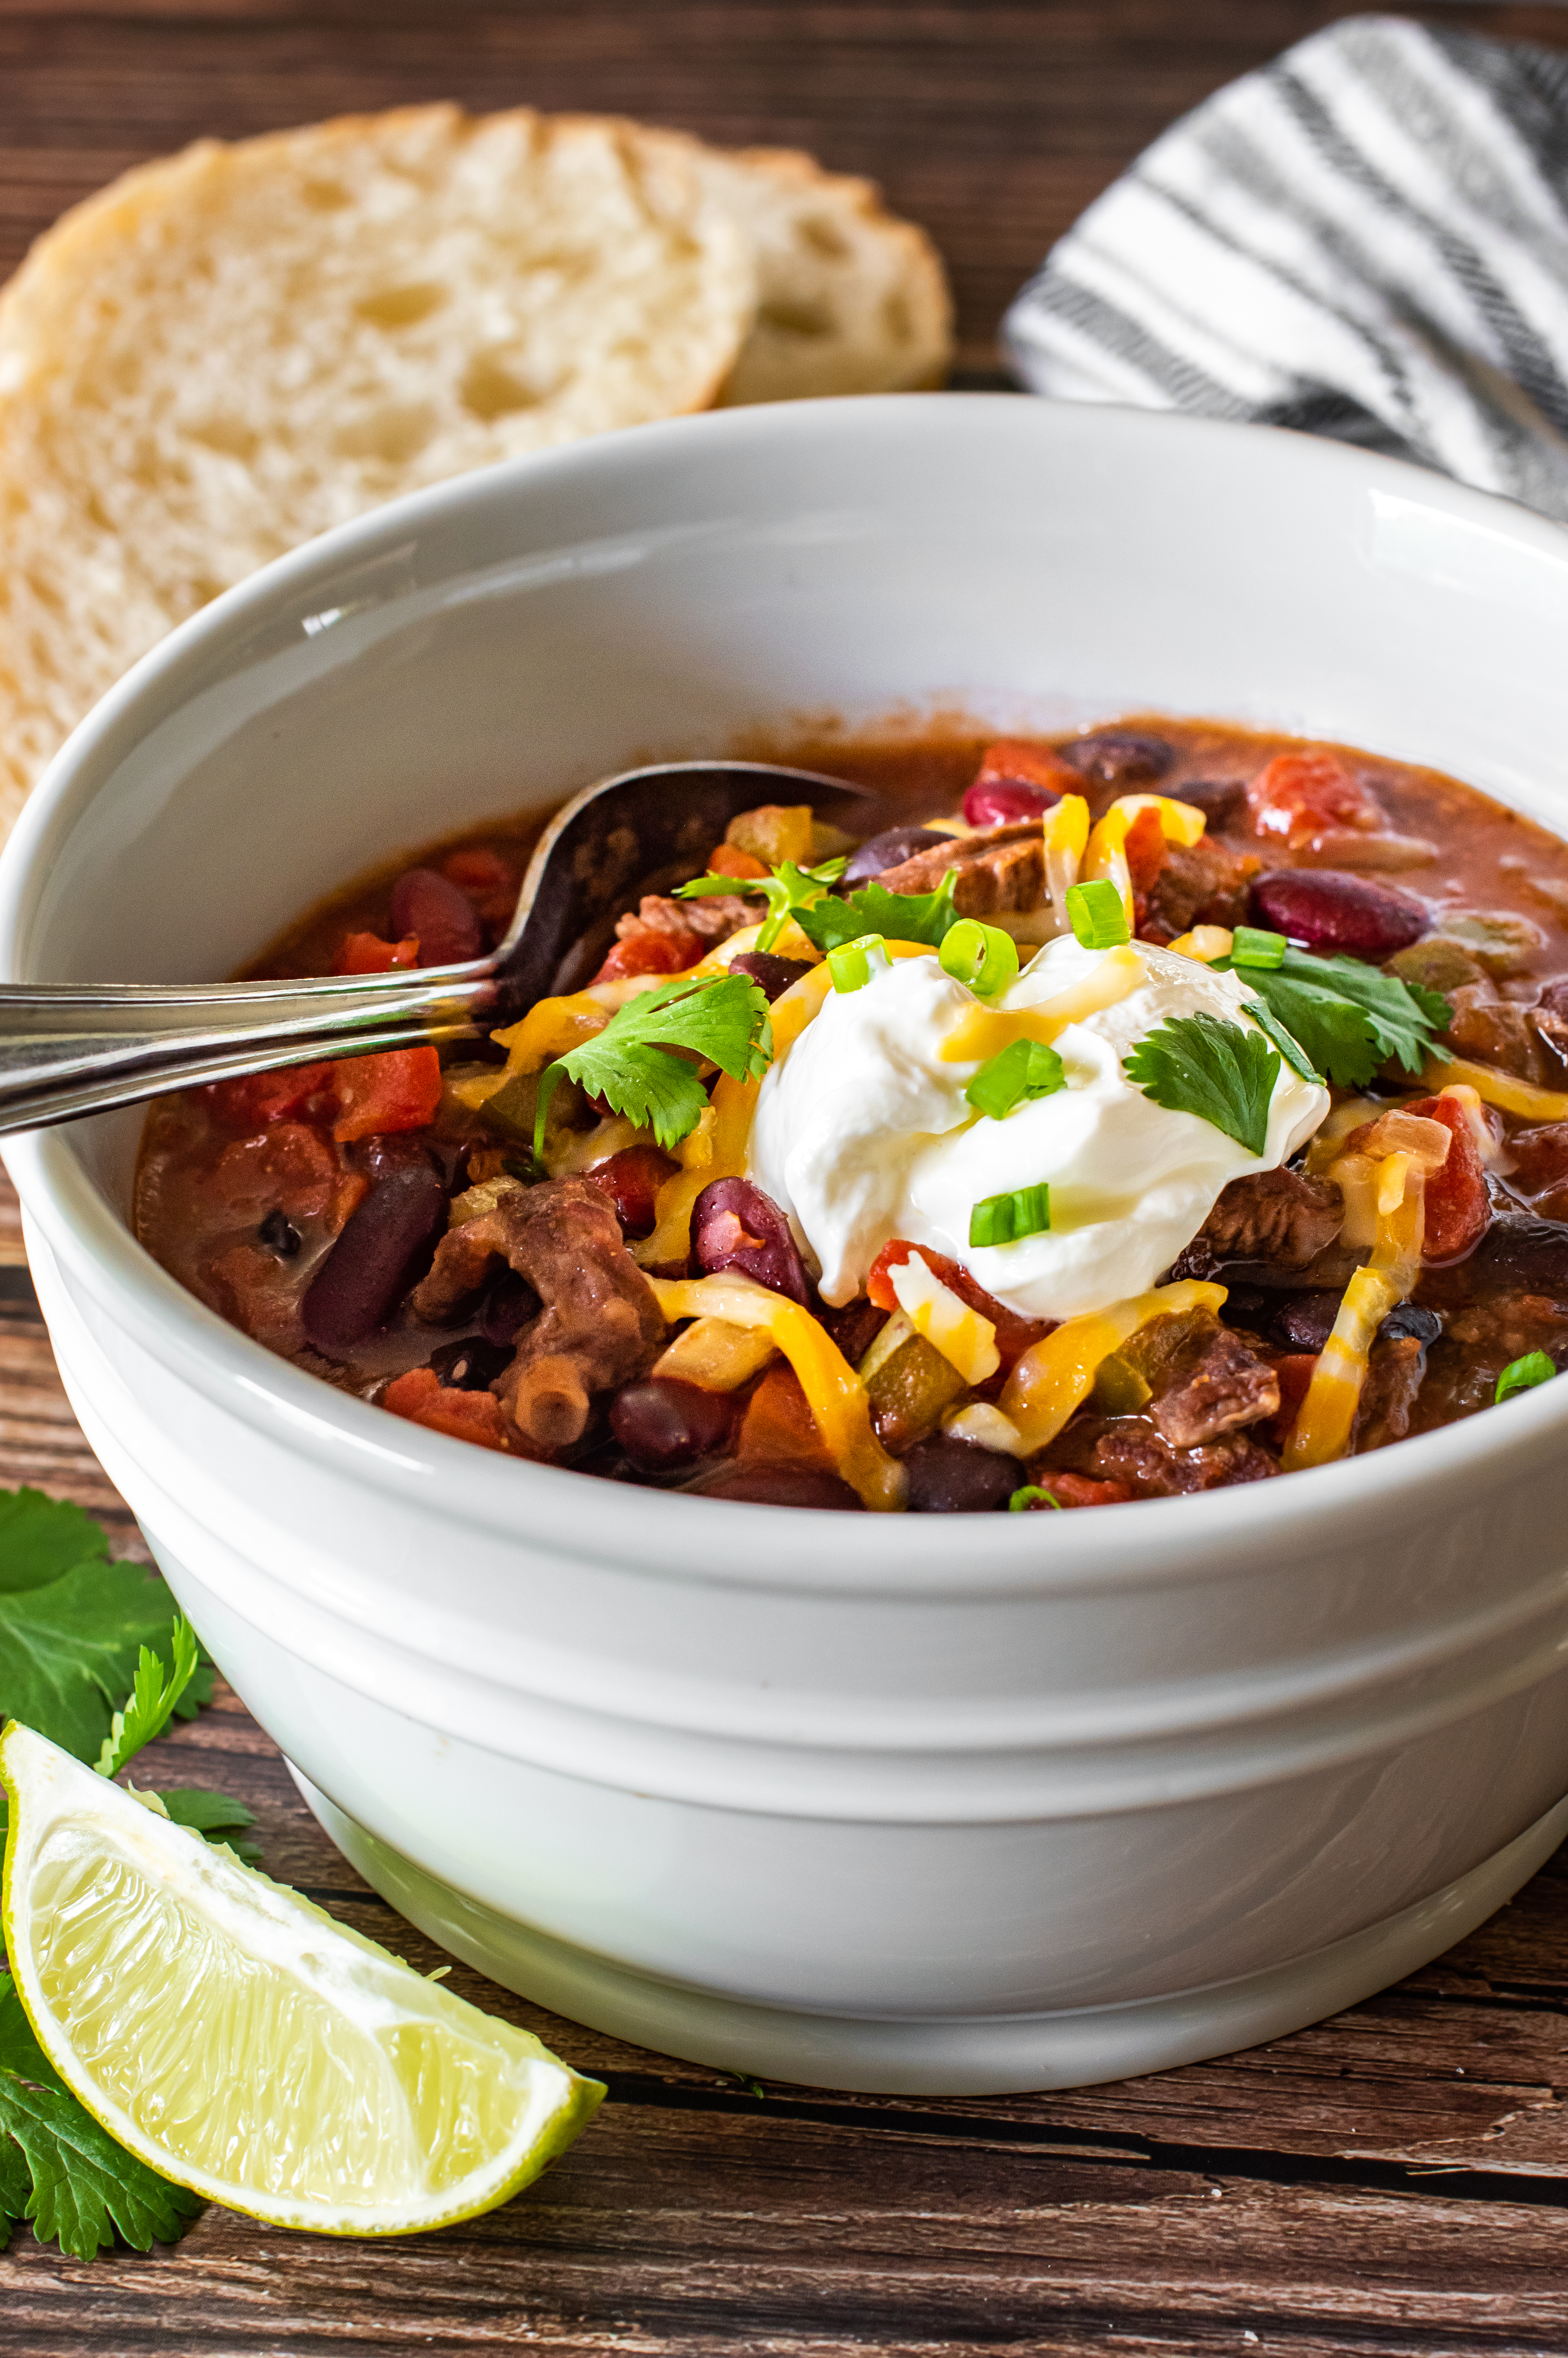
SLOW COOKER CHILI
Nothing says comfort food like a bowl of warm, thick, beefy chili. Loaded with lots of vegetables, beef, and the kicker, a hint of brown sugar and barbecue sauce! So grab a spoon and dig in!

A good, hearty chili should be a staple in your recipe rotation. So I was excited to finally have a chili recipe that would be my go-to! It’s everything a good chili should be; it’s thick, meaty, full of texture, and bursting with flavor. We enjoy it so much; I have even made this chili to take camping. We simply reheat it over the campfire. To be honest, I think it tasted even better, but doesn’t everything taste better cooked over a campfire!
One of the crucial ingredients in this recipe is the meat. If you want to make it without meat, no shame; it will still be amazing. But if you’re going to use meat, make it count. Nobody wants to gnaw on a chewy, tough piece of meat. I’ve bought several different cuts, usually based on what’s available and what looks good. For example, I have bought store-cut stir fry or stew beef. Other times I have purchased a steak and cut it up myself. You could even mix things up and use pork sausage or chicken.

If you are using beef, whatever cut you use, give it a quick sear in a pan. Your goal is not to cook it through but to sear the outside to seal in the juices. Strictly speaking, meat doesn’t need to be seared before it’s added to the slow cooker, but it’s a step I find worth the effort. The caramelized surface of the meat will lend a rich flavor to the finished dish. And meat dredged in flour before searing will add body to the sauce. High temperatures are needed to get a truly caramelized, deep-brown sear on the surface of the meat. Add a tablespoon of vegetable oil and set the pan over high heat. Add the meat to the hot pan and allow it to sear for a minute, check and flip if caramelized and brown. Repeat on the opposite side.

The vegetables should all be chopped evenly, so they cook evenly. Be sure not to skip rinsing your beans before you add them. Rinsing the beans thoroughly will help them have a less unpleasant effect on your digestive tract (aka gas)…You’re welcome!
Any brand of barbecue sauce will work, but I prefer a nice smoky sauce. It complements the other flavors perfectly!
Cooking times: To give you an idea of my cooking times, I would cook the chili for 8 hours on low or 4-6 hours on high with my standard crockpot. With my Instant Pot, I use the slow cook setting, then set it to the high heat setting and cook for at least 8 hours. The low setting just doesn’t cook at a high enough temperature, and the vegetables don’t always get tender enough. Also, with the Instant Pot, I remove the lid for the last hour and let some of the moisture evaporate as it finishes cooking, so the chili is less watery. You will need to adjust your heat settings and cook times based on your equipment.

Cornbread makes the perfect side dish to accompany chili. I have the best Homemade Honey Cornbread recipe. This cornbread is soft, buttery, and moist. With a hint of honey baked right in the bread, this recipe is sure to be a hit. 

Slow Cooker Chili
Nothing says comfort food like a bowl of warm, thick, beefy chili. Loaded with lots of vegetables, beef, and the kicker, a hint of brown sugar and barbecue sauce!
Equipment
- Slow Cooker, Instant Pot, Crock Pot
Ingredients
- 1 tablespoon oil, for searing meat
- 1-2 tablespoons flour, for searing meat
- 1 pound beef, cut up into bite-size pieces
- 2 teaspoons cumin
- 1 large onion, chopped
- 2-3 garlic cloves, minced
- 1 green pepper, chopped
- 16 ounce can of black beans, drained and rinsed
- 16 ounce can of red kidney beans, drained and rinsed
- 28 ounce can of petite diced tomatoes, drained
- 1 can beef broth
- 4 tablespoons barbecue sauce, any kind
- 2 tablespoons brown sugar
- 1 teaspoon salt, (more to taste)
Garnish
- sour cream
- green onions
Instructions
- Add the cut-up meat and 1 to 2 tablespoons flour to a sealable bag and shake to coat. Heat the oil in a large skillet over high heat. Place floured meat in skillet. Cooking for about 1 minute, then flip to sear the other side, just browning or lightly searing the outside of the meat (you do not want to cook it all the way through).
- Transfer the meat to a slow cooker, crockpot, or Instant Pot. Add the remaining ingredients and stir to combine. Cover and cook for 6 to 8 hours. The high or low setting and cook time will depend on your cooker. **See notes
- Ladle chili into bowls with a side of rice or rustic bread and top with sour cream and green onions.
Notes
**Cooking times: To give you an idea of my cooking times with my standard crockpot, I would cook the chili for 8 hours on low or 6 hours on high. With my Instant Pot, I use the slow cook setting. I use the high heat setting and cook for at least 8 hours. The low setting just doesn't cook at a high enough temperature, and the vegetables don't always get tender enough. Also, with the Instant Pot, I remove the lid for the last hour and let some of the moisture evaporate as it finishes cooking, so the chili is less watery.
You will need to adjust your heat settings and cook times based on your equipment.
Tried this recipe? Leave a comment and rating below.Follow me on Facebook and never miss a recipe!